This is an authorized repost of http://zipkid.eu/
Back in 2012 Ohad Levy wrote an excellent blog post on this subject. The concepts and steps to perform he explains are still mainly correct and relevant but the UI has changed enough to justify a new post.
A lot of time has passed since then and many Foreman versions, with many improvements and changes, have passed. It is time for an updated HOWTO on this subject. This post will mainly be a shameless copy-paste of his post with updated names, details and screenshots to accommodate the differences between version 0.5 and 1.10.
Configuring AWS
Select Infrastructure > Compute Resources. Compute Resources are services that can generate a host, e.g. VMWare, libvirt, openstack etc.
Click on New Compute Resource and fill in the information about your new compute resource, normally the name should represent something meaningful to you, such as a combination of the ec2 region and the account used.
if everything is entered correctly, you should be able to get back a list of regions and select the region that you would like to deploy to.
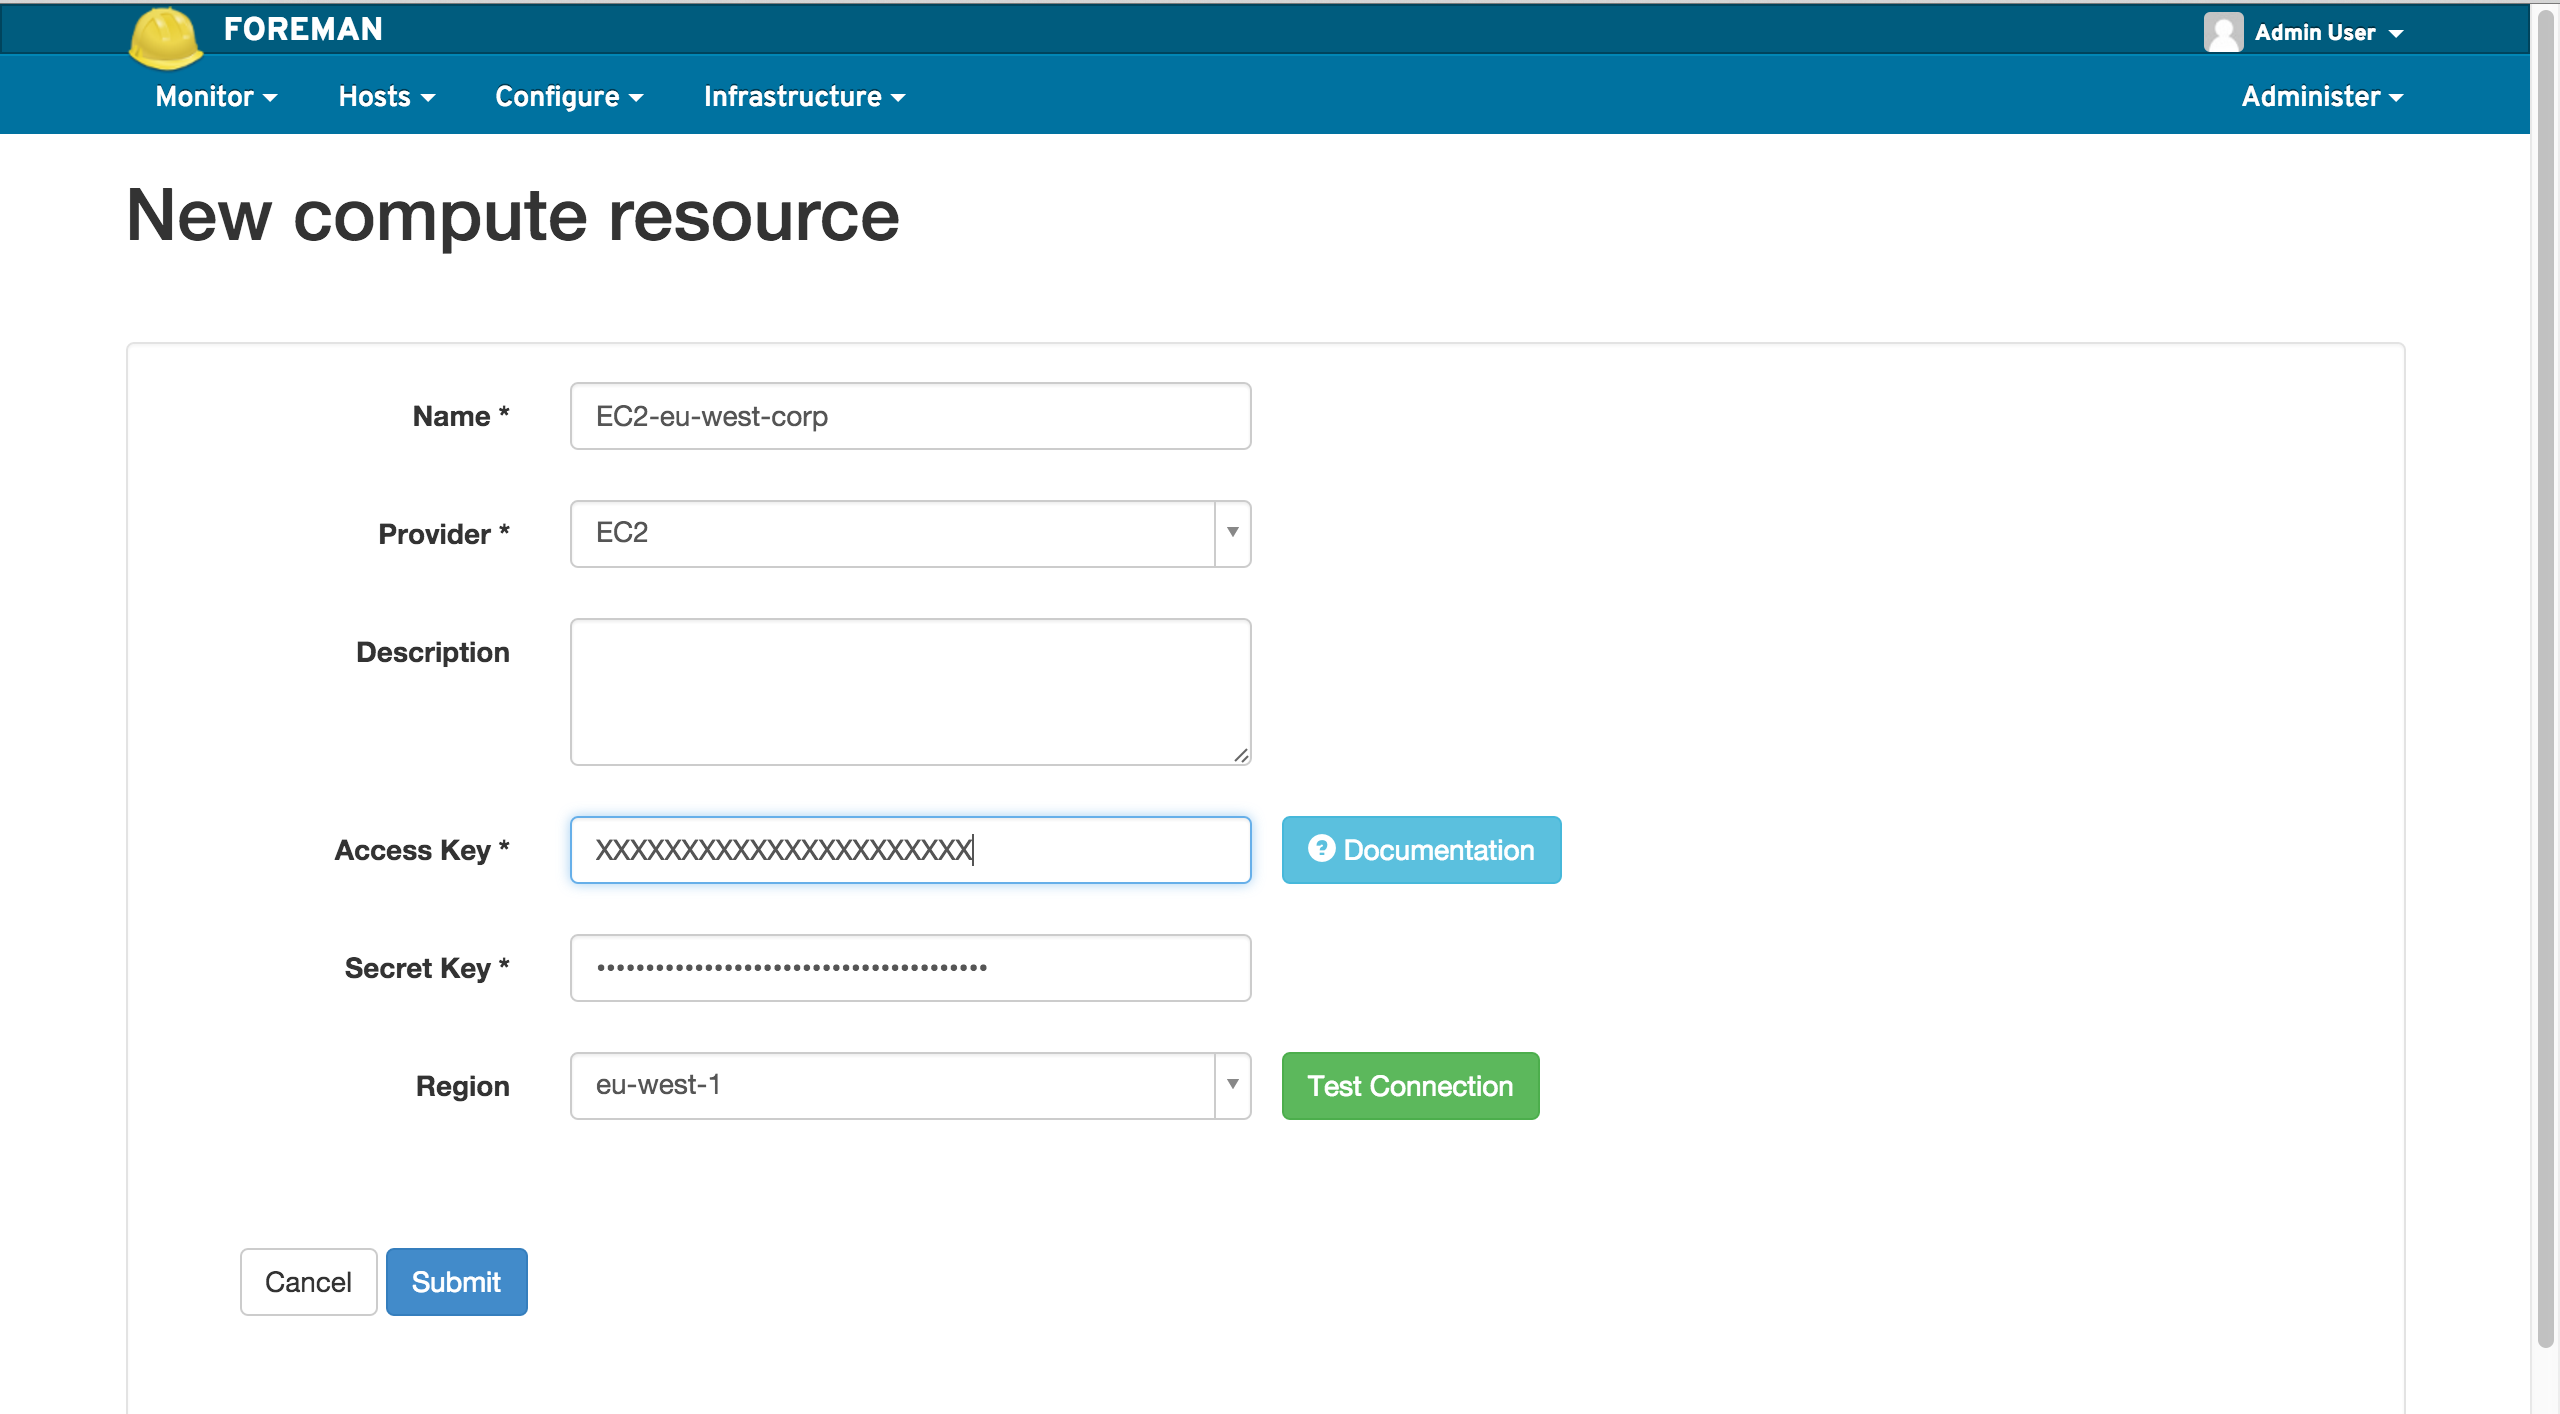
Foreman would then automatically create a new set of SSH keypairs, which would be used in order to configure the instance (you may remove them later on).
Then, the next step is to define which images are allowed to use and assign them to Foreman Operation systems / architectures.
Click on the image tab and select New Image.
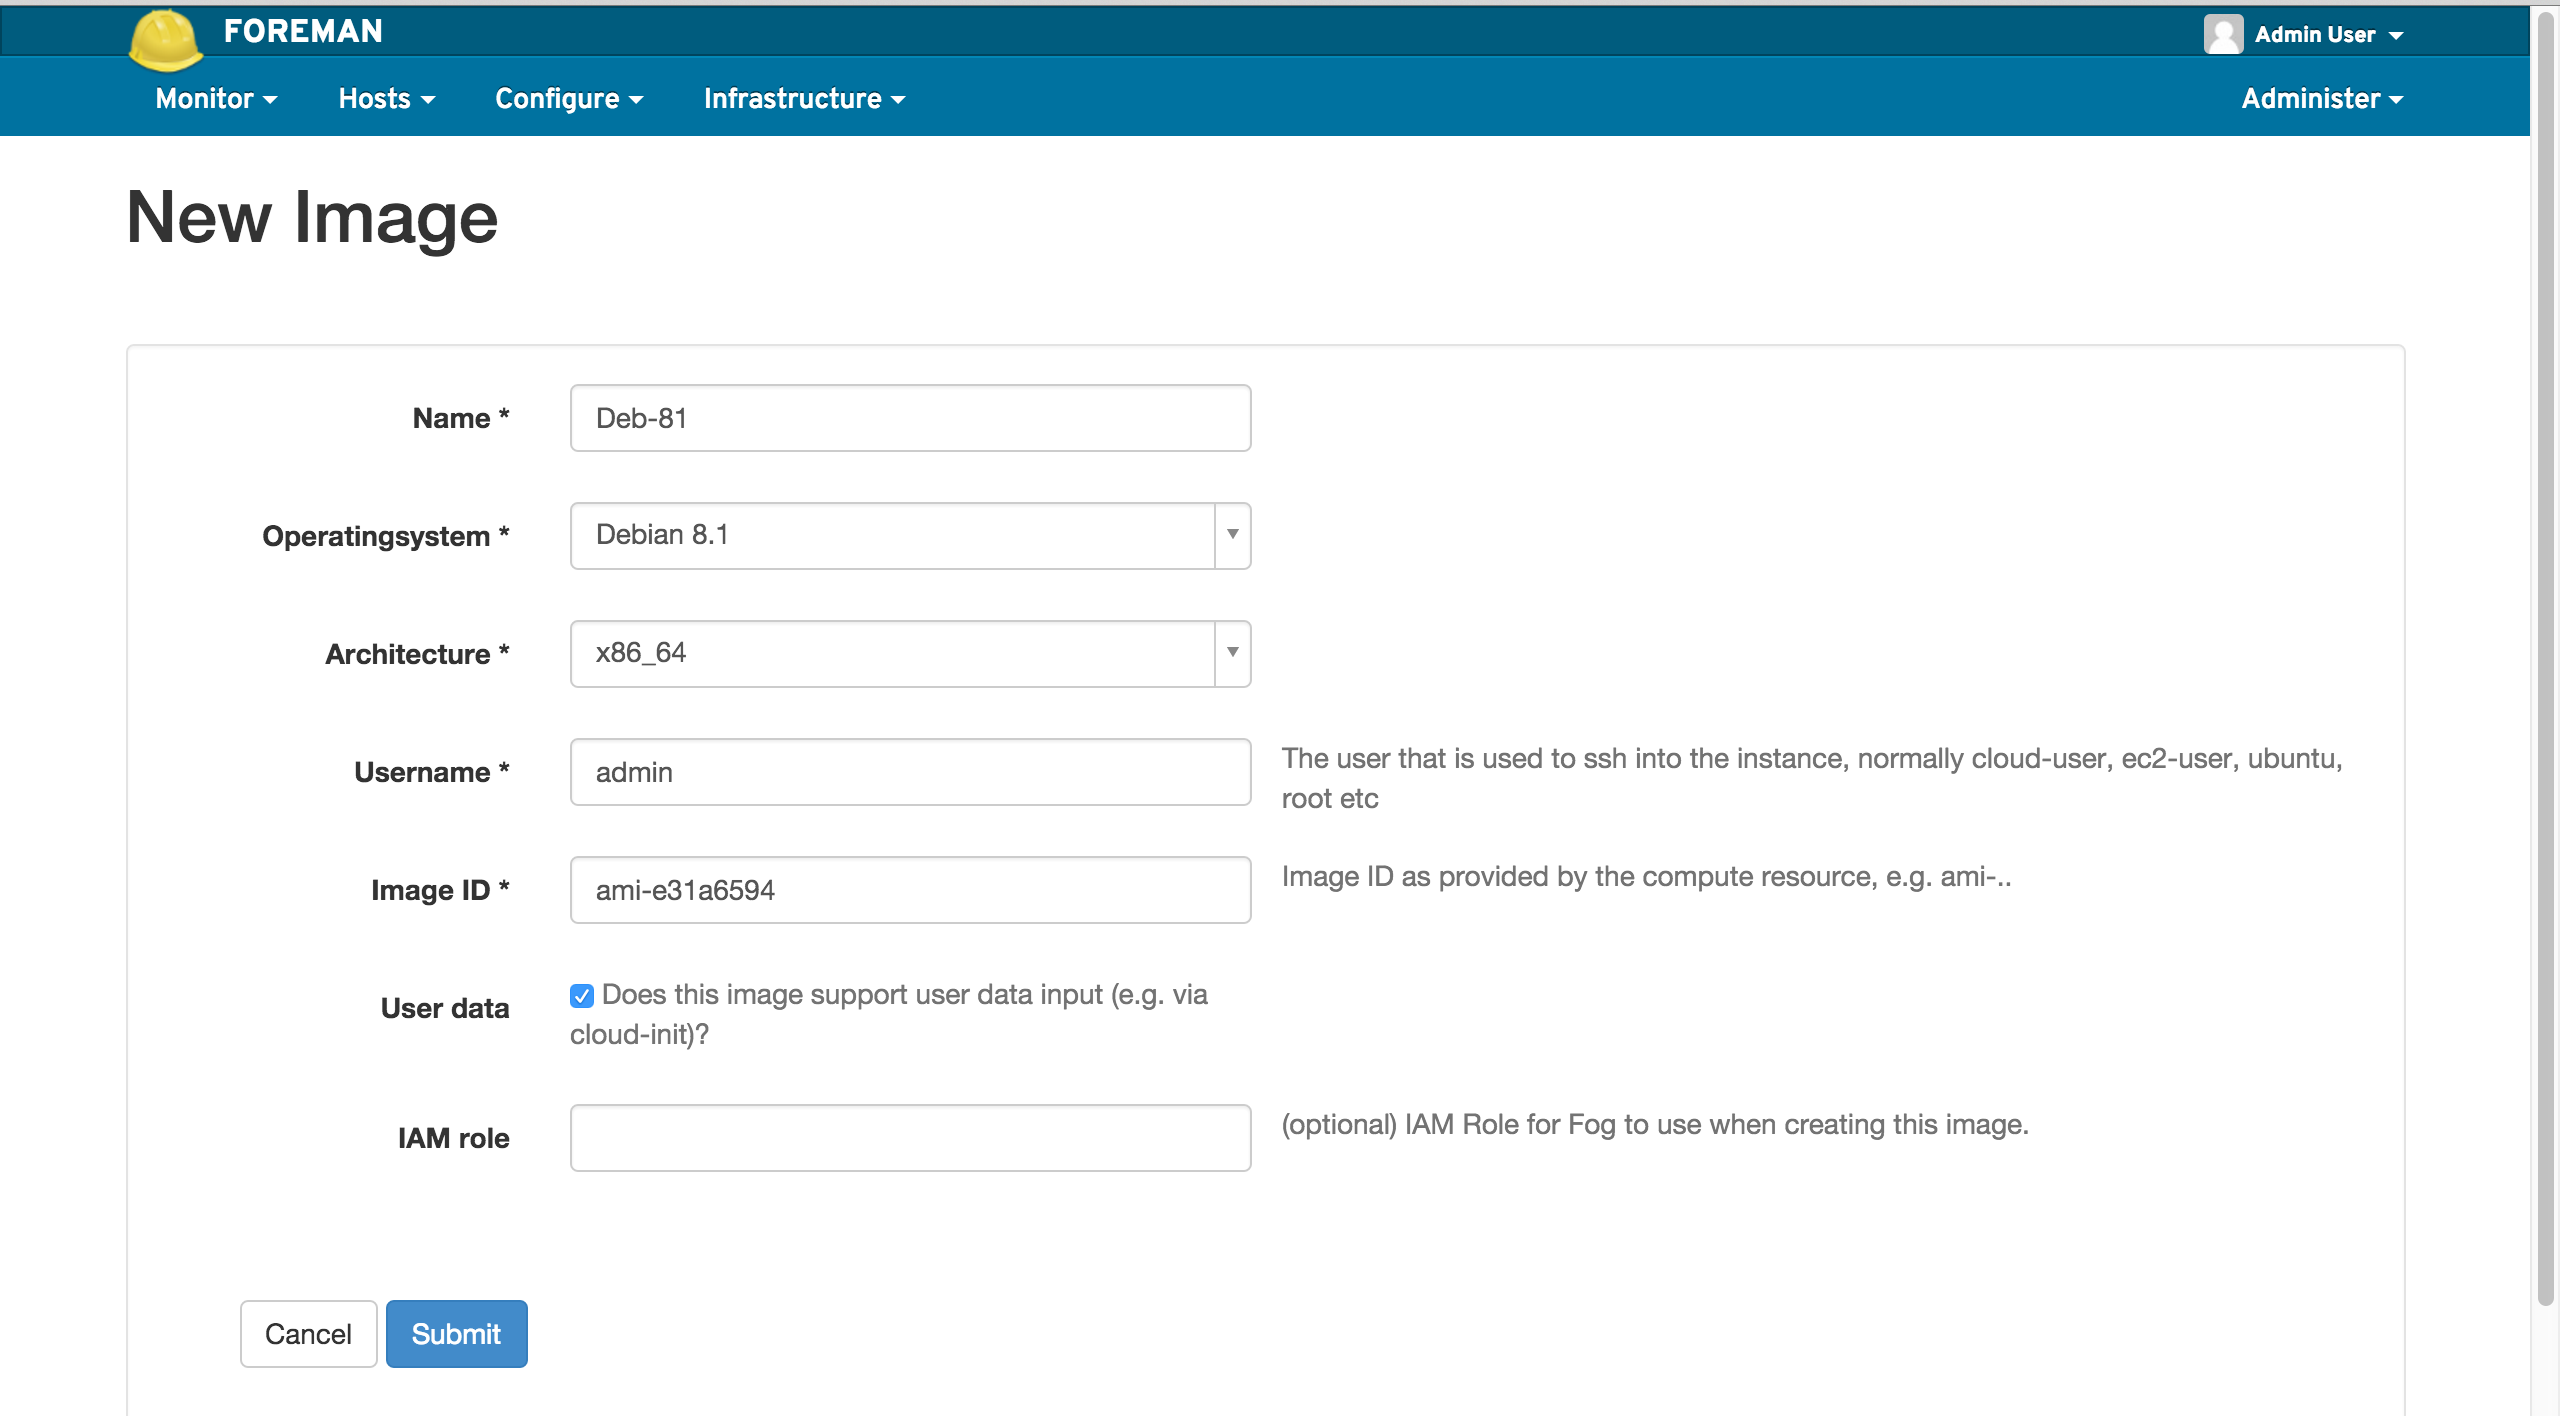
Since i am using an image that supports cloud-init i check the appropriate box. If you don’t use cloud-init, it is very important that you define the correct user for foreman to SSH to the instance, that is configured on the ami (normally the ubuntu user, or ec2-user) and of course, the ami id.
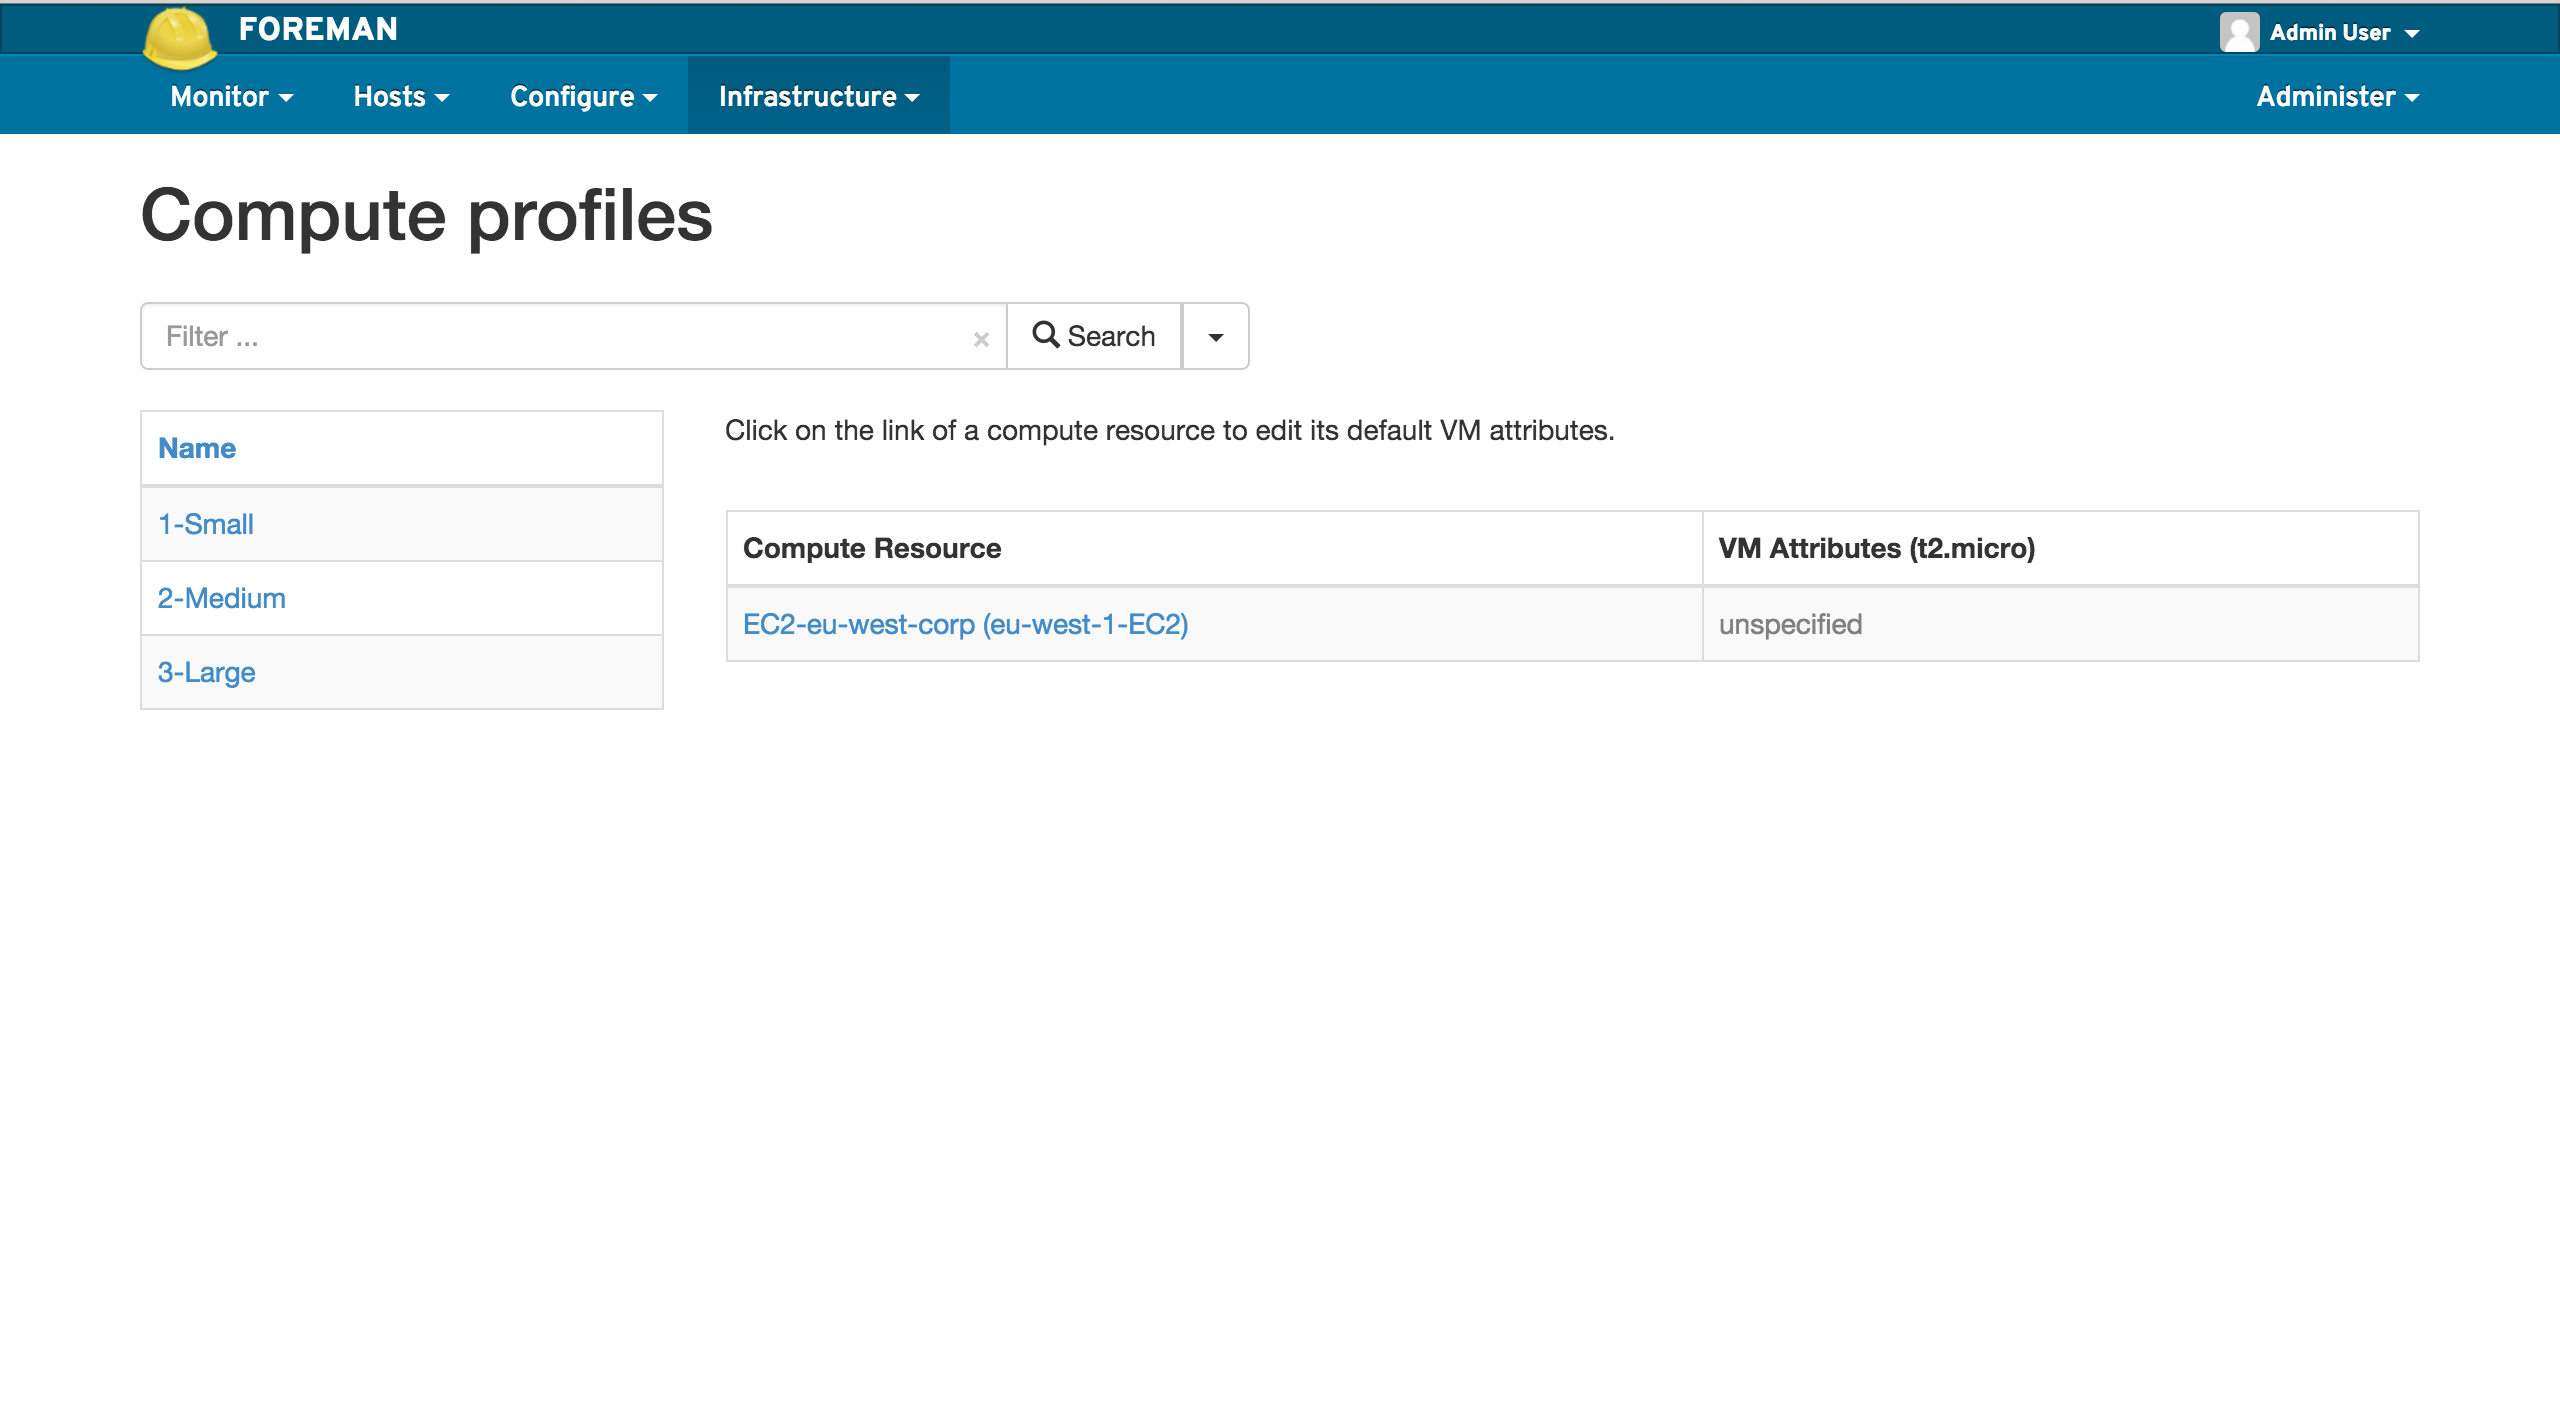
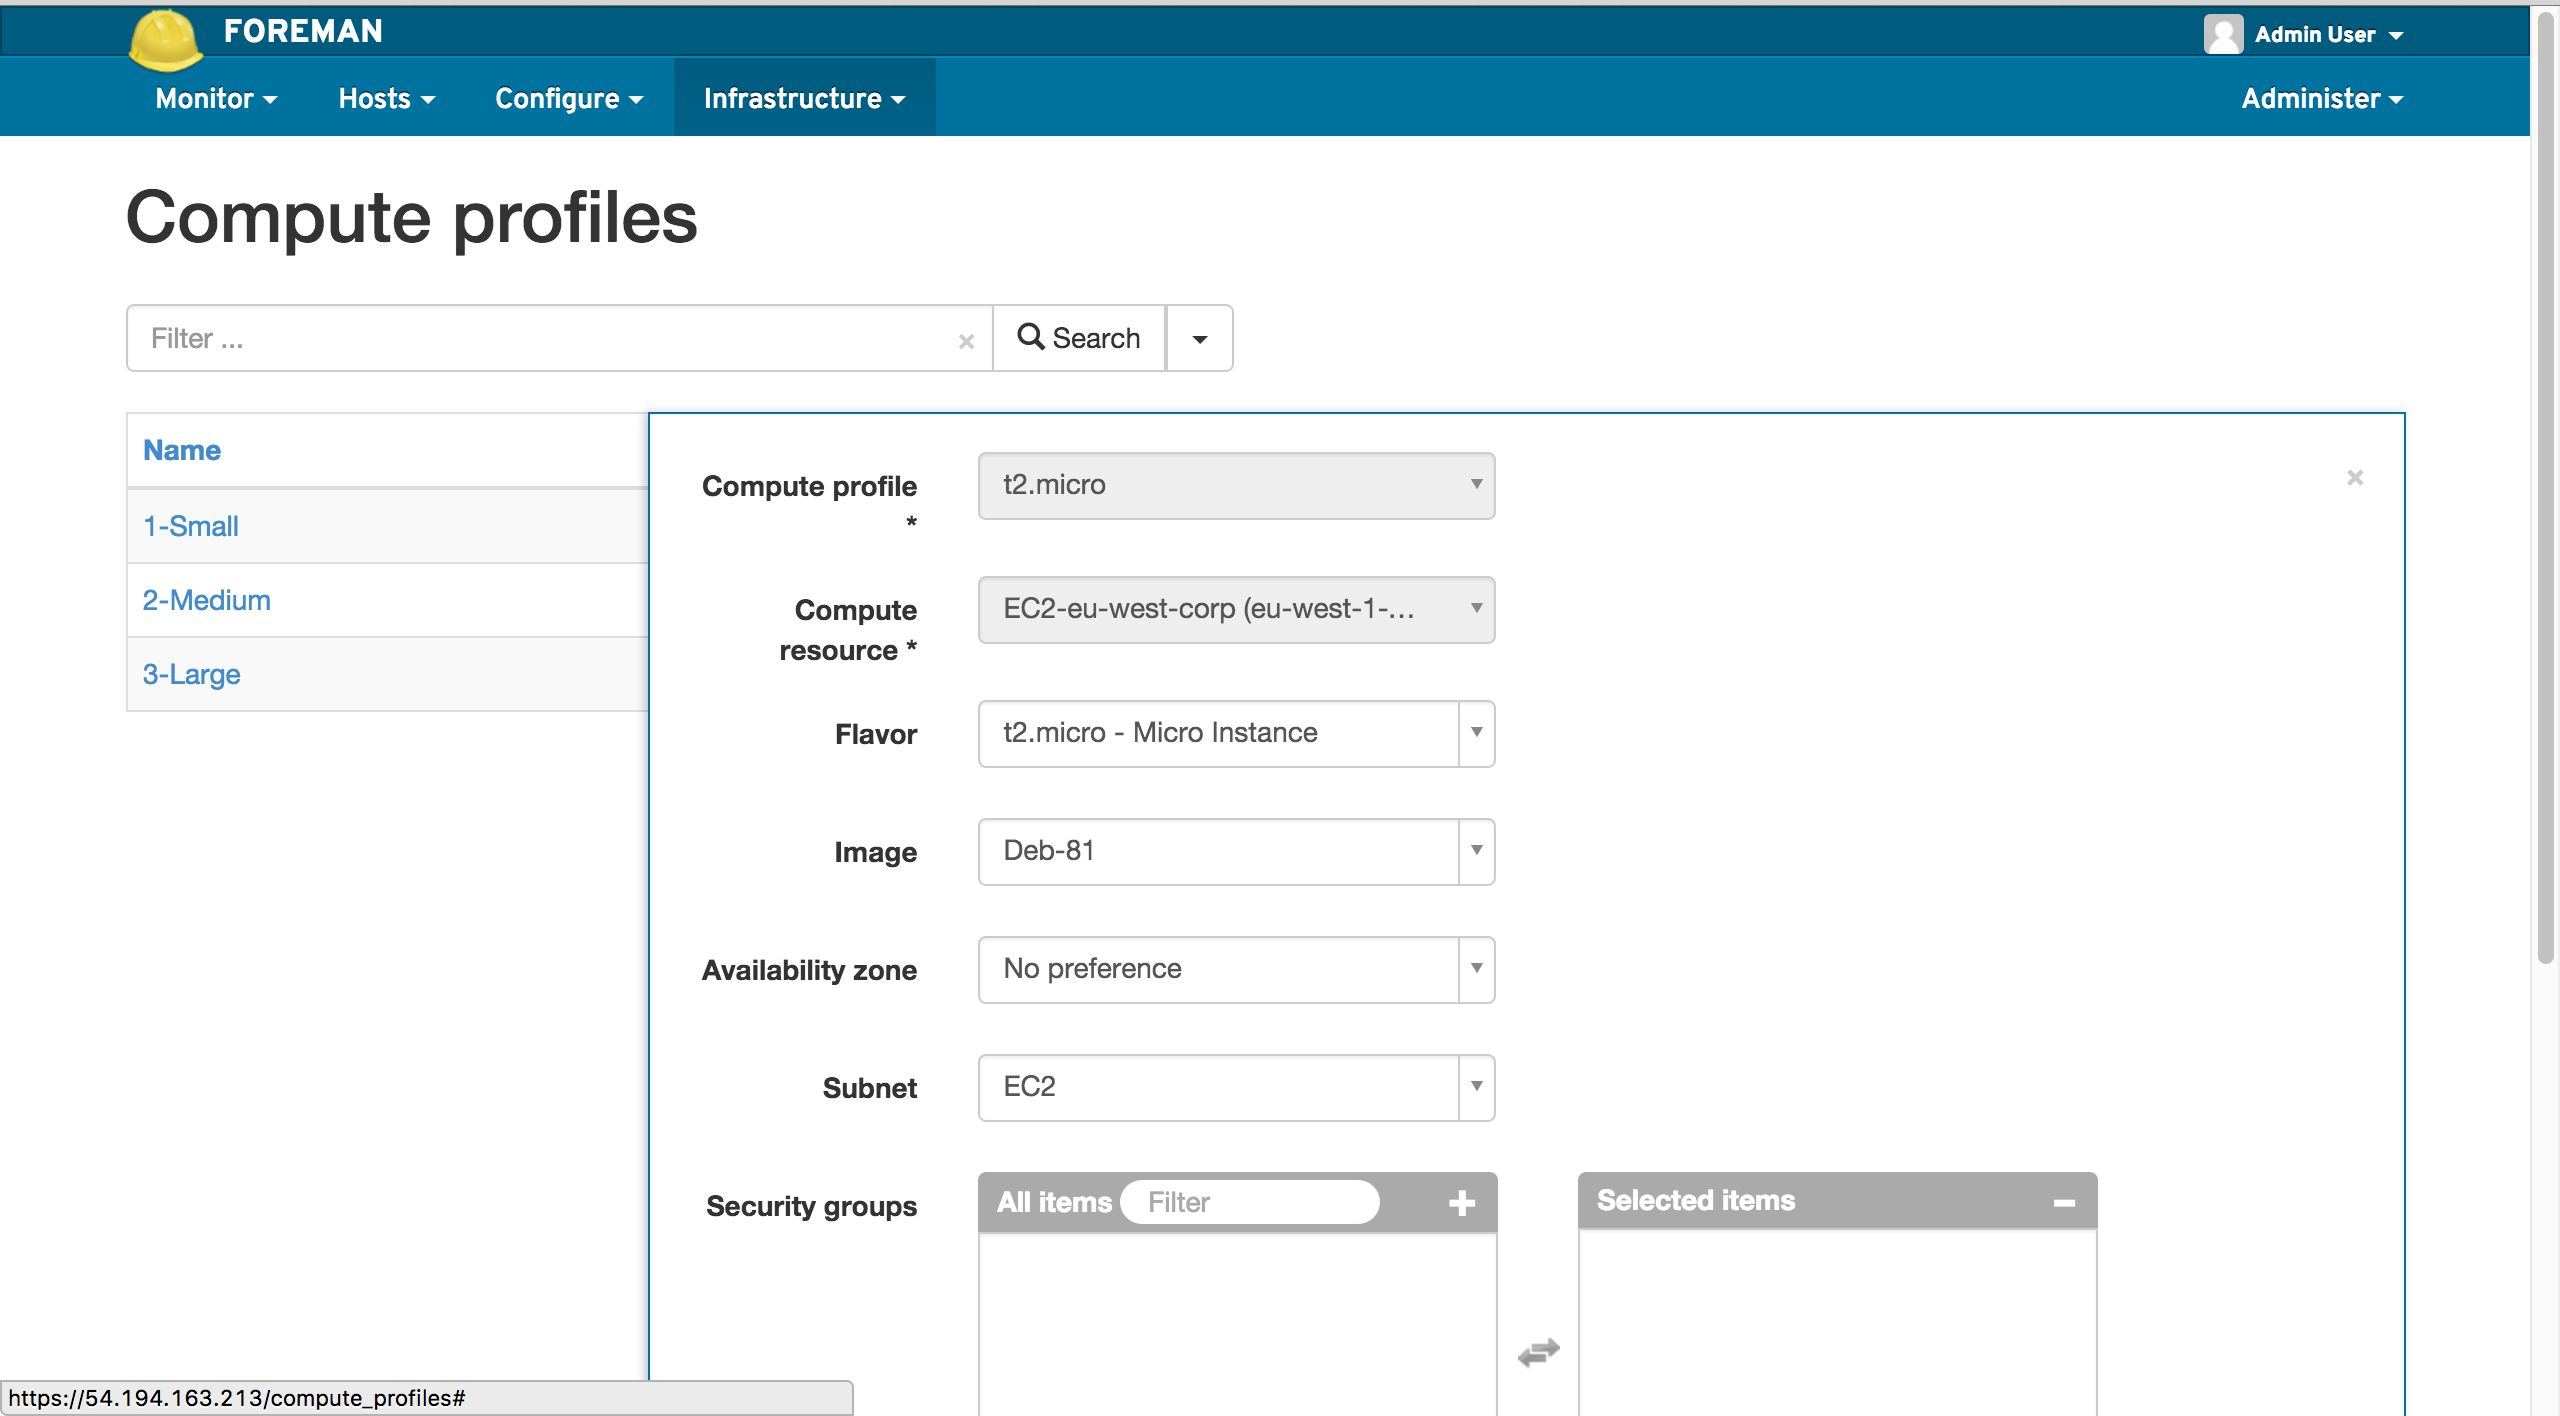
Compute profiles
Compute profiles are a way of expressing a set of defaults for VMs created on a specific compute resource that can be mapped to an operator-defined label. This means an administrator can express, for example, what “Small”, Medium” or “Large” means on all of the individual compute resources present for a given installation.
Select Infrastructure > Compute Profiles There you can either edit an existing one or select New Compute Profile
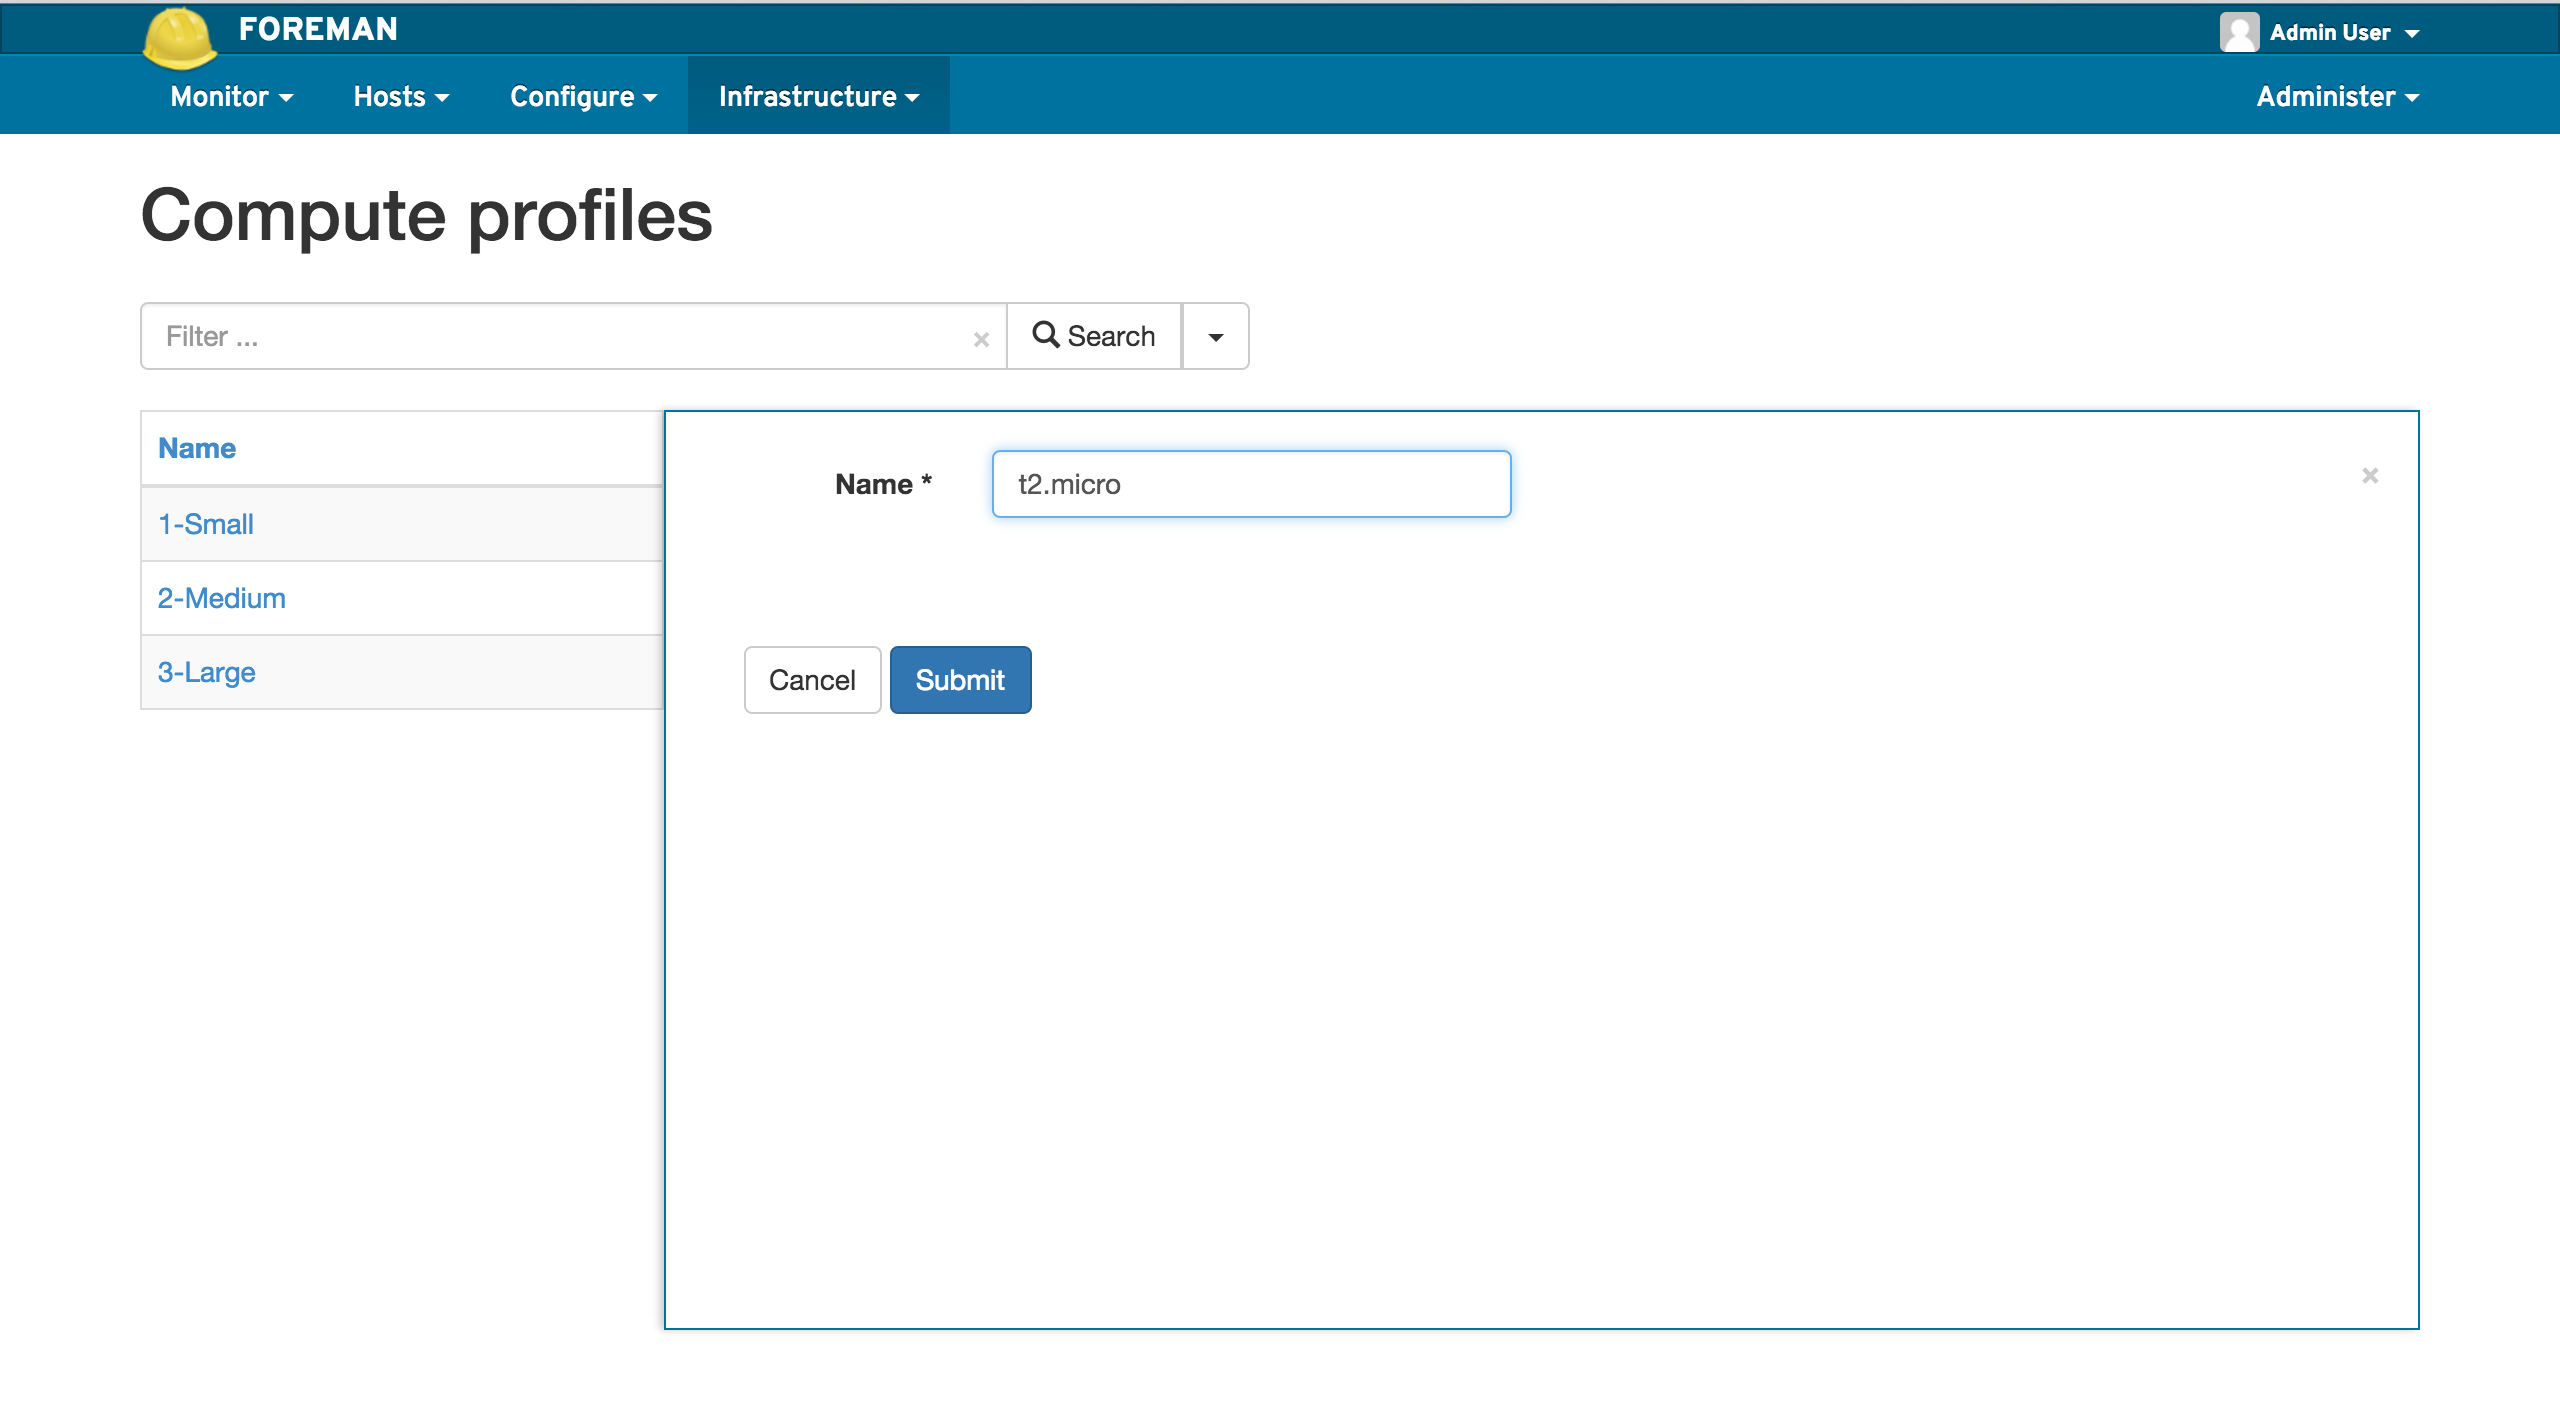
Give it a meaningful name and after submitting select the Compute Resource to edit the details for.
Foreman is now ready to create your instance, however, in order to automate fully puppet to load upon instance launch, we need to associate the correct user-data, this is where the provisioning templates comes into play.
Configuring Provisioning Templates
Add or edit a provisioning template, Hosts > Provisioning Templates
You can use the search box that will also suggest search terms to find the type of template you’re looking for.
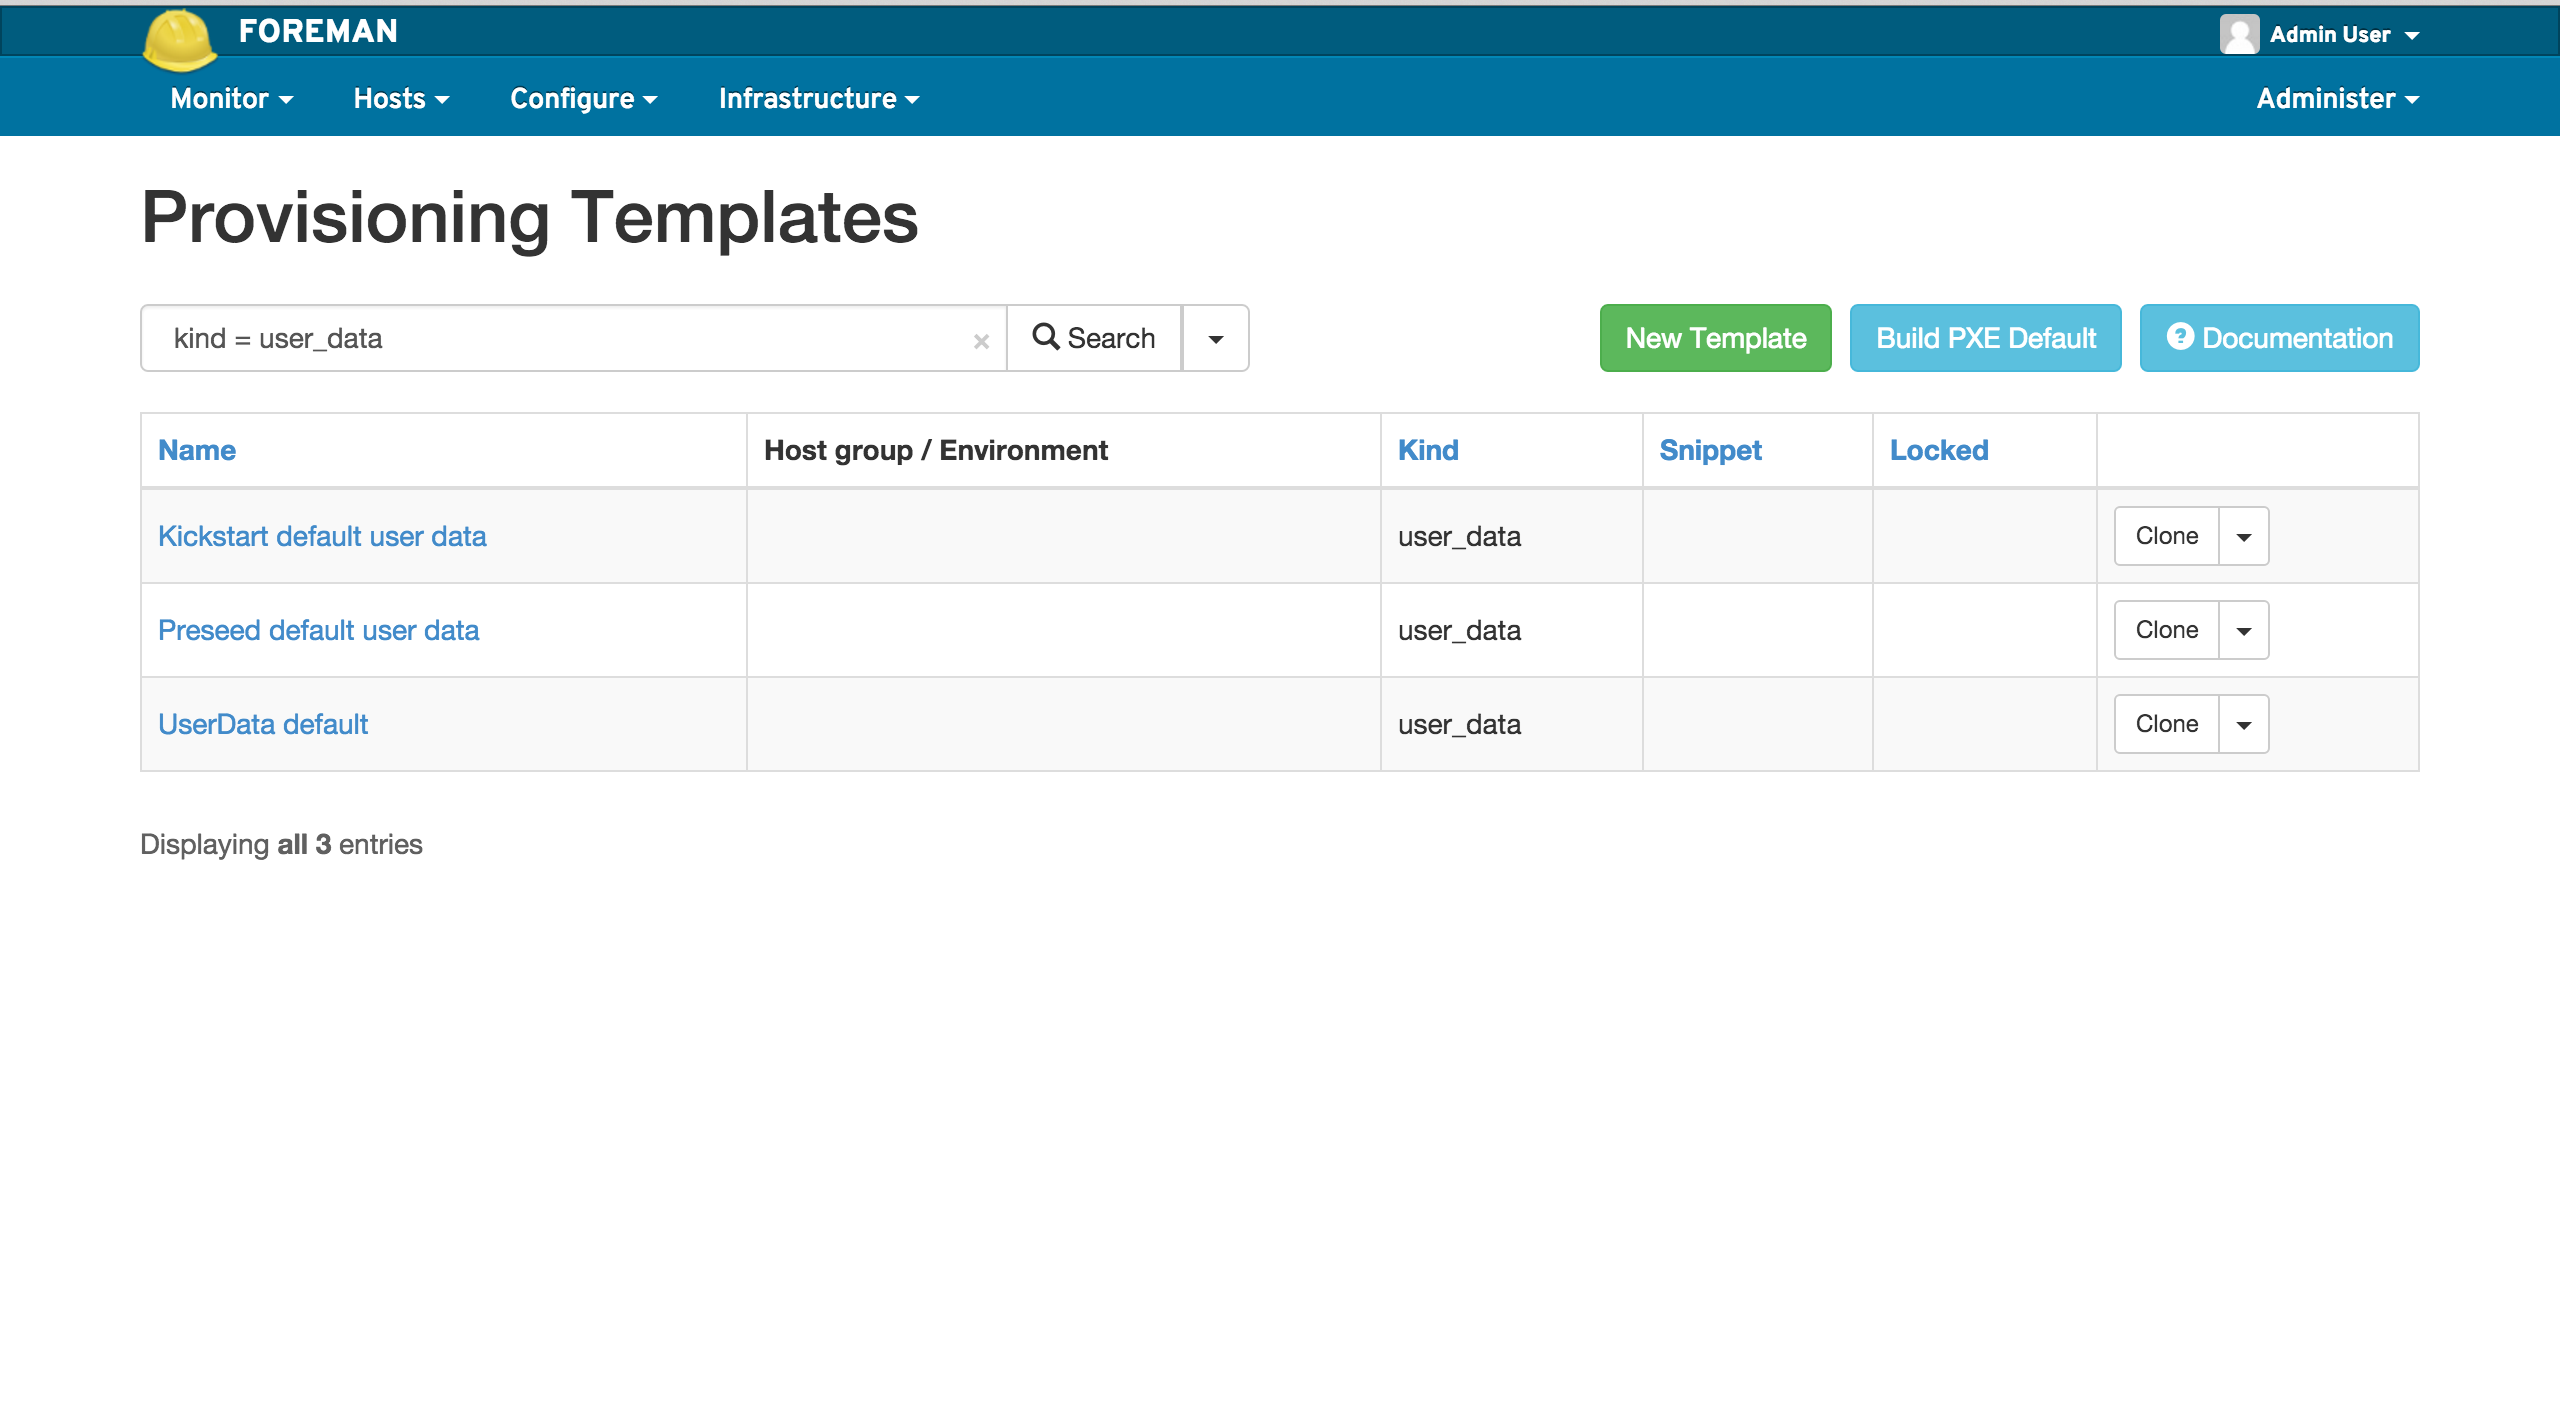
I will be using the ‘Preseed default user data’ template. Select the Association tab
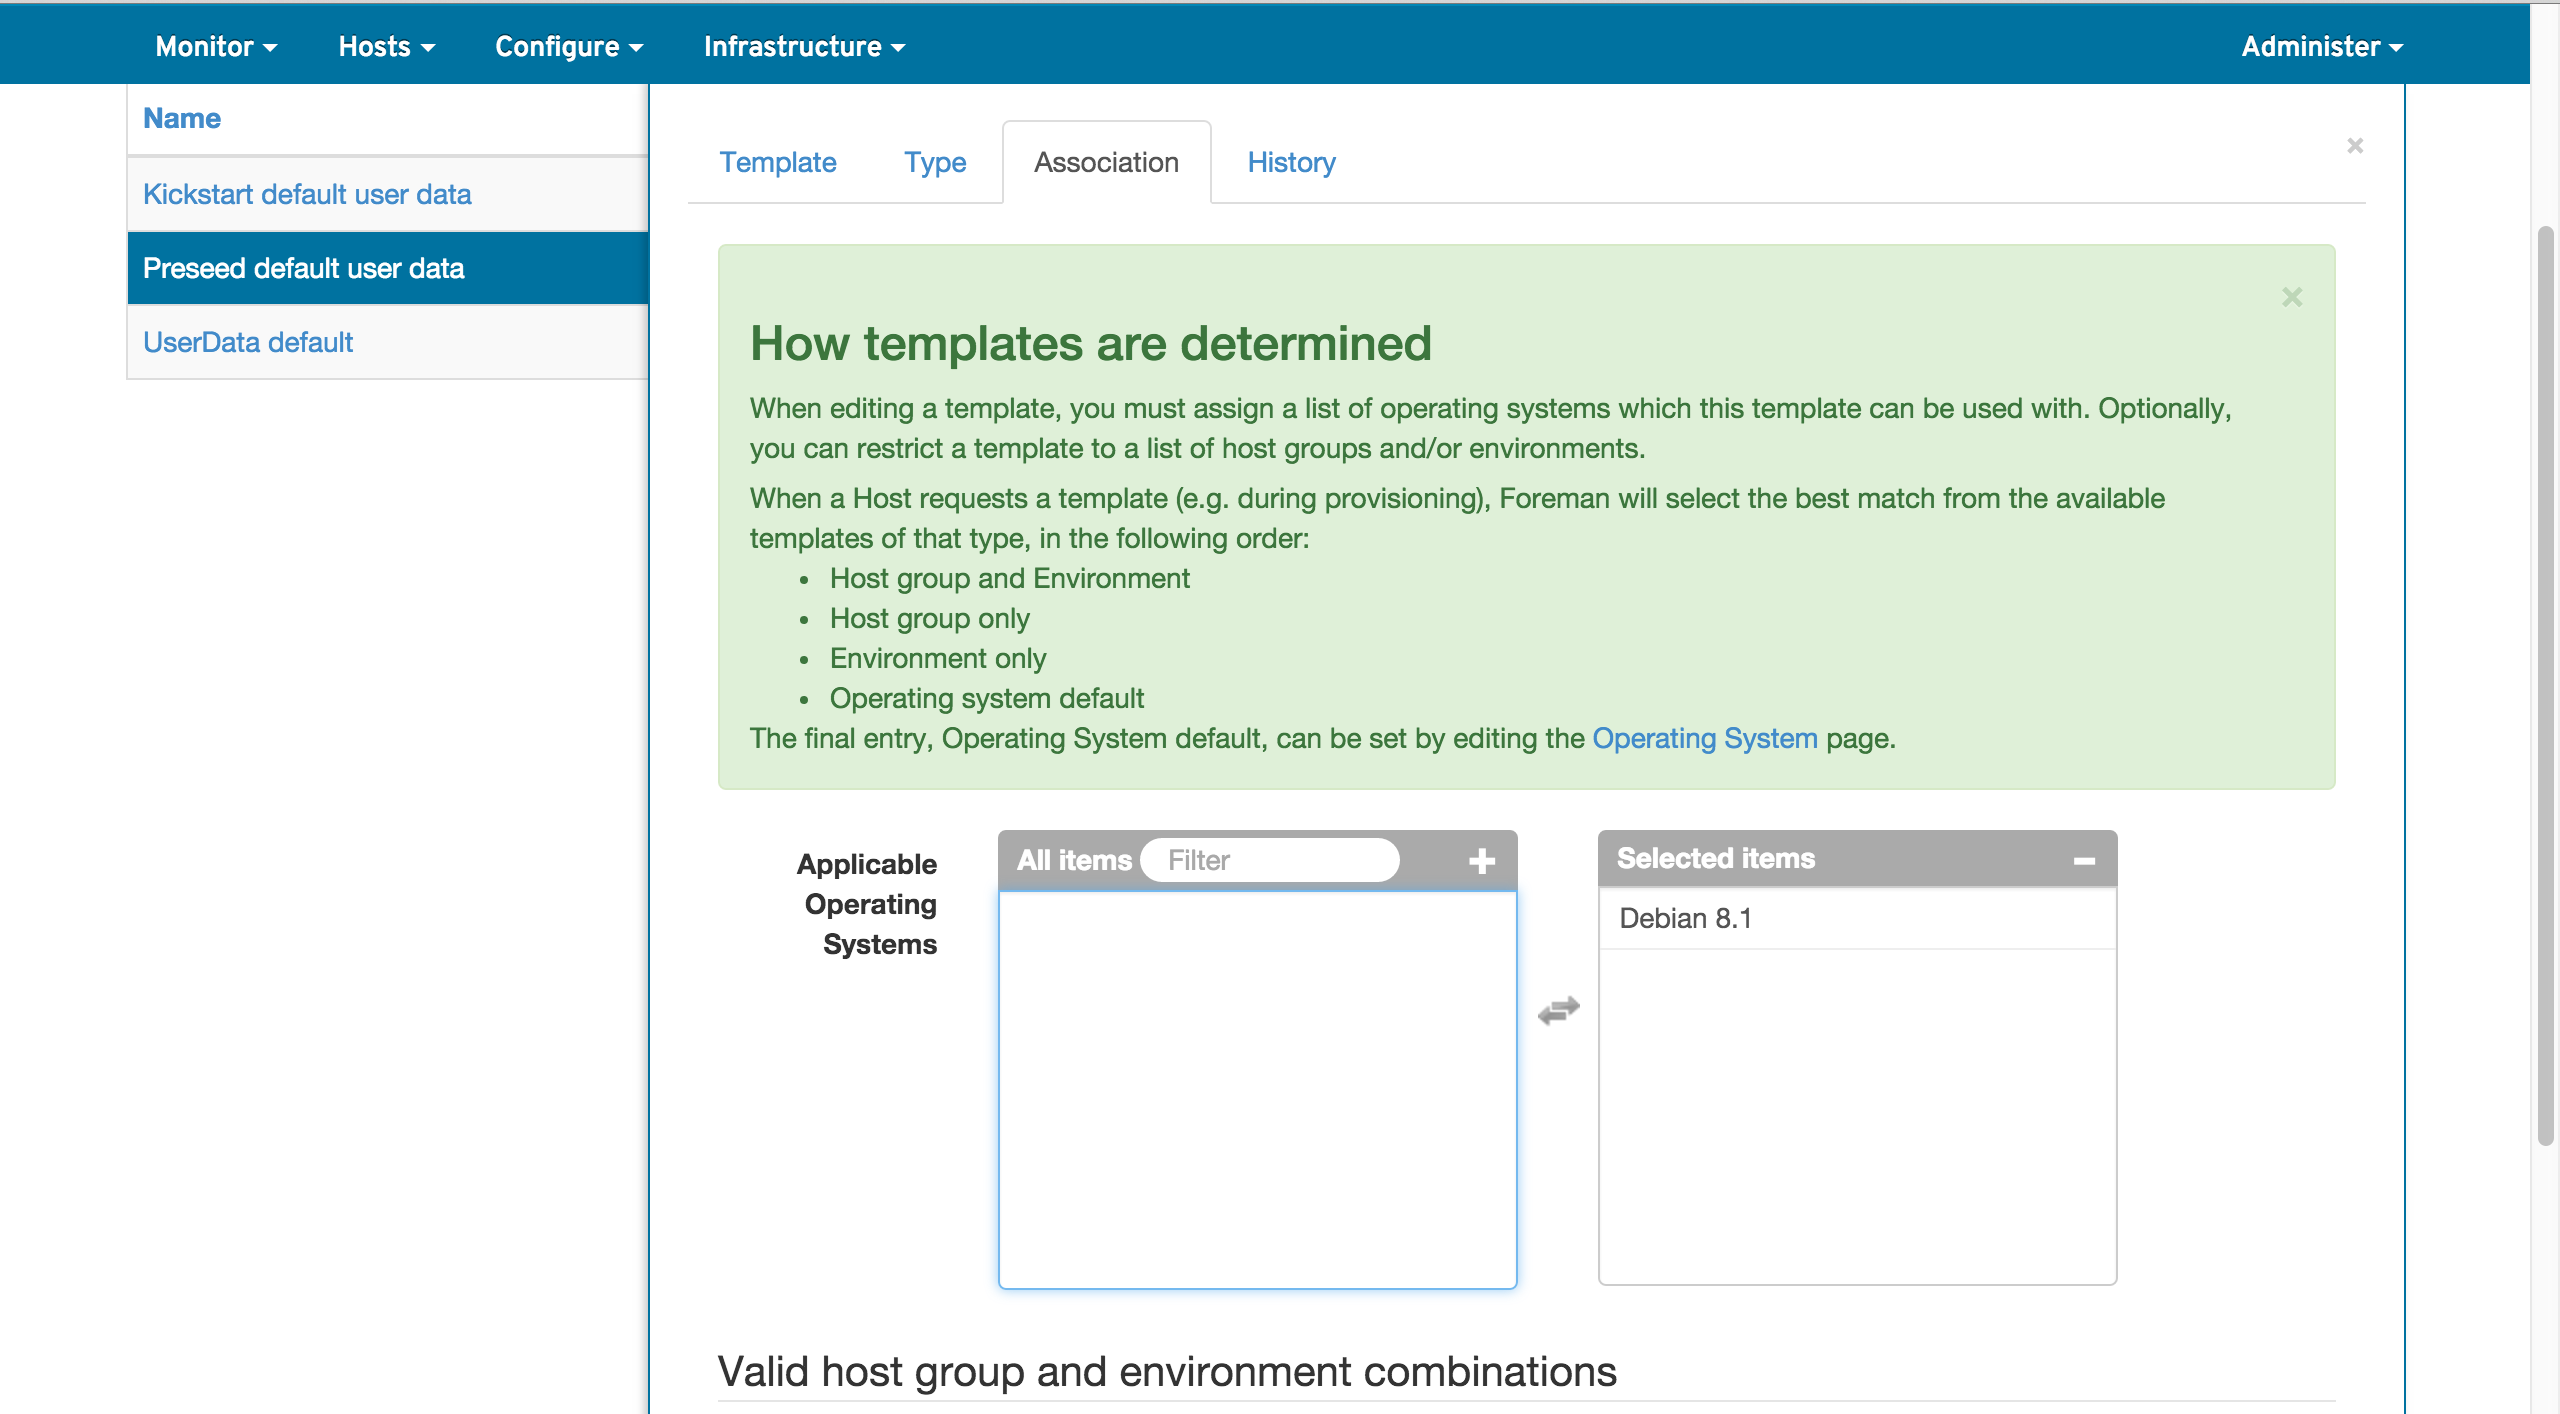
You need to select the Operating system this user-data can be used on.
Operating systems
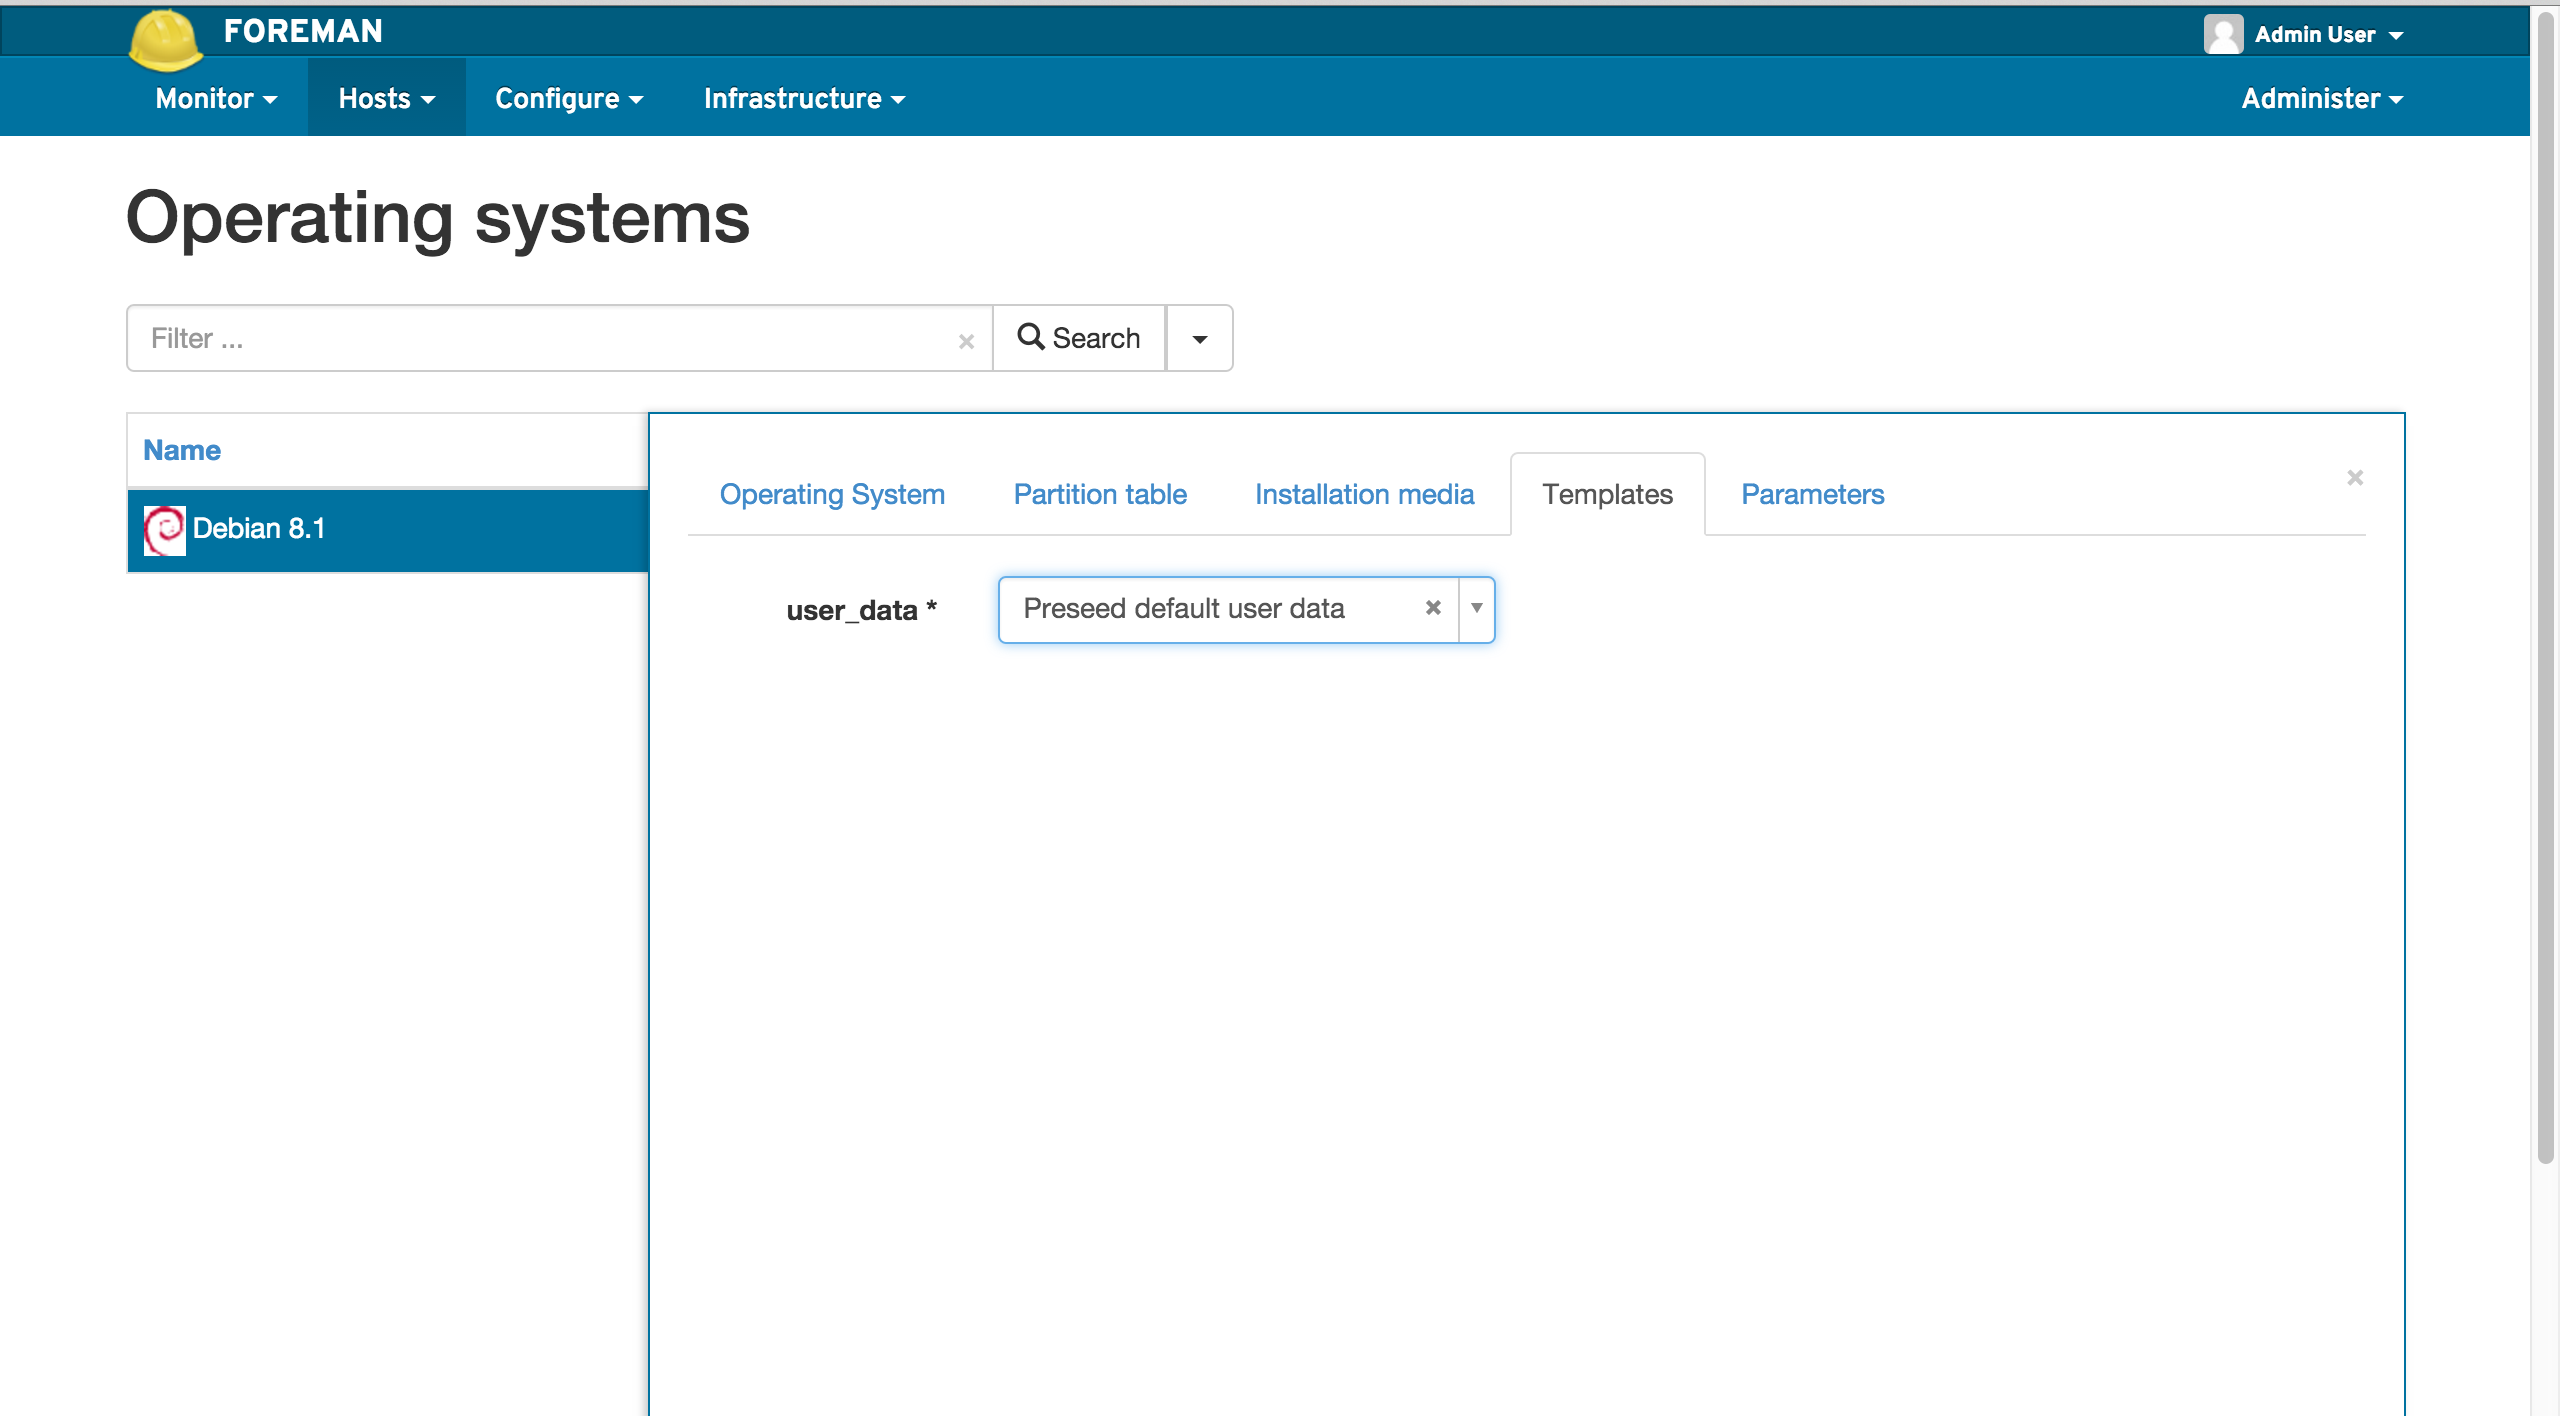
The Operating system must now be edited to use the associated template. Go to Hosts > Operating Systems and select the OS. There go to the Templates tab. There select the wanted user_data template to use.
Actual instance launch
Goto to the Hosts tab, click on New Host, among other settings, make sure you select your compute resource, image and hardware profile
Primary tab

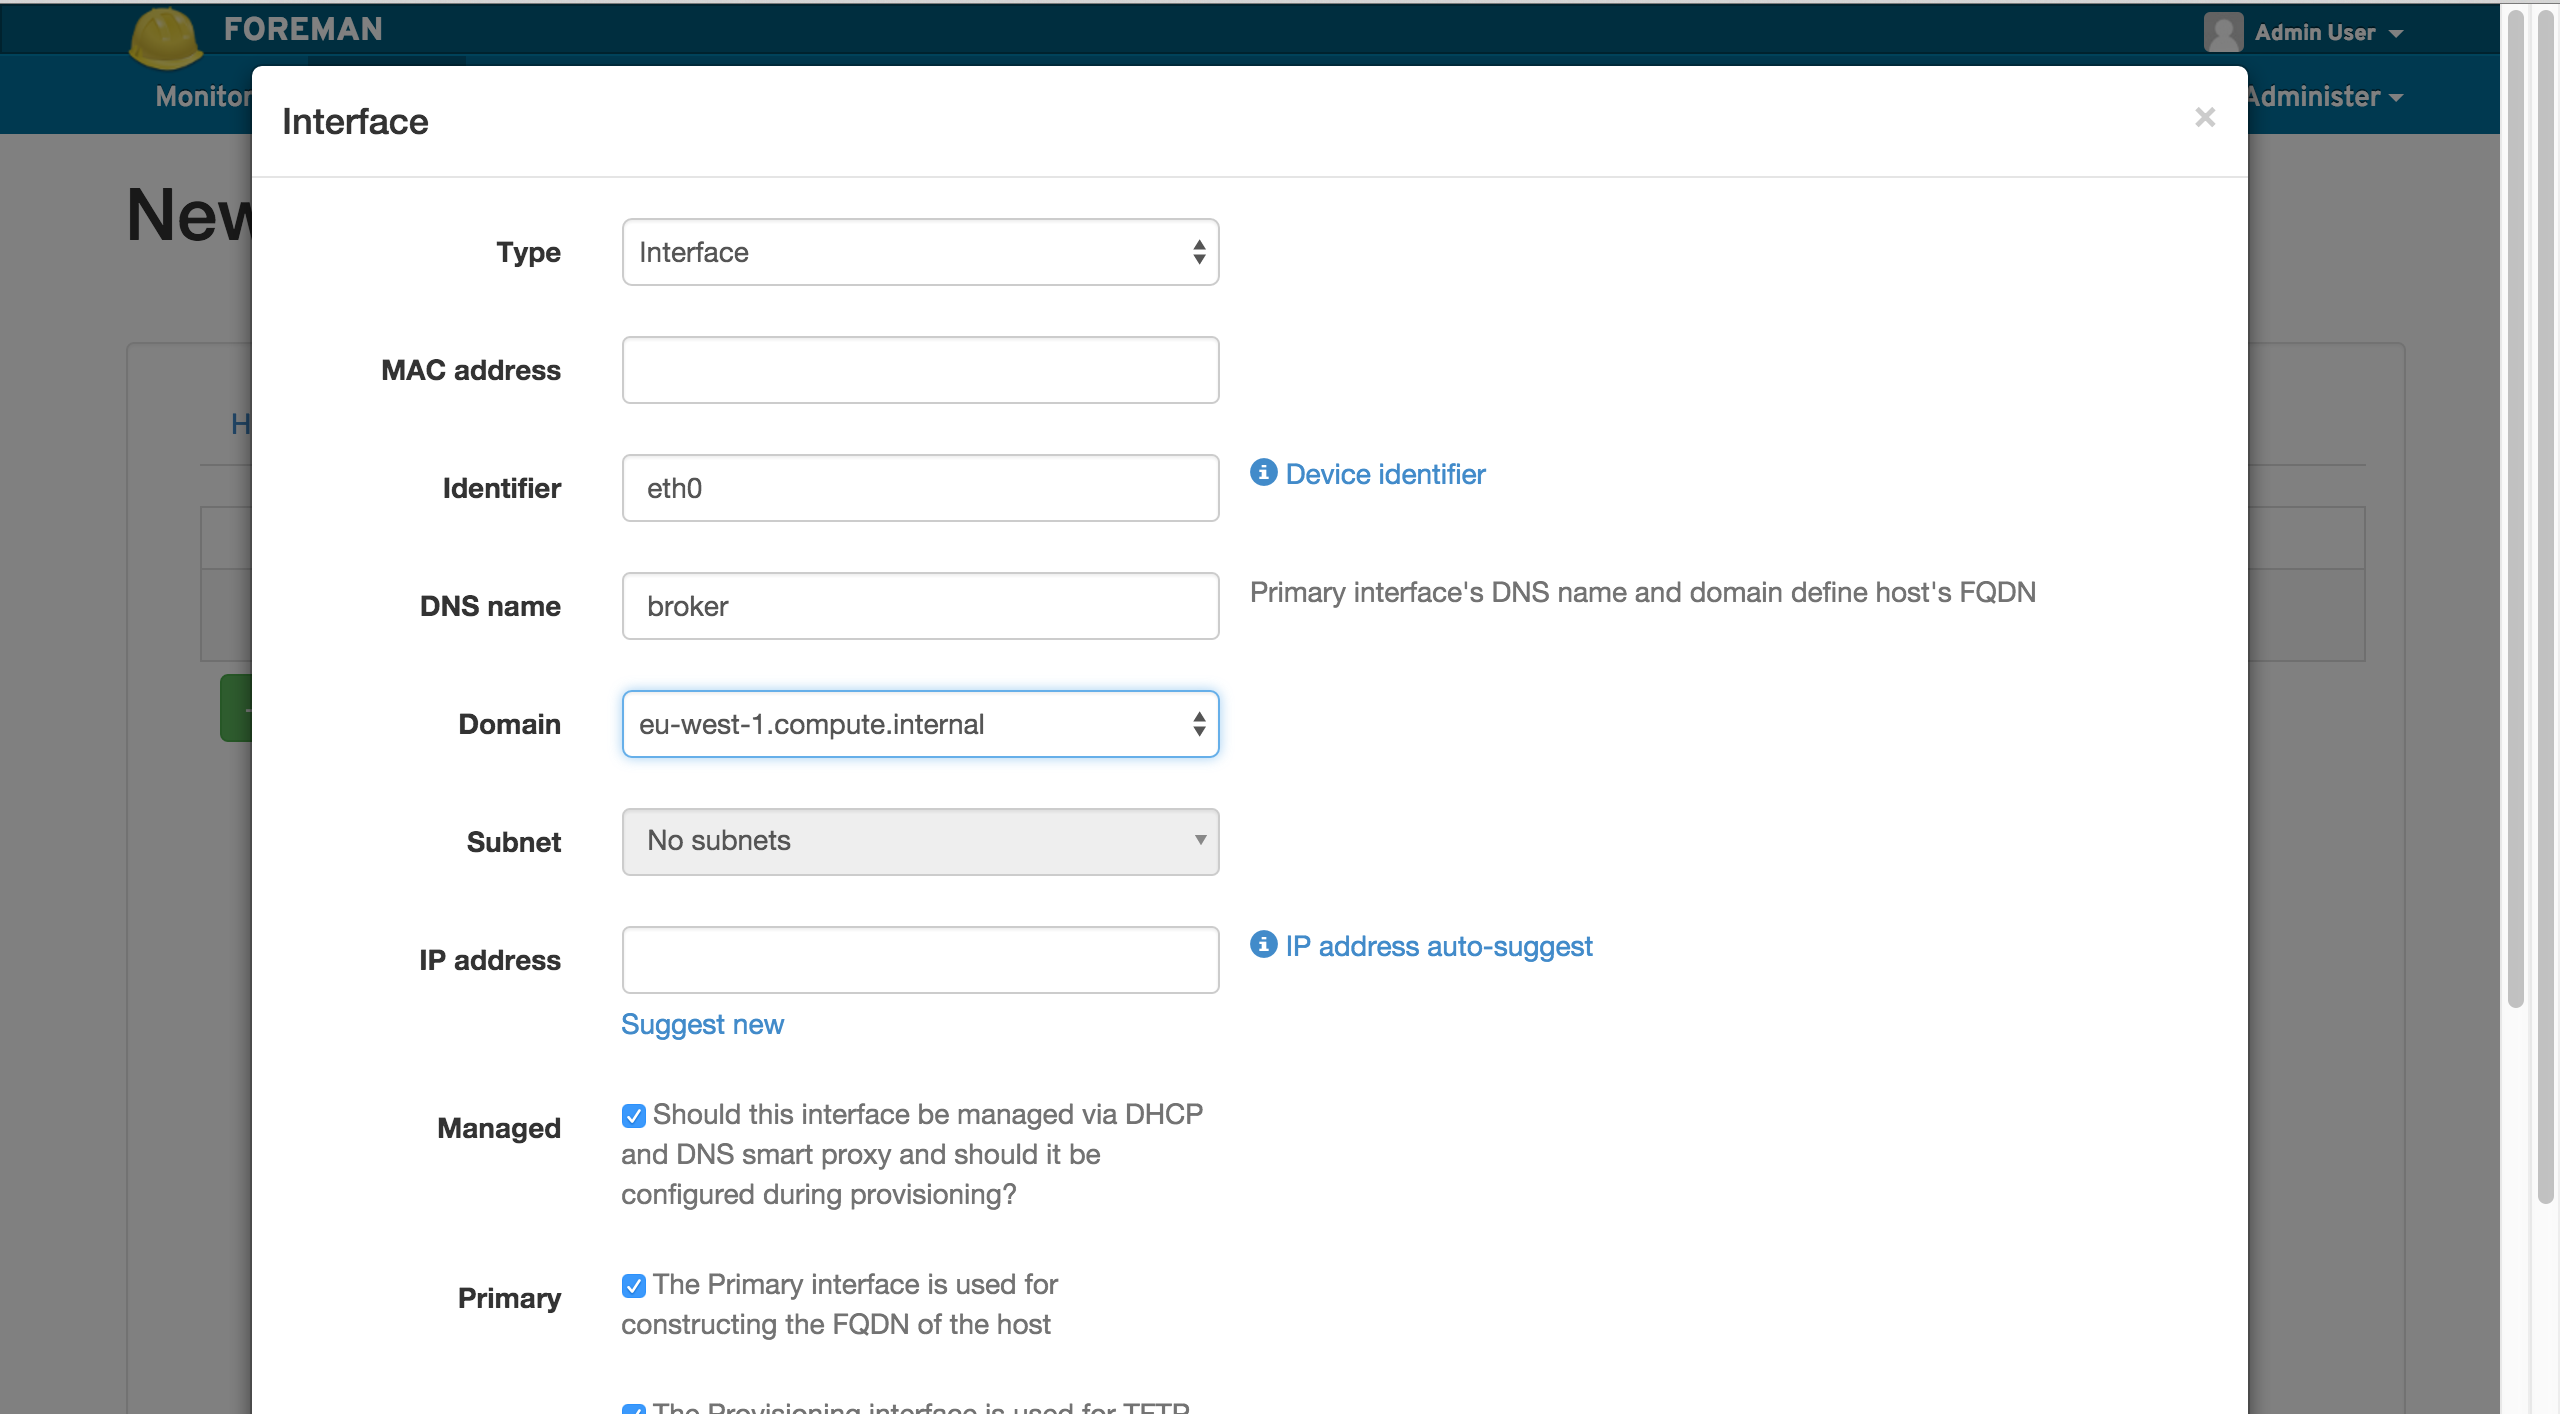
Interfaces tab
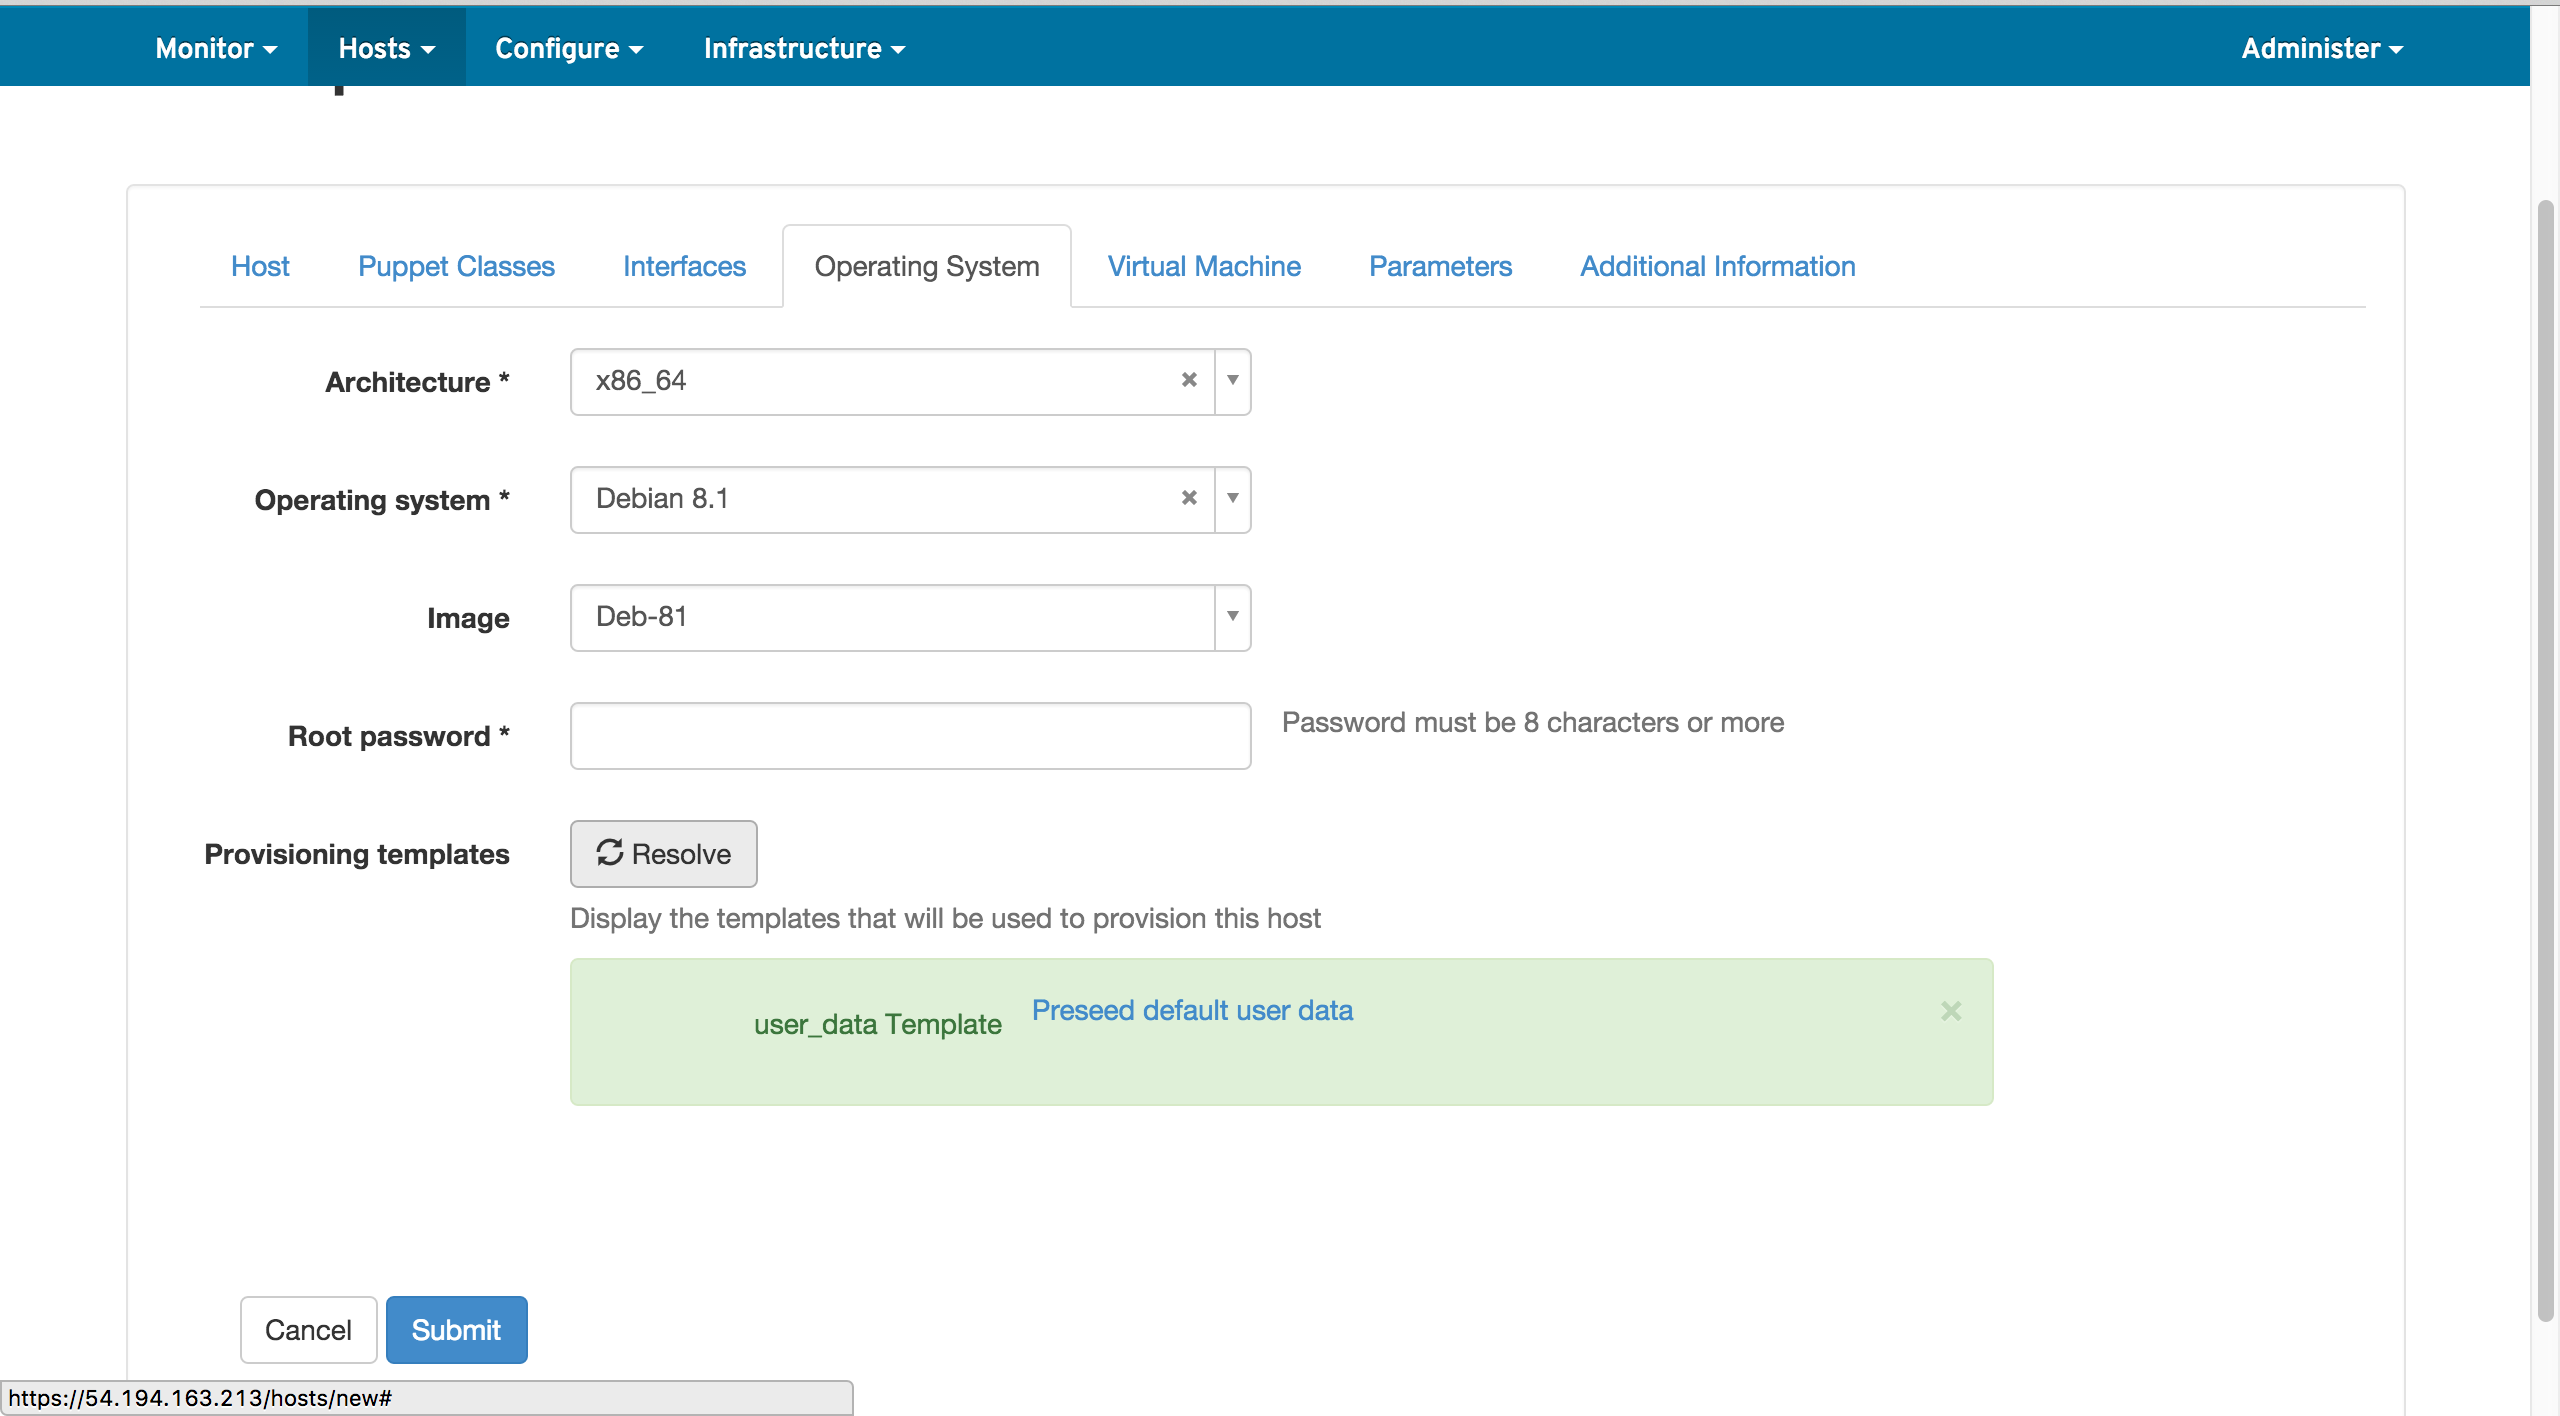
Operating System tab
Select the correct values and click the Resolve button to link the template.
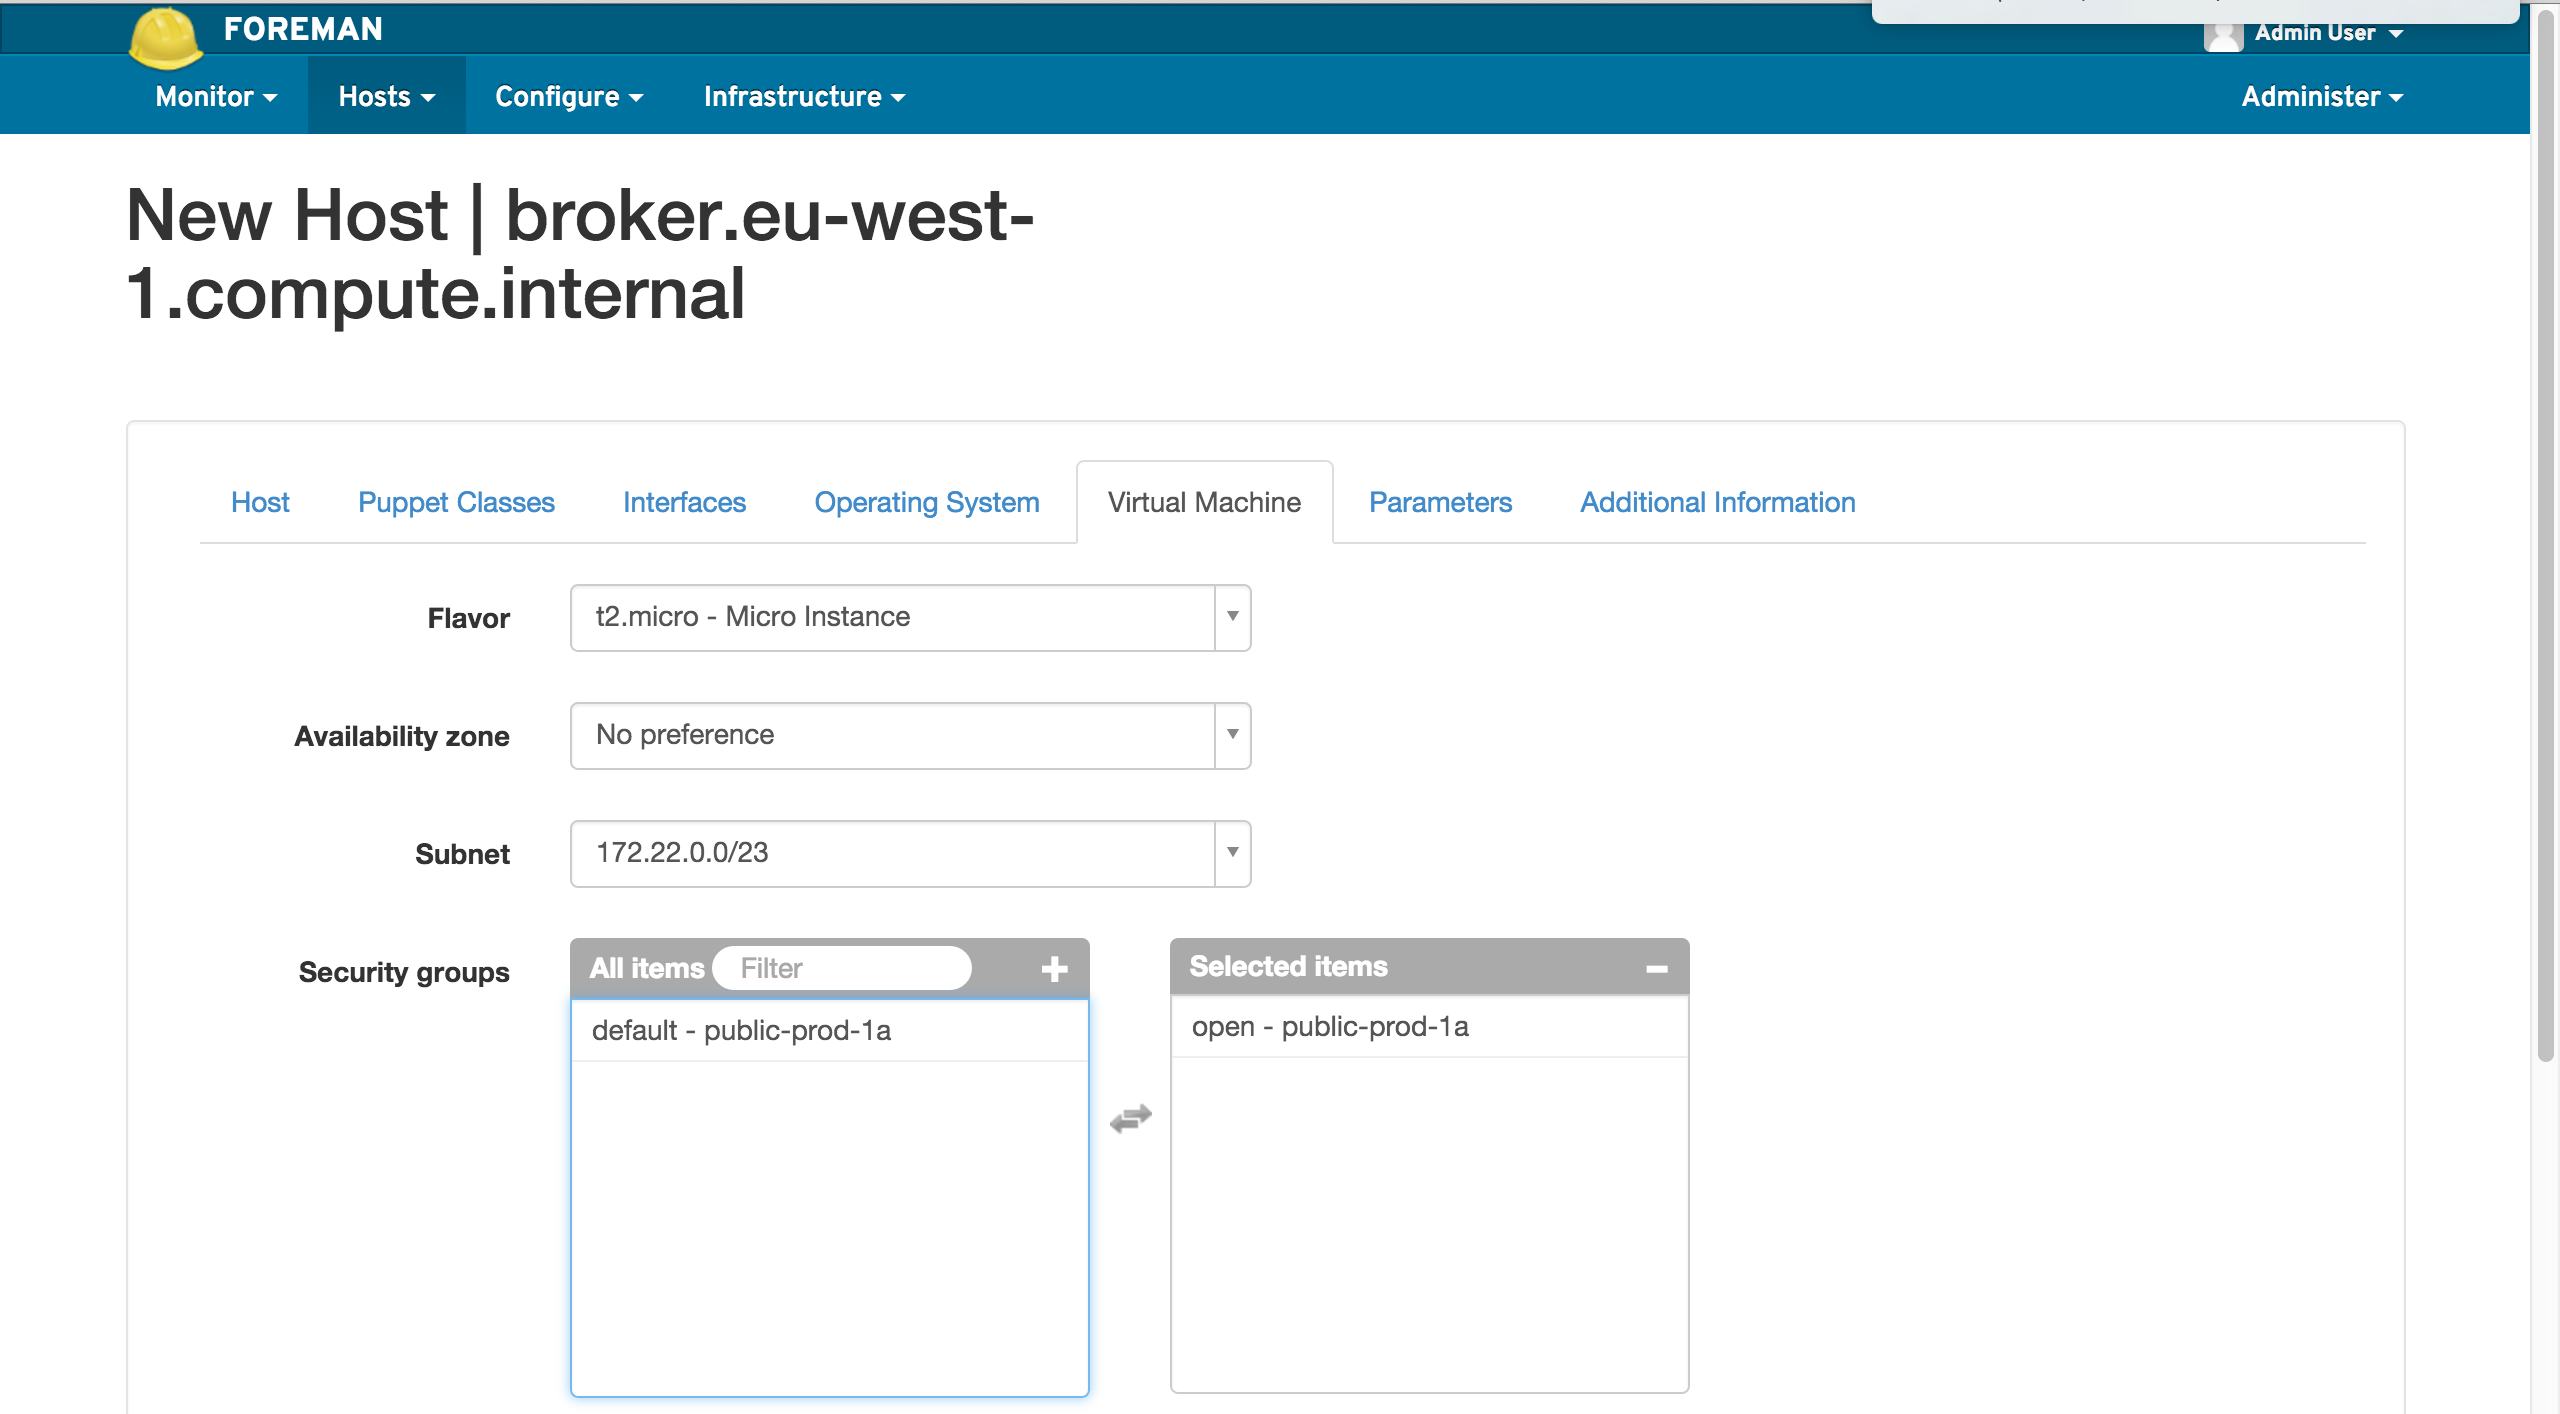
Virtual Machine tab
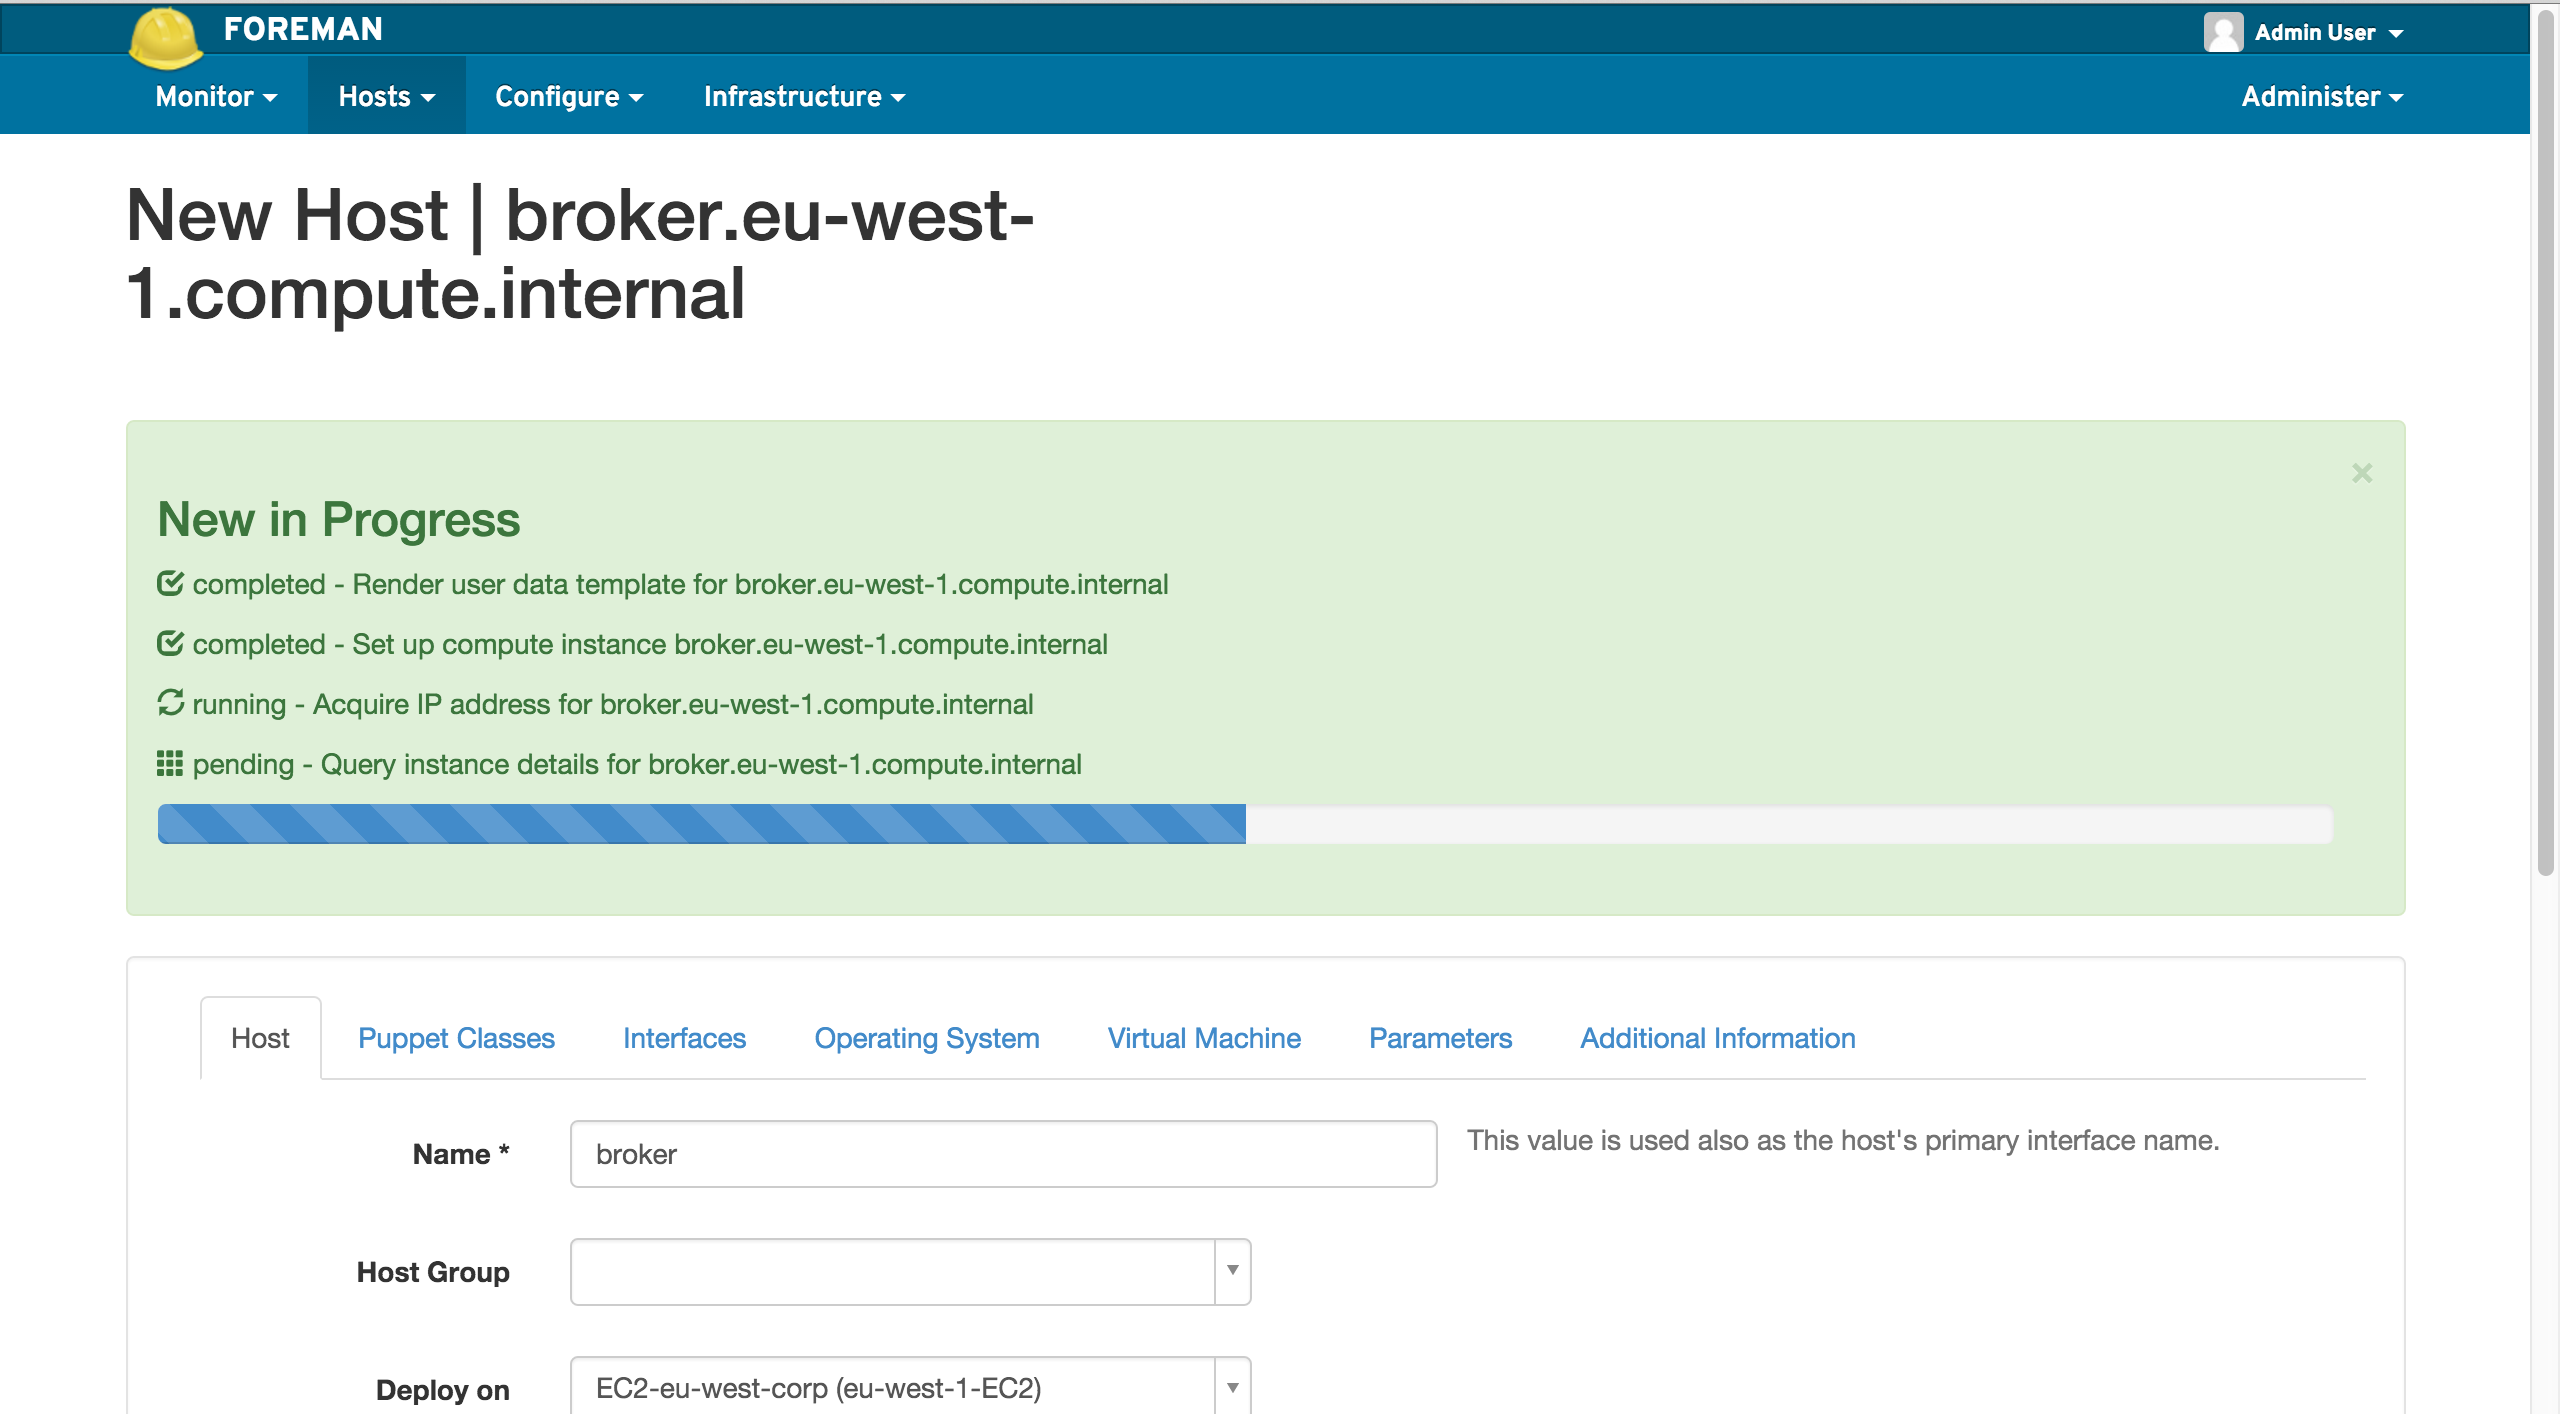
Progress bar
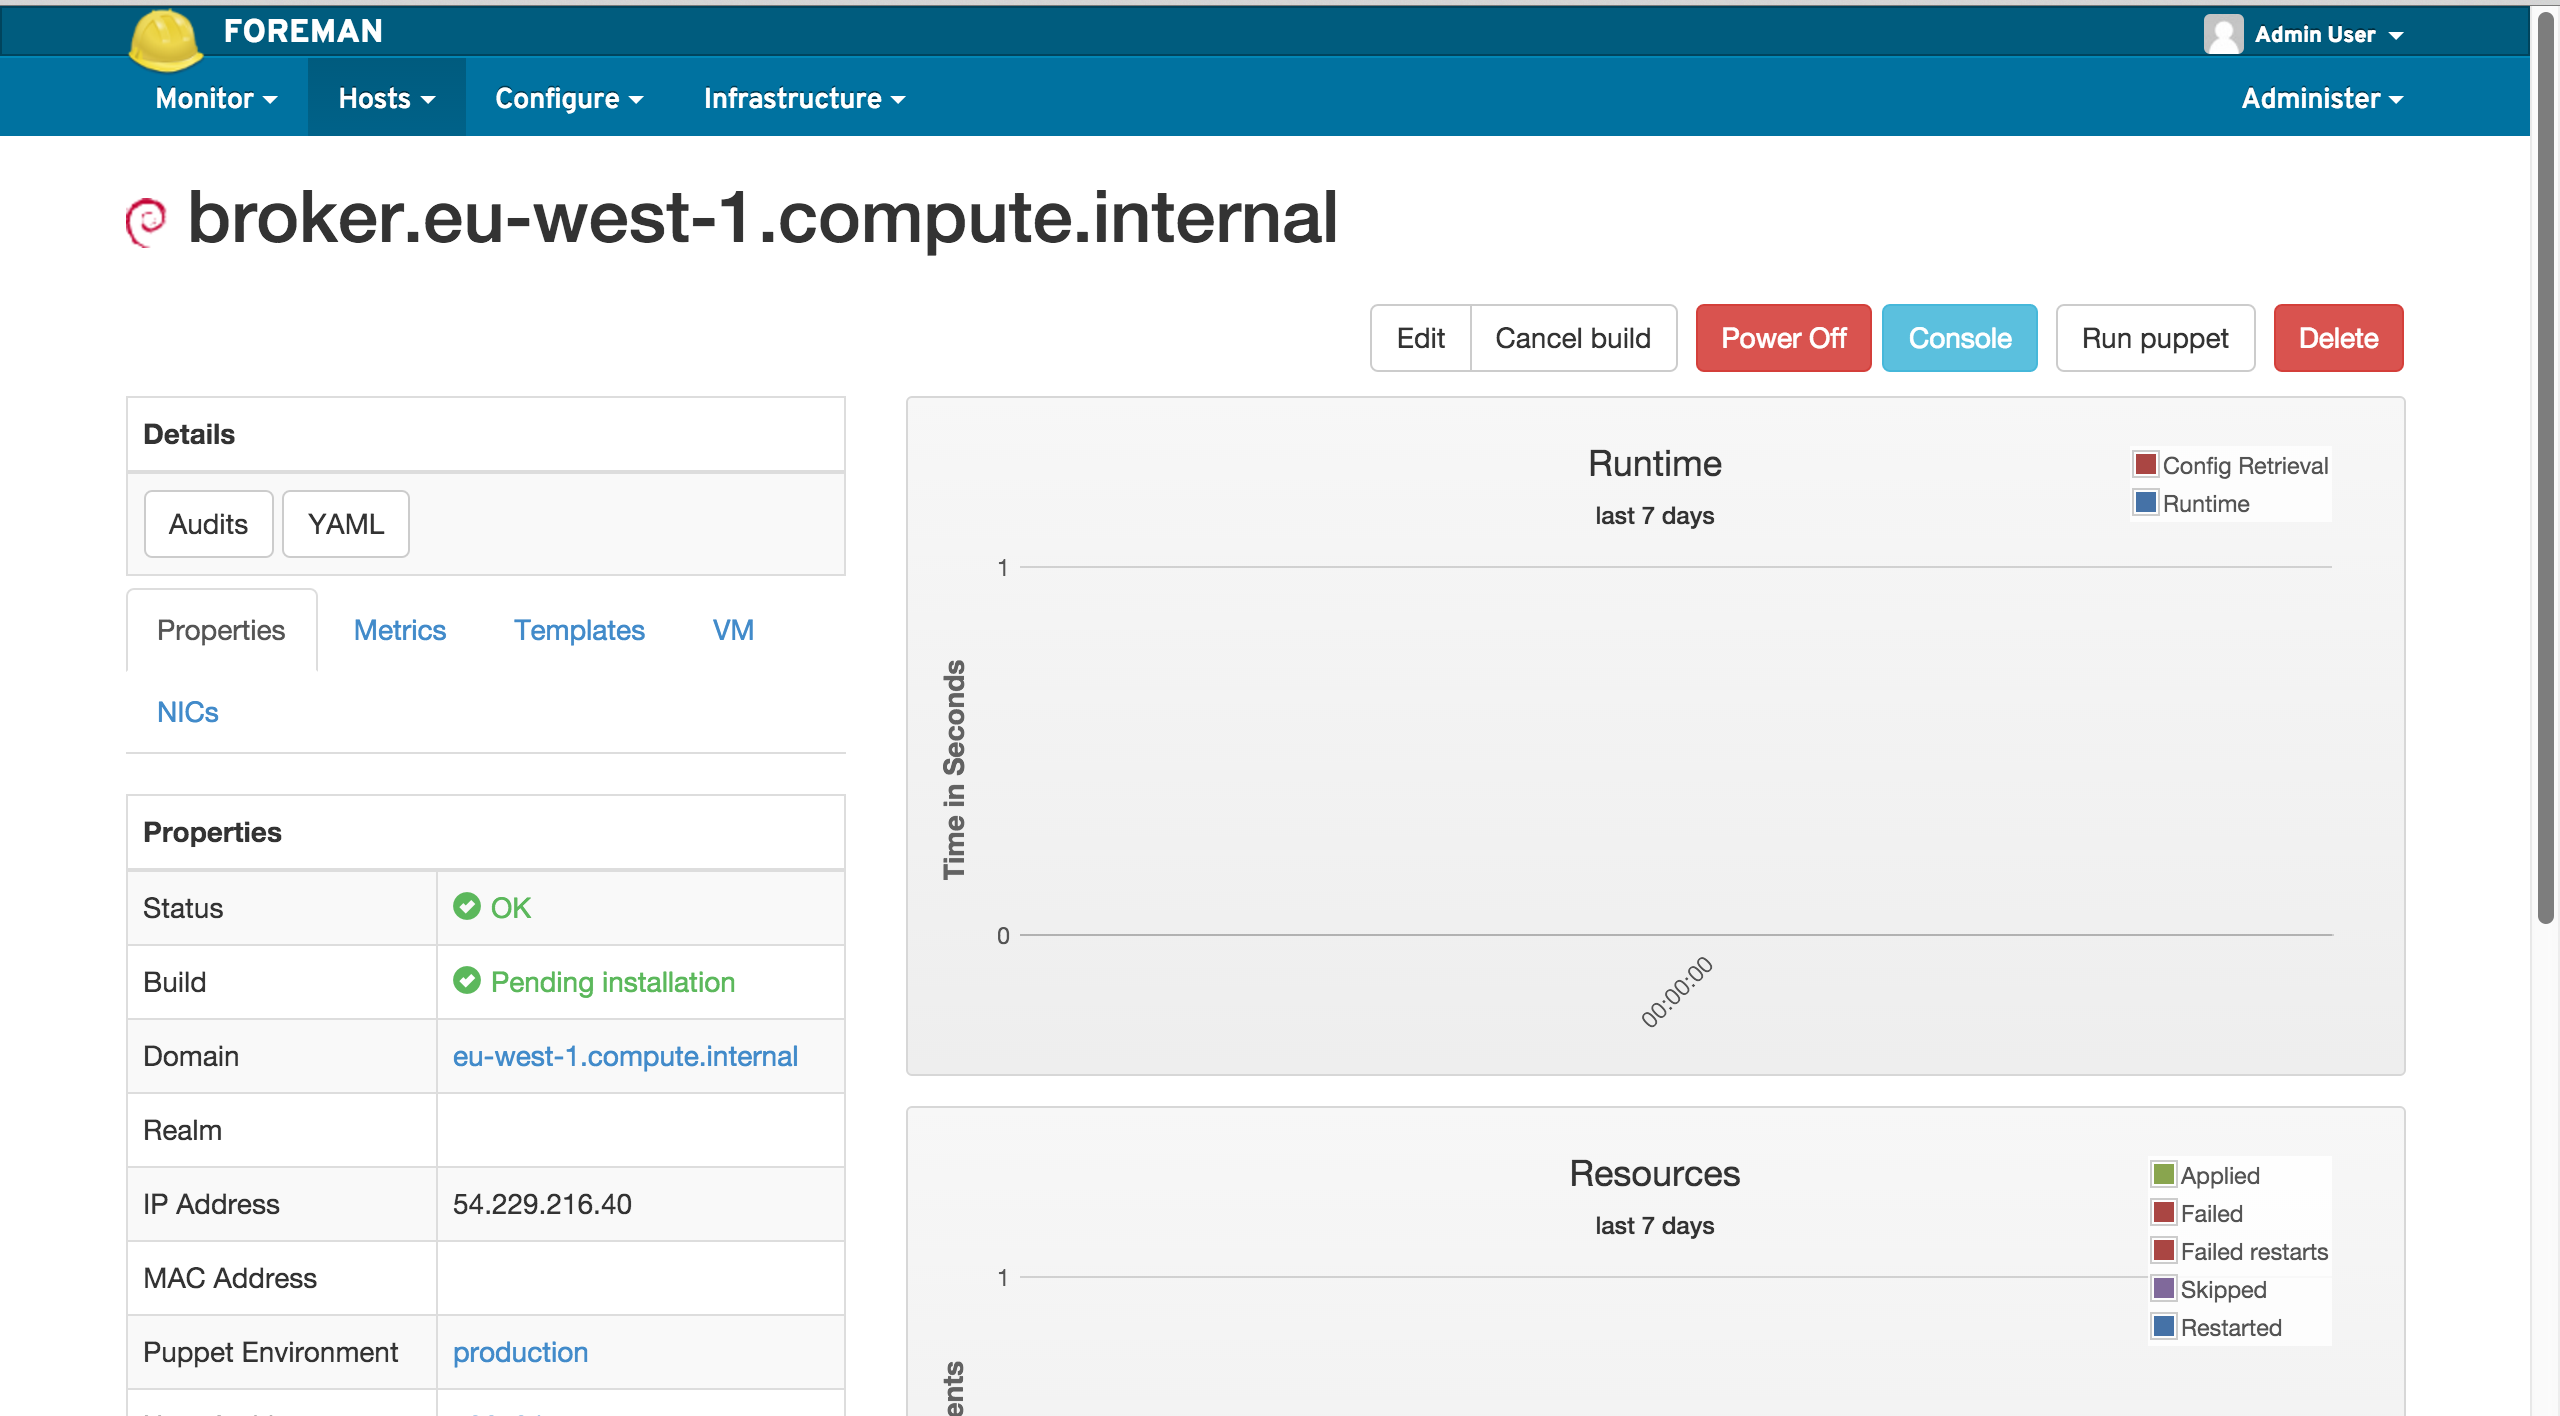
Completed Host
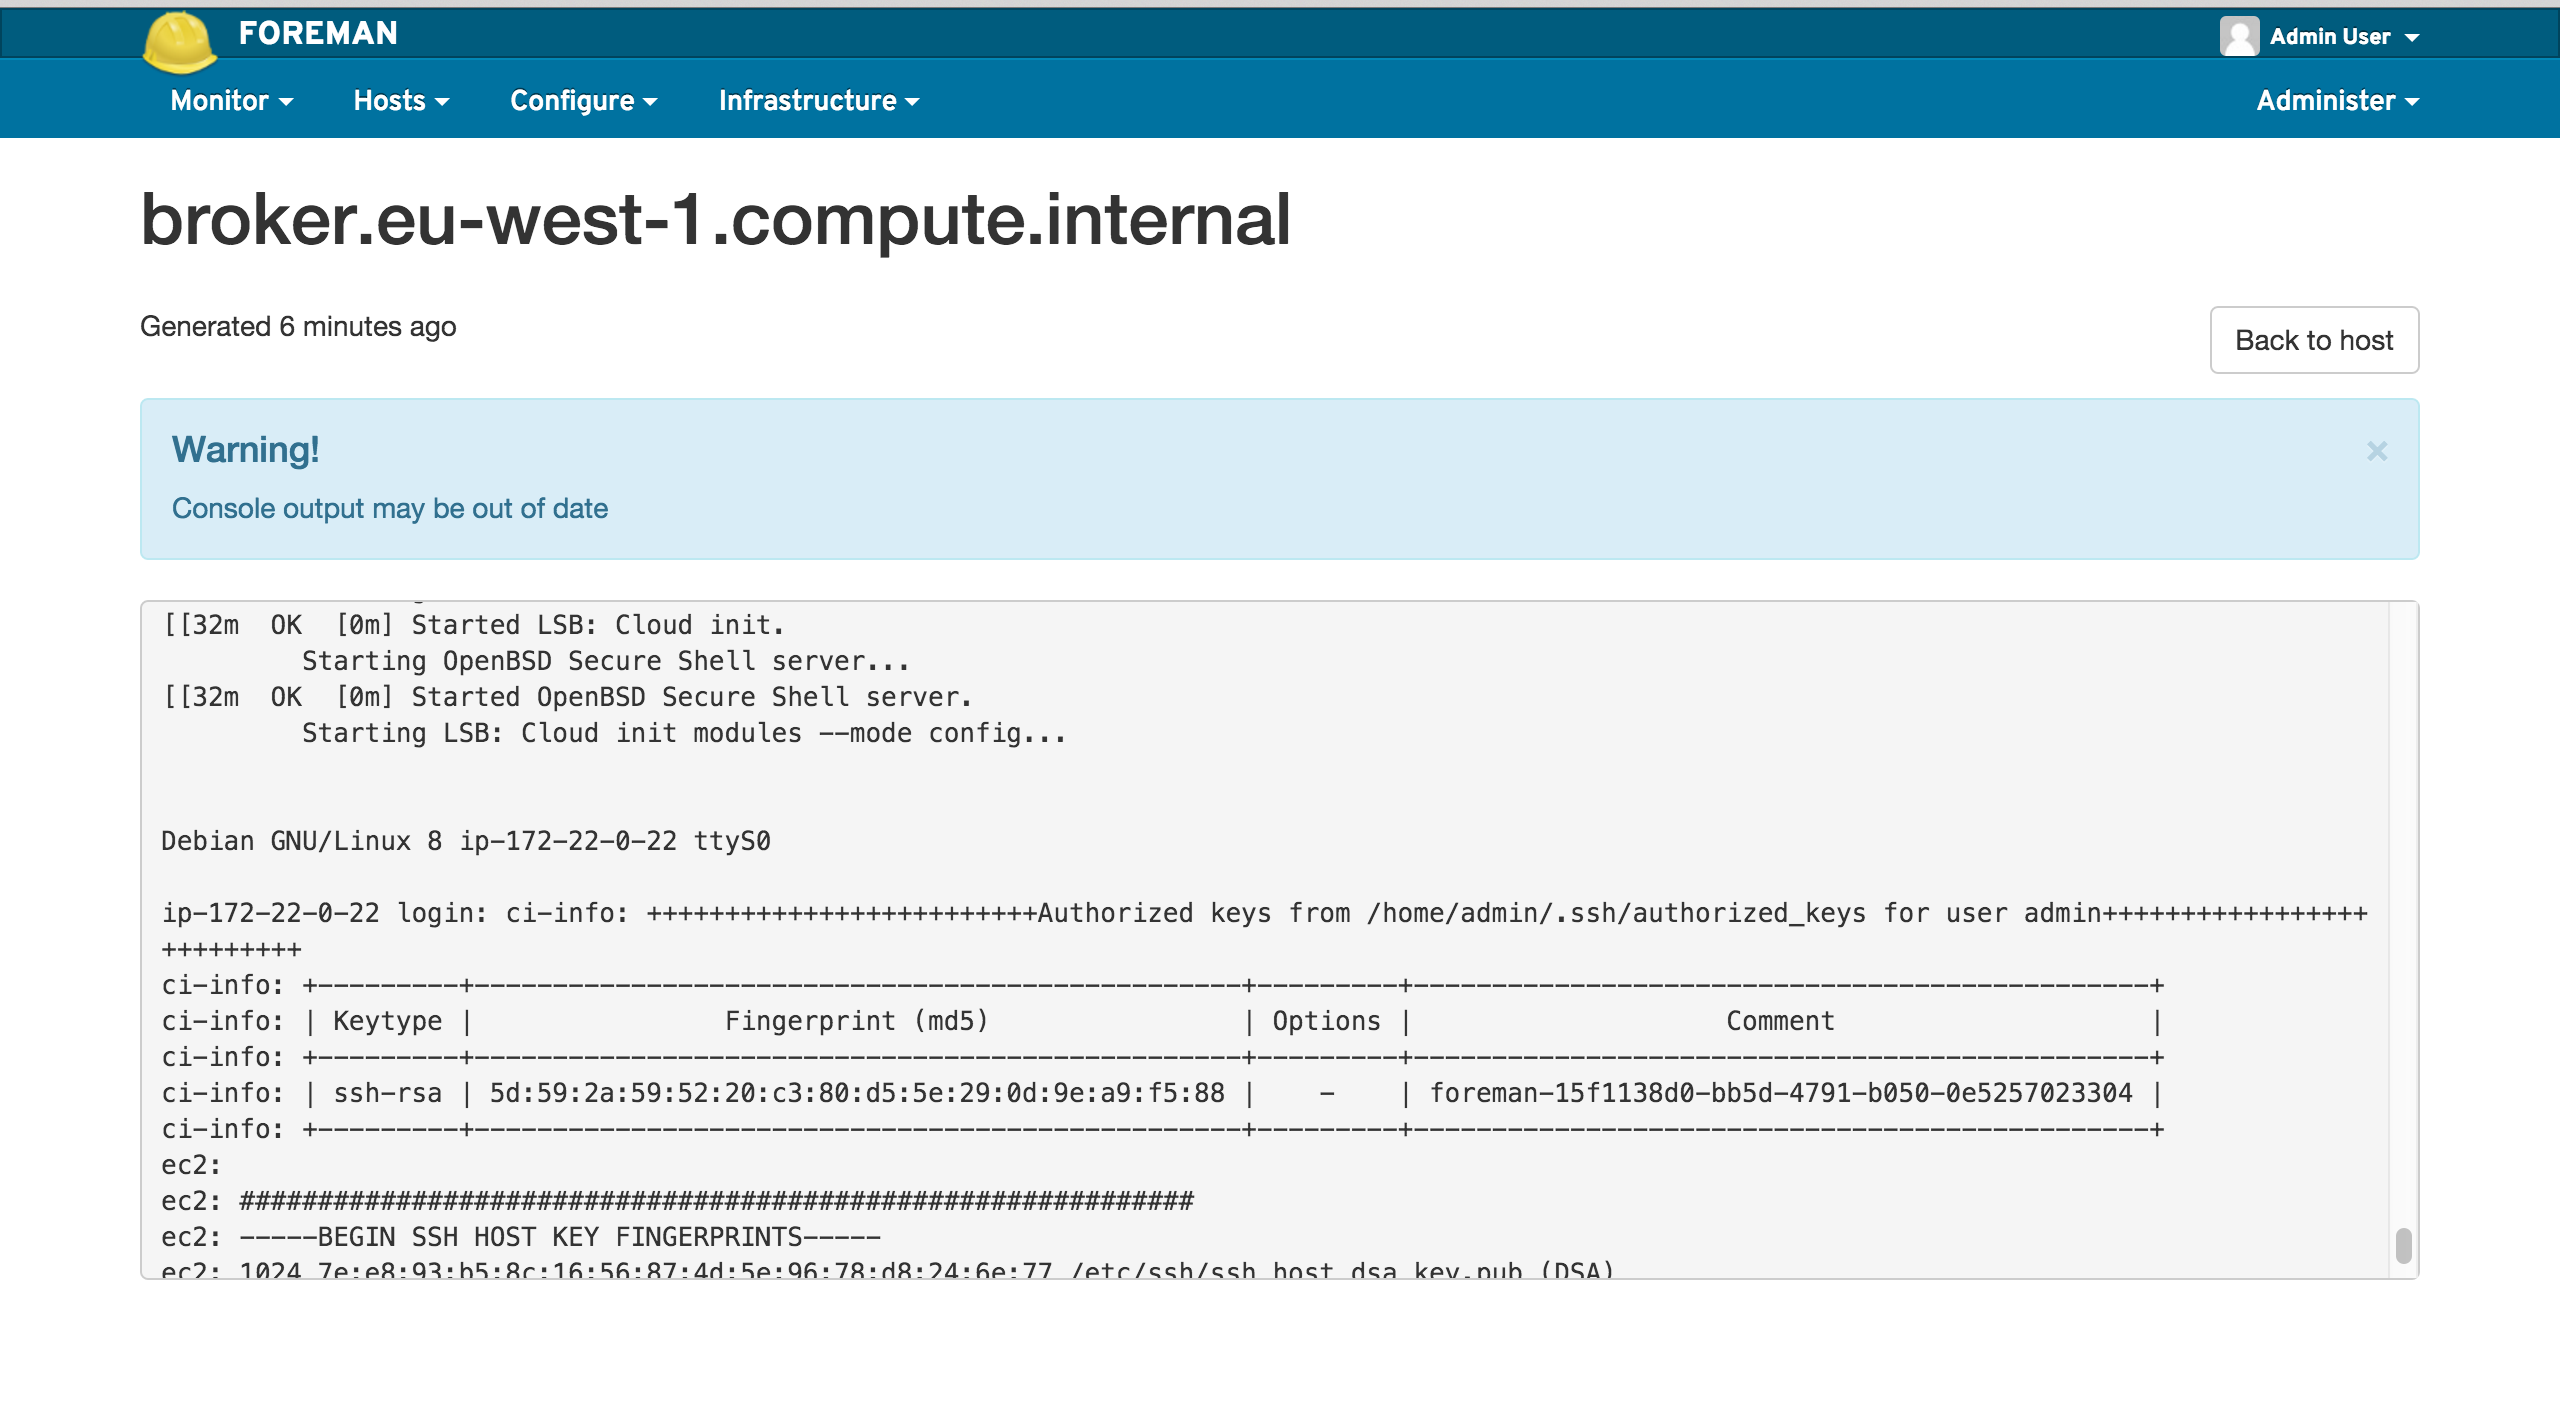
EC2 Console
Now your host is ready for use. :-)