This post targets primarily users new to Foreman. It can be interesting for those, who would like to start using Foreman but feel lost or who just installed Foreman and would like to investigate its capabilities. We’ll assume a fresh Foreman installation without any plugin and with the default configuration. The primary focus will be on filling in the data about the infrastructure. If you’re searching for installation instructions, please take a look at Installing Foreman chapter of the Foreman manual. This post assumes installation using the foreman-installer.
Foreman allows us to define many objects, which serve different purposes. But the heart of everything is the Host object, it glues all other objects together. A host represents a machine. It can be a device on the network or simply something, that you want to install an operating system on. It’s typically a thing you want to manage or automate some tasks around it. In virtualization terminology, it can be hypervisor but also a guest. It can be a baremetal machine, it can be VM running on some hypervisor or a VM somewhere in the cloud. While Foreman does not primarily target these, it can also be a router, IoT sensor, laptop, container.
Regardless of what kind of machine the host is, Foreman calls that simply the Host. Hosts have names. They also must belong to some organization and location. This is the bare minimum that Foreman requires in order to define a Host. Some use-cases may require more attributes. E.g. to provision a host in the cloud, cloud credentials are required or in order to provision a host using PXE boot, host MAC address is needed. In order to run job through SSH on it, its FQDN or IP must be set.
Hosts can be either managed or unmanaged. While it’s a simple boolean flag, it dramatically changes how Foreman treats them. Managed hosts are seen as something that Foreman tries to manage in external services. Imagine you create a new Host in Foreman, you set its name (FQDN), IP address, MAC address. Based on the managed flag, Foreman can reach out to associated DHCP server to create a reservation for the given MAC and IP pair. It would try to create A, AAAA and PTR records for the hostname and IP address pair. What exactly happens is driven by what is configured in Foreman. We won’t go to more details in this post, but reading our manual could give you some ideas.
For unmanaged hosts, Foreman does not reach out to external services and modify their configuration. The only exception to his rule is the communication to hypervisor/cloud in case of a virtual machine. Foreman would delete the linked VM when the Host is deleted from Foreman.
Unmanaged Hosts can be used in many use cases. The first and most simple use case is the inventory. You can keep track of your infrastructure information. You can have multiple users and control, who has access to a specific subset of data. This data can be searched through using advanced, yet easy to use, search syntax. You can generate various reports and statistics. Therefore you can e.g. easily tell, how many CentOS 7 and 8 are running in your datacenter, search for all hosts in Subnet 192.168.0.0/24, create a CSV list of all hosts that are owned by a specific group of admins.
Once you have hosts defined, you can also take advantage of some nice plugins, such as remote execution to run scripts and commands via SSH. Or run Ansible playbooks. You can setup your configuration management tool, to send more information about your machines to Foreman and use Foreman as a dashboard for your infrastructure status. You can receive email notifications in case some configuration run fails. You can also manage the configuration management policy, be it Ansible, Puppet, Salt or Chef. With the Katello plugin plugin, you can watch what packages are upgradable or what security vulnerabilities were detected and can be patched on your hosts. You can even manage what package versions or files your hosts have access to. You can define OpenSCAP based compliance policy and start enforcing it across your infrastructure.
All these use-cases deserve its own post, but we’ll start first with how to begin, or better to say, how to create some hosts.
Adding unmanaged hosts manually
The easiest way to create an unmanaged host is using Hammer CLI. Once Hammer is installed and configured, you can create a host with this command
hammer host create --name my-first-host \
  --managed false \
  --build false \
  --organization 'Default Organization' \
  --location 'Default Location'
Name is usually the FQDN of the host, but it can also be just a hostname without domain.
The managed parameter tells Foreman, this will be an unmanaged host. The build value
represents whether the host is currently in build mode, which is only possible
for managed hosts. Without explaining what exactly it means, it always needs to be set
to false for unmanaged hosts, otherwise the host record is considered invalid.
More parameters, such as --ip, --owner, --comment, --model can be specified.
For the full list, run hammer host create --help
The other option is to use our API directly. In fact, all hammer commands are using the REST API that Foreman provides. For more information, see our manual. The equivalent of the hammer command would be the following request
curl -X POST https://foreman.example.com/api/hosts \
  -d '{"name": "my-first-host", "managed": false, "organization_id": "2", "location_id": "1"}' \
  -u admin:changeme -H "Content-Type: application/json"
Currently, there’s no way how to manually create unmanaged host easily in Foreman’s Web UI. You can create only the managed host and turn it later to unmanaged. Managed hosts require much more information from user, so that Foreman knows, how to configure external services. Therefore it’s good to start with unmanaged hosts first, unless you plan to provision hosts as the first step.
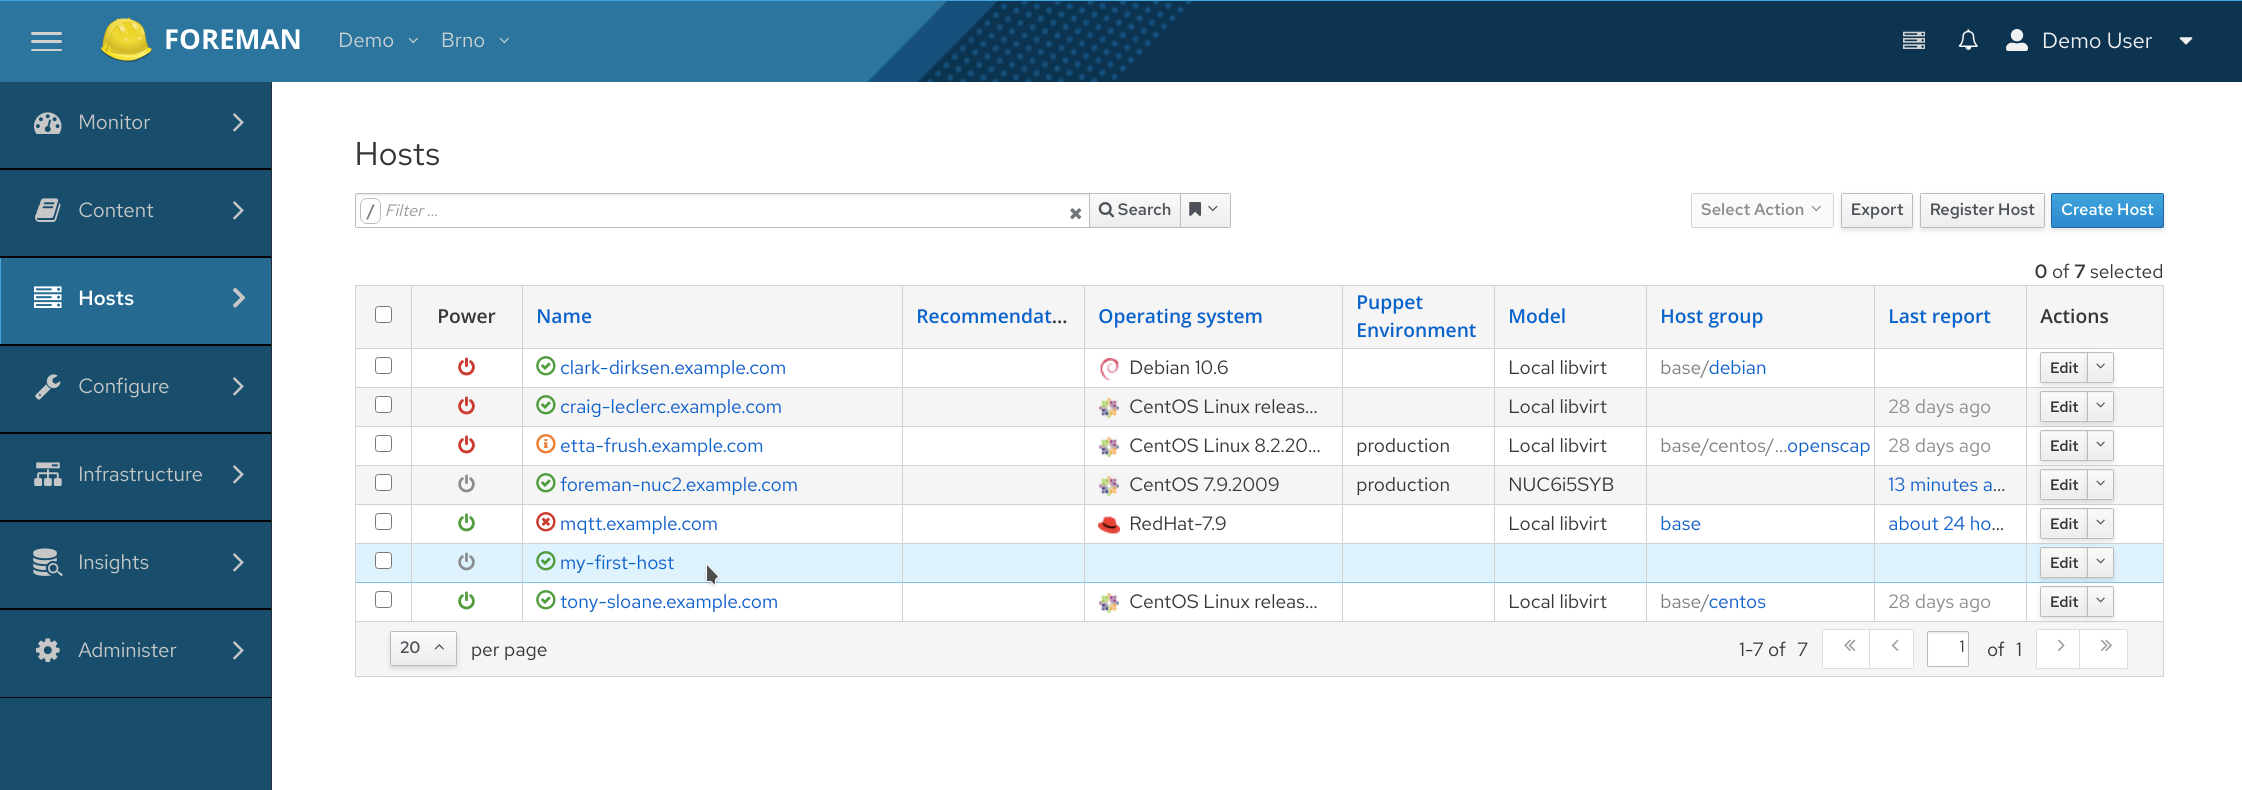
Once you create the unmanaged host, you can work with it in the UI. Navigate to Hosts -> All Hosts page and see the entry with the name my-first-host. You can click Edit button and fill in more information about the host. Clicking on its name takes you to its detail page.
Registering hosts to Foreman
Starting with Foreman 2.3, users can take advantage of the new registration flow, which is based on the Foreman templating system. It is very flexible mechanism that can be tweaked to support many infrastructure specifics.
For the successful registration, required Host information are either fetched from the machine during the registration process or you can pre-set them in the registration form. For example, the OS is required for Foreman to know what commands should be executed during the registration if we e.g. install some package.
The universal flow is to define the Operating System first, assign the registration template to it and then to generate the registration command.
To do that, follow these steps:
- navigate to Hosts -> Operating Systems and create a new OS. Feel free to fill as many details as you wish, but for the registration purpose, it should be enough to just set the name, version and the OS family.
- navigate to Hosts -> Provisioning Templates and search for
Linux registration default. You can use the search field above the table. Click on the template name. This will open the editing form. Note the template is locked, so you can’t modify its content, however you can assign it to existing operating systems. To do so, click on the Association tab. Then select the OS you’ve created in step 1. Save the template. - Go back to the OS you created in step 1, open its edit form. This time navigate to Templates tab and for the Registration type, pick the Linux registration default template.
- Proceed to the registration form by navigating to Hosts -> All Hosts -> Register Host.
Select the Operating System from the drop down. Click on Generate command button and
you will get the command that you must execute on the existing host.
You must have
curlinstalled on the machine and the command must be executed as root, since it may install additional packages. If your host is not configured to trust the Foreman CA, add--insecureflag to the curl command. Note that by this you accept the risk of man in the middle attack to your host. You can first try to run the curl without| bashpart, to see the content of the script. After thorough investigation, you can execute it manually.
If the registration was successful you should see something like
Successfully enrolled host host.example.com with Foreman.. If you see this, you can
see the Host created in your Foreman. The registration process can be tweaked, to e.g. deploy
SSH keys, pre-install some software etc.
Note the command contains a JSON Web Token (JWT) that authenticates the user when curl fetches the registration instructions from Foreman. This token is valid for 4 hours by default. The token lifetime can be customized in the registration form. The same command can be used for multiple machines, however it also contains the selected OS id, so all such machines would be considered running this specific OS.
Registering hosts using subscription-manager or bootstrap.py
This section assumes you have Katello plugin installed.
If you use Katello, there’s a way to create an unmanaged host by subscribing it. This is specific for RPM based distributions, namely Red Hat Enterprise Linux and CentOS. The subscription-manager was recently ported also to Debian (and derivatives). However you need to add a custom repository to your machines in order to install it. When the Host is created this way, the second object called Content Host is also automatically created. Content Hosts are extensions to the regular Host object, extending its. You can see that in Content Host UI. Note that the Host will be unmanaged, however you can convert it later to a managed Host. Also if you provisioned the host (meaning it’s managed) a Content Host can still be created. In fact the subscription is usually performed as part of the provisioning.
Katello provides subscription management and content management features. Meaning you can control what product entitlements are consumed by each such Host and what repositories are available to them. You can control content versions, e.g. you only want the newest packages installed on your testing environment, while in production you want to update packages only after they were tested in the testing environment.
Based on the information we receive from the host, Foreman also knows, what packages are installed on a particular Host and whether there’s some update or applicable errata.
In order to get instructions for subscribing the machine, navigate to Hosts -> Content Hosts and click Register Content Host. Follow the instructions on this page.
To make this easier, you can also use bootstrap.py, that accepts many options. See its readme for more details. The linked repository also contains an Ansible playbook that can be used to automate a subscription of multiple hosts.
Importing VMs from compute resource
Foreman can scan many virtualization hypervisors and cloud providers. Each hypervisor and cloud provider offers different capabilities. Foreman abstracts these differences and as much as possible. In order to start using some virtualization backend, a compute resources must be defined. Compute resource represents the hypervisor or cloud.
Some providers are shipped with Foreman but more can be added by installing plugins. As of today, these are part of Foreman core:
- Amazon EC2
- Google Compute Engine
- Libvirt
- OpenStack
- oVirt / RHV
- VMware vSphere
Some popular compute resource types added by plugins are: Azure, HyperV, Scaleway. If your provider is not listed here, you can write the new plugin.
Let’s say you start using Foreman with some existing VM infrastructure. The easiest way to start is connecting Foreman to your virtualization and import all VMs from there. First we need to create a new compute resource object.
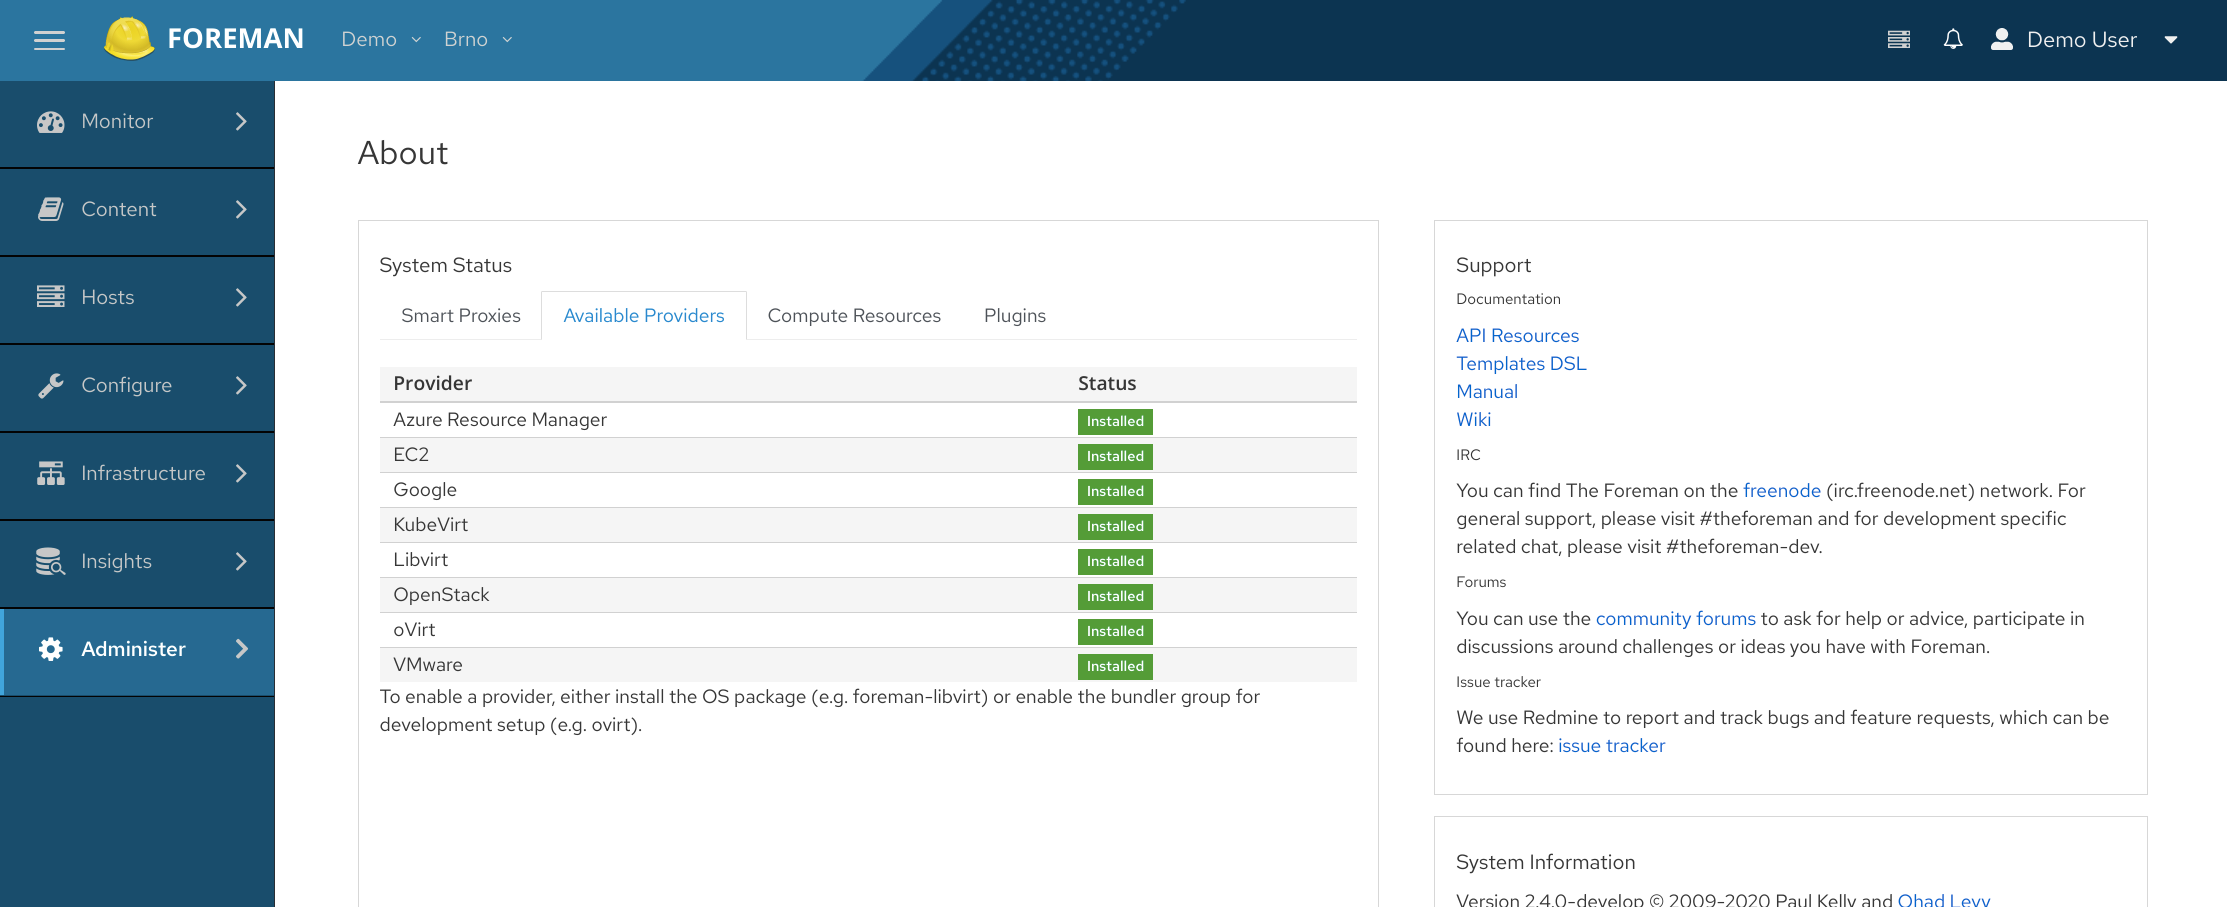
Navigate to Infrastructure -> Compute resources and click Create Compute Resource button. Give it some name and select a provider type. If you don’t see any provider, you need to install some. While some providers are part of Foreman core, we ship them in separate RPM packages, so users can install only those, that are interesting in their environment. In order to see, what providers you have installed, navigate to Administer -> About -> Available Providers.
Here’s a table with installer argument for each core provider
| Virtualization | Installer argument |
|---|---|
| Amazon EC2 | --enable-foreman-compute-ec2 |
| Google Compute Engine | --enable-foreman-compute-gce |
| Libvirt | --enable-foreman-compute-libvirt |
| openstack | --enable-foreman-compute-openstack |
| oVirt / RHV | --enable-foreman-compute-ovirt |
| VMware | --enable-foreman-compute-vmware |
To install the support for a particular provider, run the foreman-installer with the appropriate argument, e.g.
foreman-installer --enable-foreman-compute-vmware. Multiple providers can be installed at the same time.
After you choose the provider in the compute resource form, some additional fields show up. This is the form specific to the selected provider. Some providers allow to test the connection, which is required to load additional information. The test only verifies the connection can be established but does not necessarily verify, that credentials are correct or the account has all required permissions.

The Organizations and Locations tabs can be ignored for now, but make sure at least one of each is assigned. Most likely you’ll have a single option in both selectors.
After the compute resource is created, you are redirected to its detail page. Click the Virtual Machines tab to list VMs on this compute resource. You should see some basic information about VMs. Based on provider capabilities, you can power them on and off.
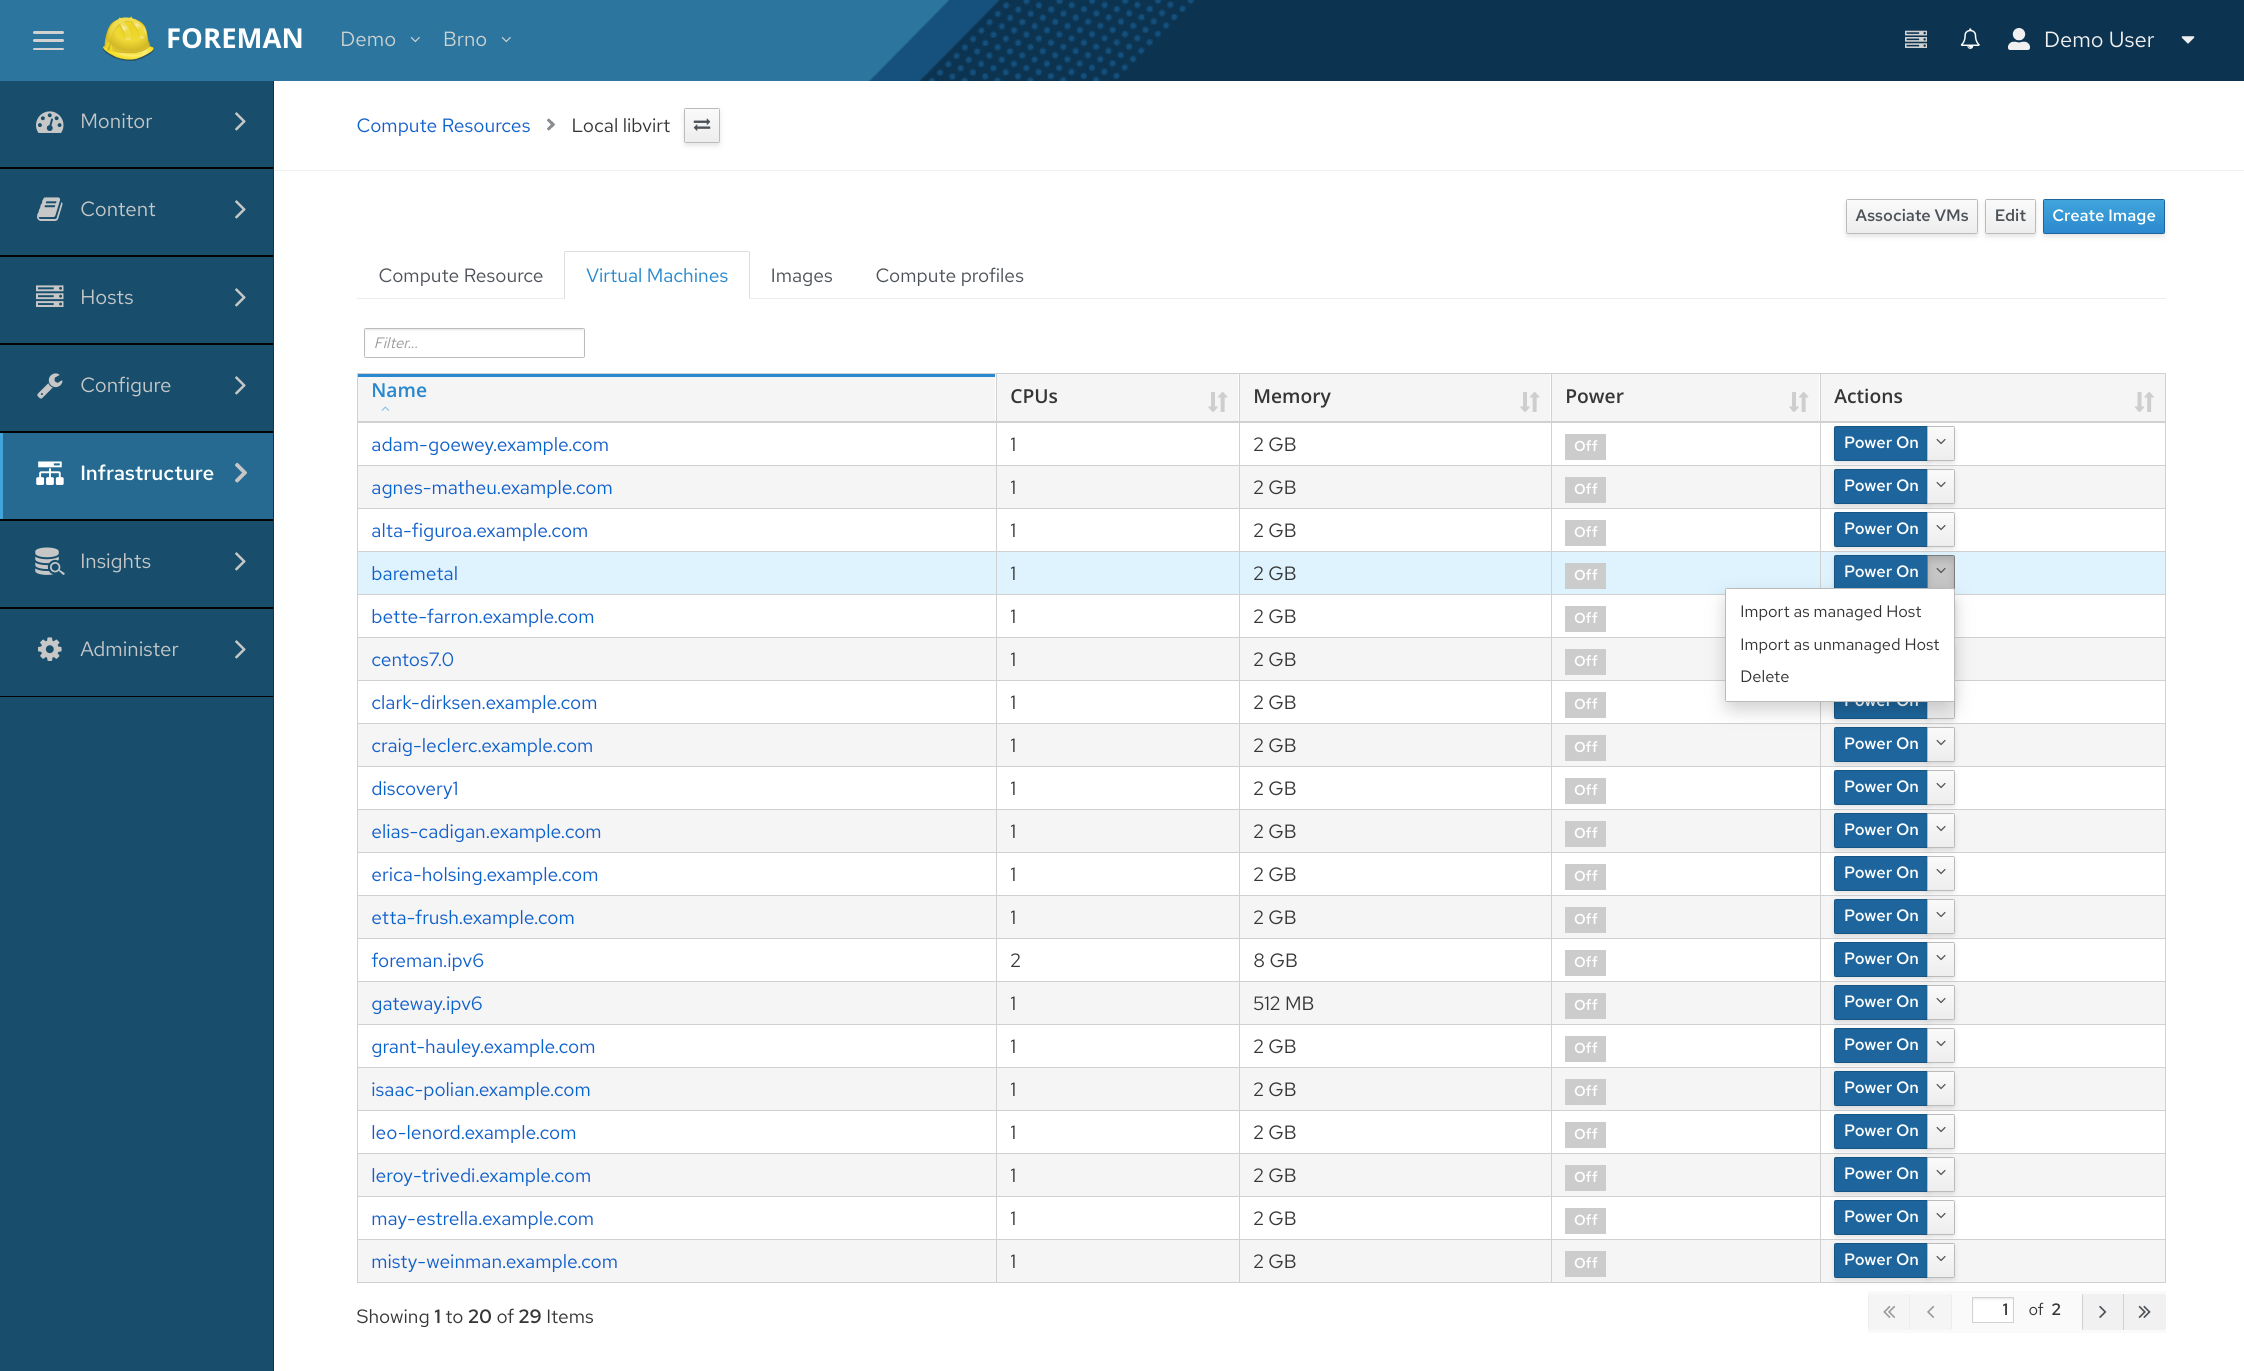
Note the little drop down icon next to Power On and Power Off buttons. This is the multi action button that the Foreman uses in many places. Clicking the down caret will open other actions that can be performed on the item. In this case, there are three more actions, Import as managed Host, Import as unmanaged Host and Delete. Deleting a VM can delete the VM including all hard drives on the compute resource, so be careful with that. This behavior respects the Destroy associated VM on host delete setting, which defaults to No. However if turned to Yes, this can lead to the permanent loss of the data of your VM.
However the import functionality is what we were searching for.
The difference between importing a managed and unmanaged host should be clear at this point. Both actions take you to the Host creation form. The form allows to specify more details about the Host. For unmanaged hosts, all necessary information is already prefilled, so you can go ahead and click the Submit button. The information is fetched from the compute resource, so e.g. RAM amount or network interfaces MAC addresses is correctly set. Provided information differs per compute resource type, e.g. VMware gives us much more information than Openstack.
A brief note on managed hosts
When you import the Host as managed a lot more information is required to be filled in manually. For some fields you may not even have objects defined in Foreman yet. The bare minimum that you’ll need to set is
- architecture
- operating system
- installation medium
- partition table
- root password
- domain
- subnet
Architecture can be customized, but usually, one of the default records will do. In the default installation usually one Operating System already exists. It’s the OS of the host running Foreman. It’s common to create more OSes under Host -> Operating systems. For that, you will need to select some partition table and installation medium. All information is required for provisioning, but we won’t go to the details in this post.
Root password is also meant to be used during provisioning. If you don’t want to specify it for each host, set the default value in Administer -> Settings -> Provisioning -> Root password.
Domain is automatically created if the machine name contains it. Subnet is required, if you’re going to fill in the IP address of the host. Make sure you define Subnet under Infrastructure -> Subnets with the right IP range first.
Now that has been a lot of clicking, but from now on, you are able to create managed hosts.
If you already created hosts manually as unmanaged, you can use another compute resource function - Associate VMs. Not all compute resources support it and each uses a different mechanism, but usually, hosts are matched with compute resource VMs by MAC address. If the match is found, the Host is linked with VM.
Beware, once you link host with VM, when you delete the host, it also deletes the VM on compute resource. If you want to keep VM untouched, either first disassociate it from host edit form or make sure to keep the global setting under Administer -> Settings -> Provisioning -> Destroy associated VM on host delete set to No.
The fruit
If you follow one of the way to populate your inventory, now it’s the time to see, how to perform some basic operations mentioned in the beginning.
how many CentOS 7 and 8 are running in your datacenter?
Go to Hosts overview page Hosts -> All hosts, type the following into the search field
os_title ~ CentOS and (os_major = 8 or os_major = 7).
The table will filter only matching hosts, the total count is displayed at the bottom of the table.
You can investigate the search field capabilities through its auto completion feature.
search for all hosts in subnet 192.168.0.0/24
On the same page, you can try several ways to find hosts matching this subnet. If you defined the Subnet object and gave it a name, e.g. “lan1”, you can search all hosts assigned to it via their primary interface like this
subnet.name = lan1
The other option is to search by IP addresses using a wildcard, e.g.
ip ~ 192.168.0.*
Note that also this will only search in the primary interface of hosts. If you want to find hosts that have any interface with an IP from this range, you can use the following term
has_ip ~ 192.168.0.*
create CSV list of all hosts that are owned by a specific group of admins
You can easily generate one of the predefined reports or create a custom one. To see all
existing Report Templates, navigate to Monitor -> Report Templates. Find the one called
Host - Statuses and click on Generate button. You can specify a host filter in the hosts
field. Assuming you have created a user group “linux admins” and set that as owner for some
hosts, you can now use that as a search query owner = "linux admins". If you haven’t set
any owner, feel free to just generate the report without filter, you’ll get the idea anyway.
Summary
We looked at how to create the most important objects in a fresh installation. In the next blog post, we’ll talk about how to fill in data based on configuration management systems and discuss how to keep it up to date.