Foreman Discovery is a powerful tool for provisioning new hardware. The system facts discovered by Facter when the Foreman Discovery Image boots provide us with important information needed to determine how a system should be provisioned. Many of the facts we need are captured out of the box, but what happens when we need something a little more? This is where custom facts come into play.
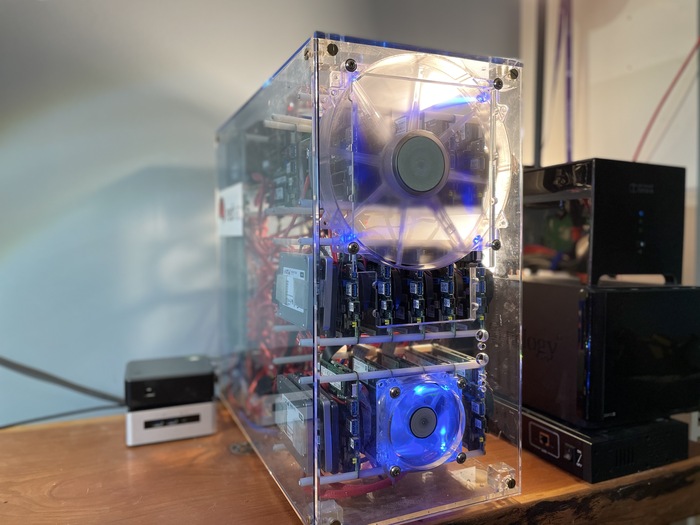
Custom Facts can be anything that we need. In my instance, I have a lab environment that I use for development and demonstrations where I need to keep track of many small systems. The lab contains 17 Intel NUC boards and sometimes I need to know which particular board I am working with. As the discovery_bootif for all my system’s is the onboard NIC and the MAC is printed on the board, this gives me a unique identifier and simple means of tracking these little guys as they are swapped in and out of the environment before I even power them on. I can use the MAC to map to a custom fact that tells me where the system is located in the chassis for the lab. How do we generate the custom fact though?
It is really quite simple. Following the Foreman guide, we find that we need to first create a directory structure to hold the code that is used to generate the custom facts. It looks like this:
MyProjectDirectory
 ├── autostart.d
 ├── bin
 ├── facts
 │   └── nuc_position_facts.rb
 └── lib
     └── ruby
As you can see, to generate the facts we want, we implement a bit of ruby code that is consumed by facter. This ruby file is tucked under the facts directory. In the example, we simply created a case statement to map the MAC address to the position where the board is installed within the chassis. A simple row and column model like a spreadsheet is used in this example. All the systems connected by risers are a “Stack” and each is positioned from the connecting side. The ruby code looks like this:
# nuc_position_facts.rb

# Assign a position based on the MAC Address
Facter.add("chassis_position") do
  setcode do
    mac = Facter.value('discovery_bootif')
    case mac
    when "ff:ee:dd:cc:bb:31"
      "Stack3 NUC1"
    when "ff:ee:dd:cc:bb:32"
      "Stack3 NUC2"
    when "ff:ee:dd:cc:bb:33"
      "Stack3 NUC3"
...
...
    else
      mac
    end
  end
This isn’t the only thing that we can add to the Foreman Discovery Image. There are a number of other extensions that can be made use of. In the bin directory, binaries can be included that are able to be used in scripts to perform actions required at discovery time. In the autostart.d directory shell scripts can be added that use the included binaries. The lib and lib/ruby directories are added to the LD_LIBRARY_PATH and RUBYLIB path respectively so that any included binaries can be executed properly. Please see the Foreman Provisioning documentation for more details.
With the example file built, it is time to deploy the code to the Foreman server to make use of it with discovery. In the MyProjectDirectory, zip the contents of the directory tree to a file with:
zip -r discovery_facts.zip .
Copy the resulting zip file to the Foreman server and place it in /var/lib/tftpboot/boot for Red Hat OSes. For Debian, the corresponding directory is /srv/tftp and depending on which version of Ubuntu you use, it might be /srv/tftp or /var/lib/tftpboot.
scp discovery_facts.zip root@myforemanhost.example.com:/var/lib/tftpboot/boot/
Now we need to modify a provisioning template to tell the discovery image that there is something additional that it needs to include when it starts. Navigate to the provisioning templates page on your foreman server and search for the pxelinux_discovery snippet. You can unlock the snippet to edit it or clone it. For simplicity we will unlock the templates for editing.
Edit the APPEND line in pxelinux_discovery provisioning snippet on your foreman server to include a parameter that references the zip file. You can use more than one zip file to ease some of the management burden. The file can be located anywhere under tftpboot, the fdi.zips parameter provides the relative path. It can be beneficial to have separate directories for your code. The line for the example look similar to this:
APPEND initrd=boot/fdi-image/initrd0.img (...other parameters...) proxy.url=<%= foreman_server_url %> proxy.type=foreman fdi.zips=boot/discovery_facts.zip
For pxegrub_discovery, add fdi.zips to the kernel line; for pxegrub2_discovery add fdi.zips to the common variable.
Don’t forget to rebuild the PXELinux defaults after editing the snippet and ensure that the ONTIMEOUT points to discovery in the resulting default file /var/lib/tftpboot/pxelinux.cfg/default. It should look like this:
UI menu.c32
MENU TITLE Booting unknown host (ESC to stop)
TIMEOUT 200
ONTIMEOUT discovery
DEFAULT discovery
...
Now we are ready to (re)discover hosts and pull in the new facts.
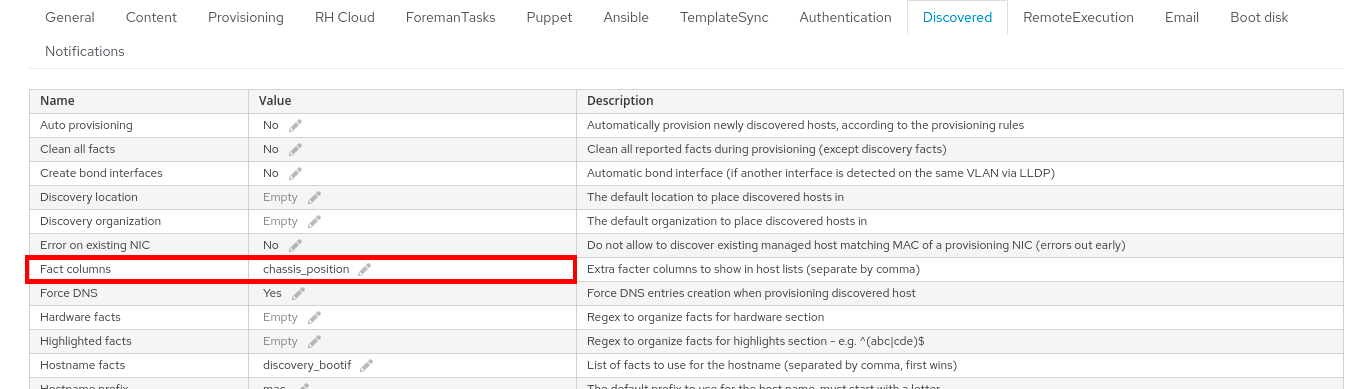
You can display the new fact in the Foreman web UI by editing the Discovered settings under Administer > Settings > Discovered. Add your custom facts to display to the Fact columns entry. This can be a comma-separated list if you have multiple facts. Also, you may want to make use of that new custom fact in generating the default hostname for the discovered system. You can edit the Hostname fact and Hostname prefix entries to change Foreman Discovery’s hostname generation scheme. If there are any spaces (or other disallowed hostname characters) in your Custom Fact, they are removed to create the hostname and all characters are converted to lowercase. Click Submit.
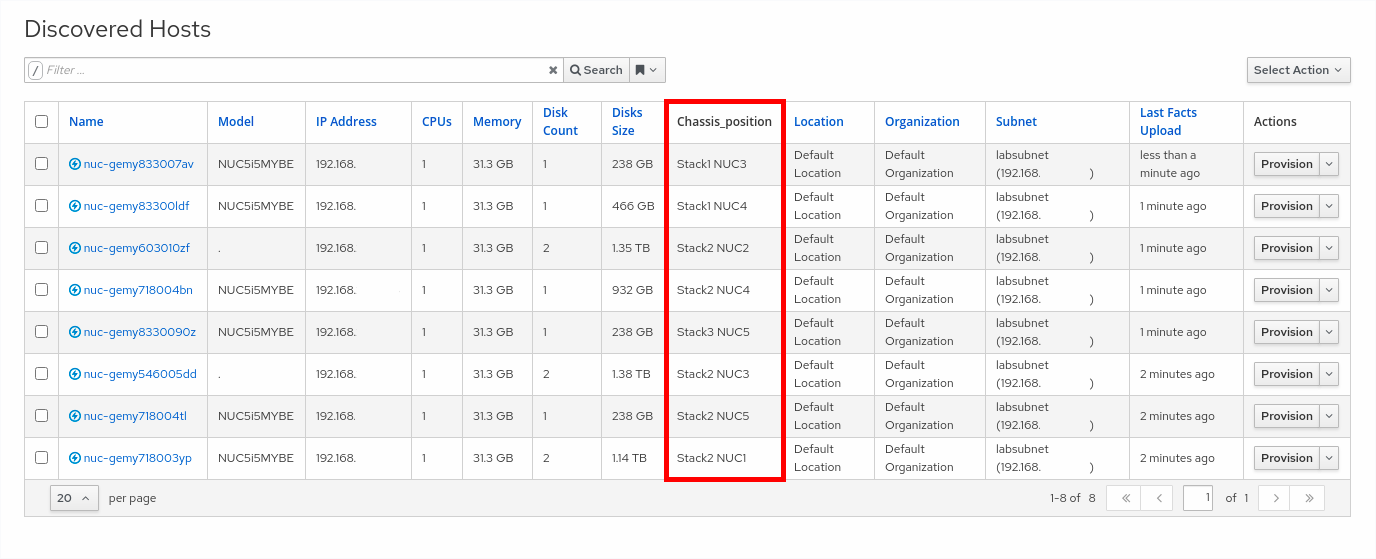
After rebooting several of your discovered hosts, you should see the new fact displayed. If a system didn’t generate the fact, you will see N/A in the column - that would signal something to investigate.
There can always be some troubleshooting. If you have troubles, access the console of the discovered system and check the facts page in the discovery image TUI. It should display what your error is to help you track down the bug.
As you can see, implementing custom facts for Foreman Discovery is straightforward, quick to deploy and allows for augmentation of the information provided during the discovery process.
Hopefully this little example can help give you better insight into your discovered systems.
Enjoy!