Update
There is an updated version of this post available targetting version 1.10. It can be found here
One of foreman goals, is to provide a simple and familiar process to provision systems, regardless of where they are located.
We’ve now added the ability to provision systems in EC2, alongside with the existing virtualization providers such as RHEVM, libvirt, VMWare etc.
In this blog, I’ll try to describe step by step what is required in order to provision a new instance in EC2.
Requirements
- You should be using a recent version of foreman, either directly from git, or using the nightly, see for git instruction, or use the debian,redhat or fedora nightly packages.
- Have a working foreman server, this should include operating system definitions and unattended mode enabled In addition storeconfigs data must not be stored in the foreman database.
- Amazon valid EC2 access and secret keys.
- Security Group which allows foreman to SSH to the instance.
Configuring AWS
Click on the more tab, and select Compute Resources. Compute Resources are services that can generate a host, e.g. VMWare, libvirt, openstack etc.
Click on New Compute Resource and fill in the information about your new compute resource, normally the name should represent something meaningful to you, such as a combination of the ec2 region and the account used.
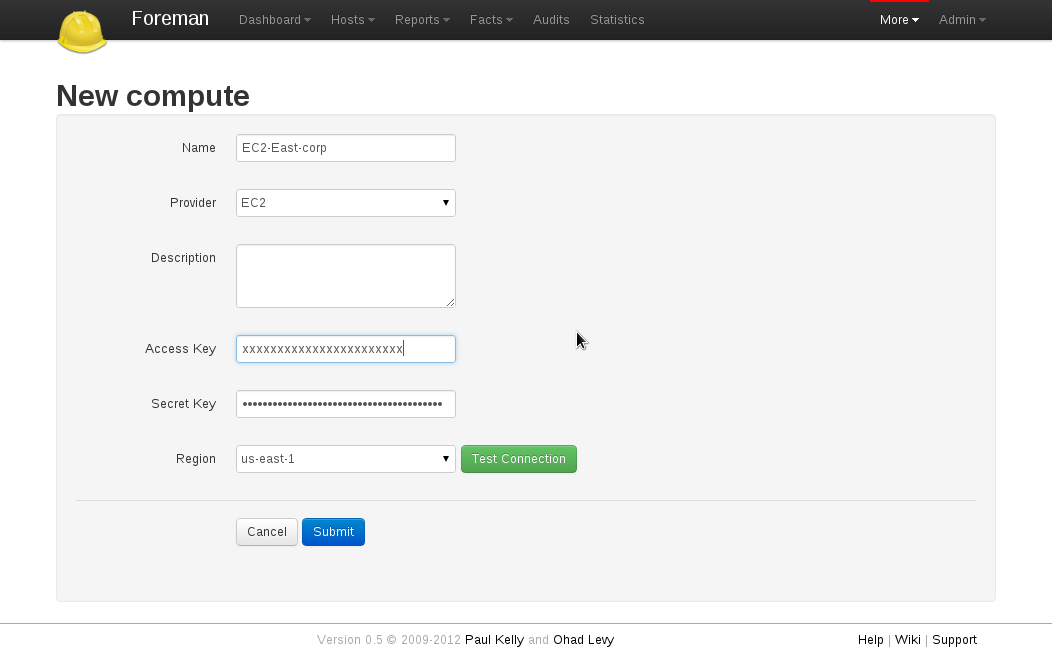
if everything is entered correctly, you should be able to get back a list of regions and select the region that you would like to deploy to.
Foreman would then automatically create a new set of SSH keypairs, which would be used in order to configure the instance (you may remove them later on).
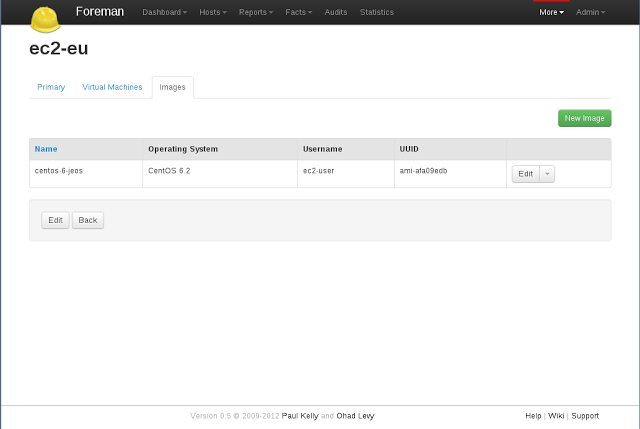
Then, the next step is to define which images are allowed to use and assign them to Foreman Operation systems / architectures.
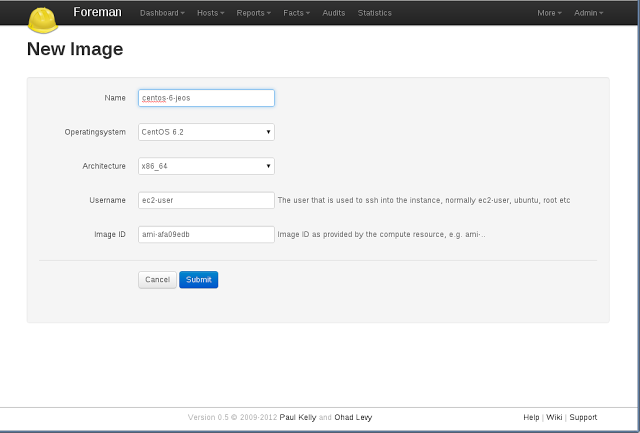
Click on the image tab and select New Image.
Since foreman would SSH to the instance (at least for now, we’ve decided using ssh first, cloud-init later), it is very important that you define the correct user, that is configured on the ami (normally the ubuntu user, or ec2-user) and of course, the ami id.
Foreman is now ready to create your instance, however, in order to automate fully puppet to load upon instance launch, we would need to create a little post script, this is where the provisioning templates comes into play.
Configuring Provisioning Templates
Add or edit a new provisioning template, More => Provisioning Templates => New
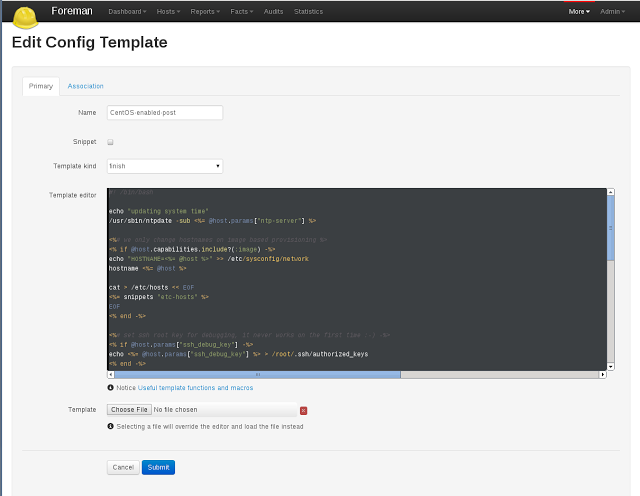
Select Finish and paste the following content in
Don’t forget to associate the template, (in the association tab) and set a default per OS (in the OS settings)
Then add the snippets too
etc-hosts
puppet.conf
An important note about UUID’s for certnames: if you want to use this feature, please make sure that you enable use_uuid_for_certificates under More => Settings, if not, you can simply use <%= @host.name %> for the certname. Additionally, it is not compatible with storeconfigs at this time.
And if you want to provision a whole puppet master in EC2, you can use the following snippet to get it up and running
master_bootstrap
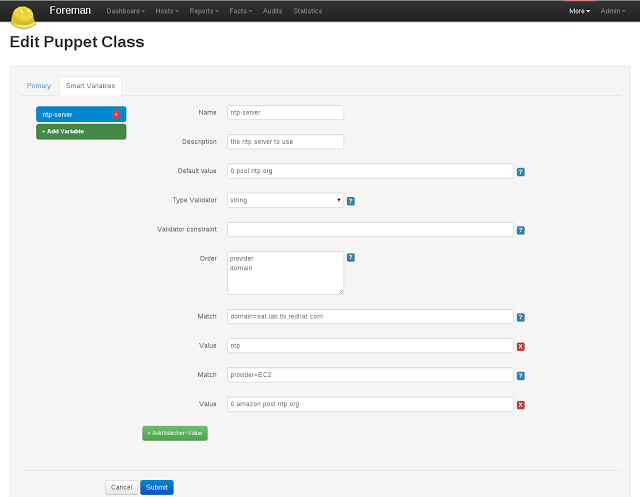
Now if you ask your self how variables like ntp-server get resolved, they are simply Foreman smart vars
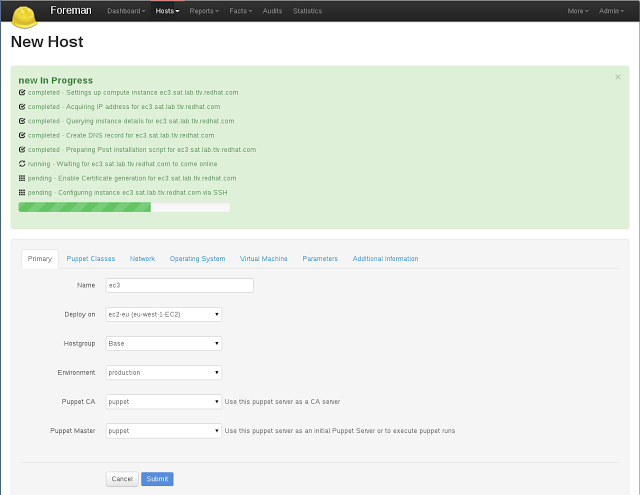
Actual instance launch
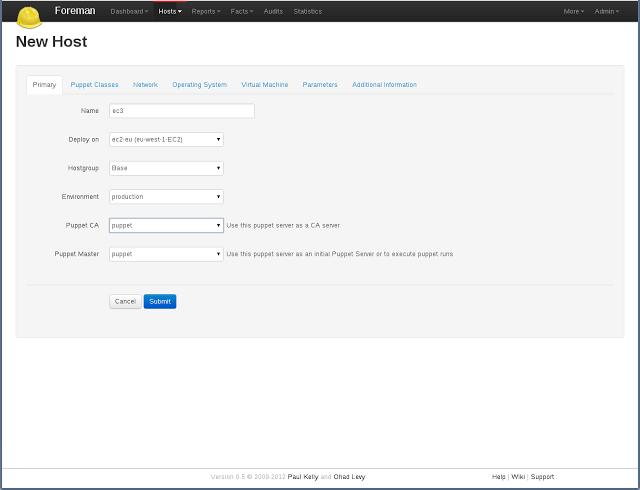
Goto to the Hosts tab, click on New Host, among other settings, make sure you select your compute resource, image and hardware profile
Primary tab
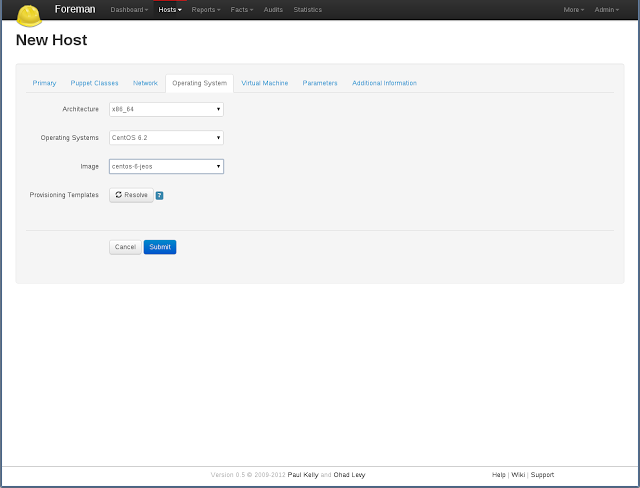
Operating System tab
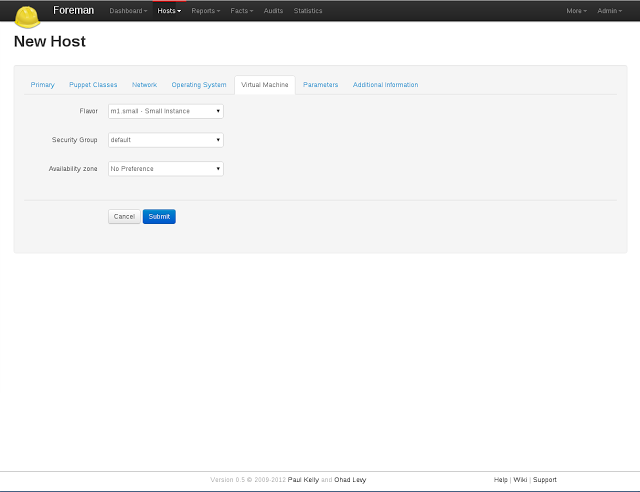
Virtual Machine tab
Progress bar
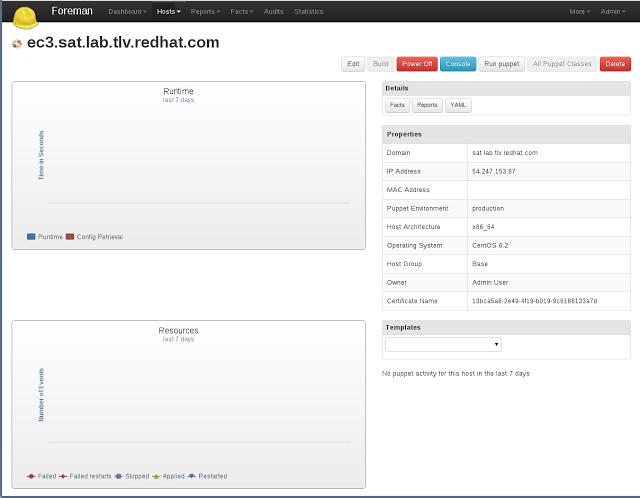
Completed Host
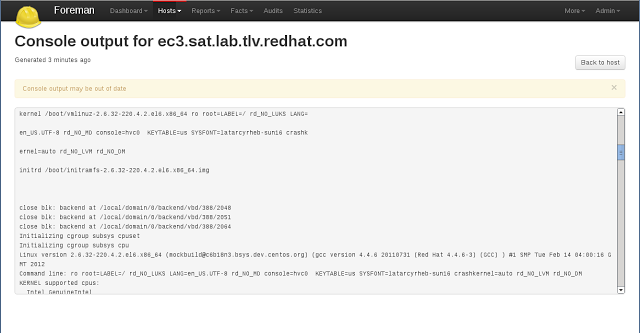
EC2 Console
As always, since this is a new feature, any feedback, comments etc are welcomed!