Katello nightly Documentation
HTTP Proxies
HTTP Proxy Support
Katello enables external HTTP proxies (provided by utilities such as squid) for repository operations such as synchronization.
HTTP proxies can be created and then assigned to a product though bulk selection as well as for each individual repository. Additionally, Katello provides HTTP proxy policies for products or repositories. Policies include:
- Using the global HTTP proxy (the default)
- Using a specified HTTP proxy other than the global HTTP proxy
- Not using an HTTP proxy
Creation
Creating an HTTP Proxy through the web UI
- navigate to: Infrastructure > HTTP Proxies
- click New HTTP Proxy
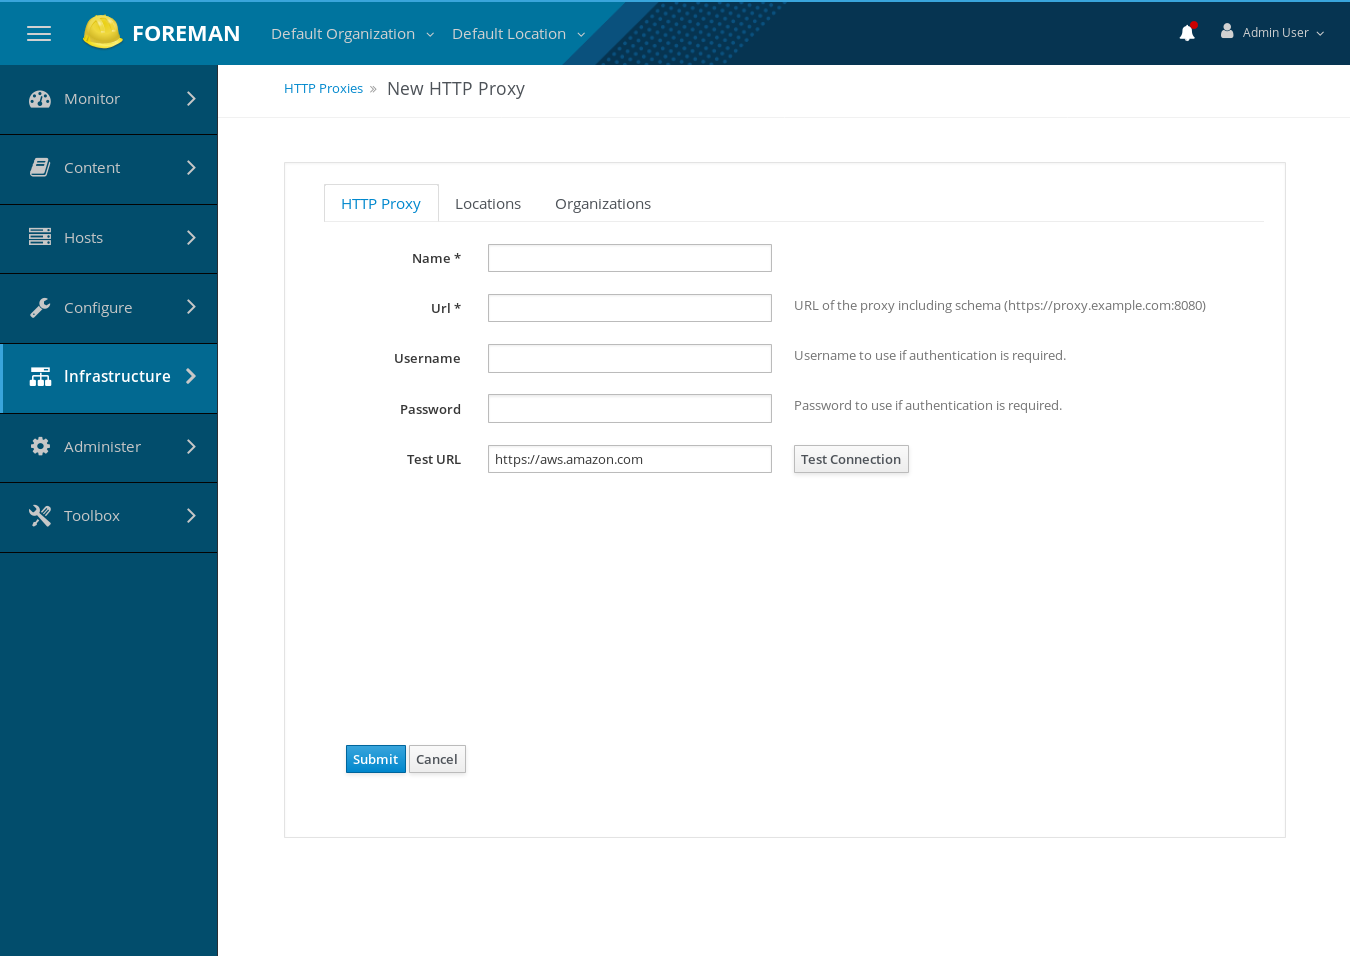
- Name: This required option is used to identify the HTTP proxy.
- Url: This required option is the URL of the proxy. Note that the scheme should be included. For example: “http://proxy.example.org:8888”
- Username: This option is used for proxy authentication, if required.
- Password: This option is used for proxy authentication, if required.
The provided field for Test Connection may be used to verify the proxy fields are set correctly. The field accepts a URL that a GET request will be sent to via the proxy configured in the form. If successful you will see a user notification such as:

If there is a problem with the proxy configuration, you will see an error notification similar to:

Removal
To remove a HTTP Proxy:
- navigate to: Infrastructure > HTTP Proxies
- click Delete in the row of the proxy you want to remove
Bulk Applying HTTP Proxy Policies and HTTP Proxy Selection
HTTP proxy policies and HTTP proxy selection can be selected for one or more products. The policies and proxy selection propogates to all repositories contain in the products.
Selecting the Global Default Proxy
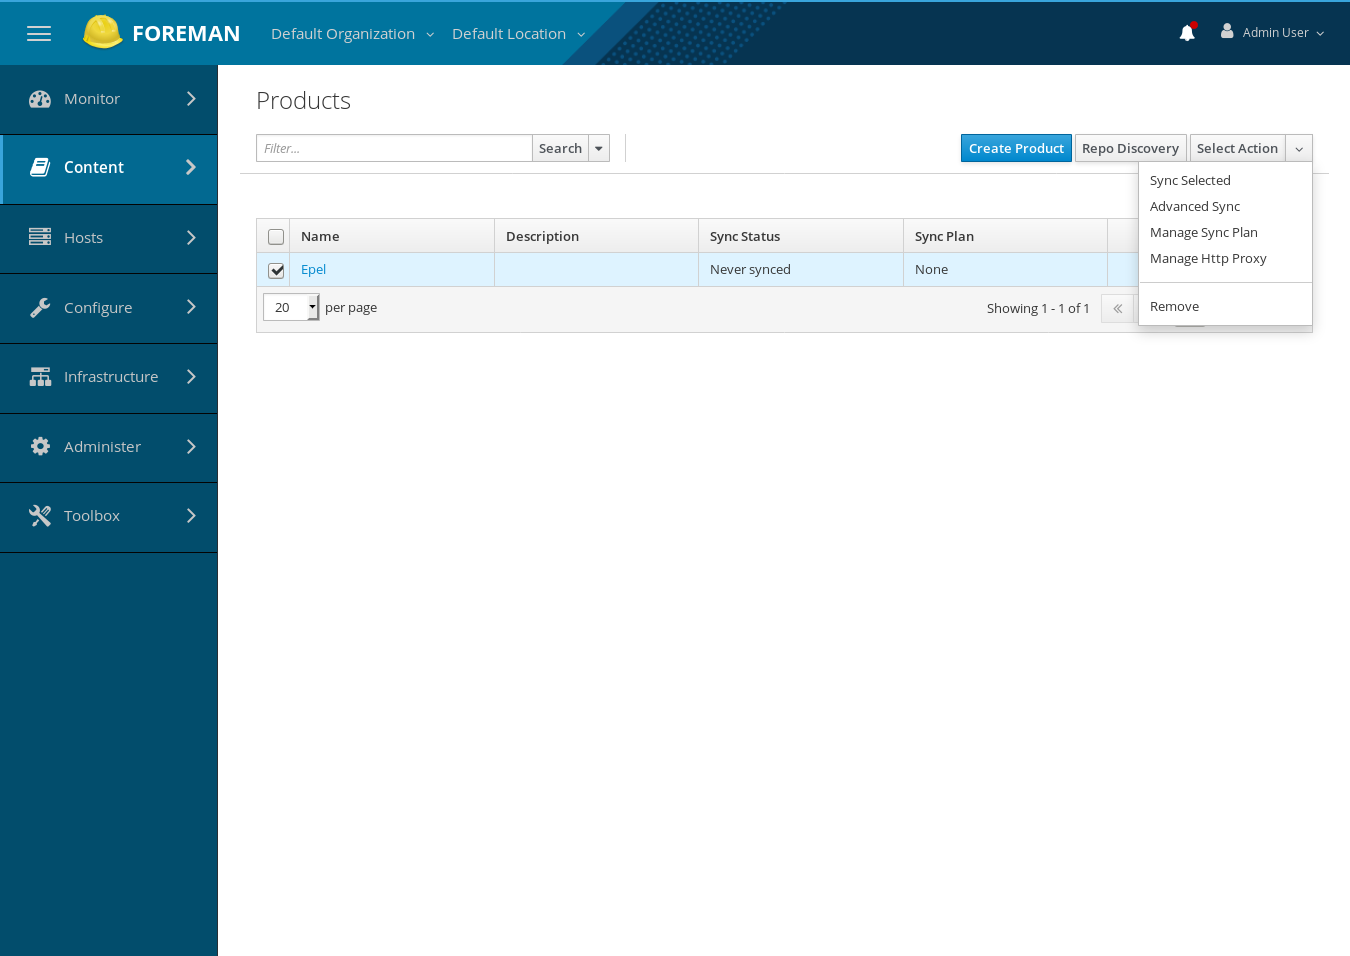
To apply the global default proxy policy to one or more products:
- navigate to: Content > Products
- Select the row checkbox for each product you want to assign the HTTP policy to
- Click the Select Action dropdown
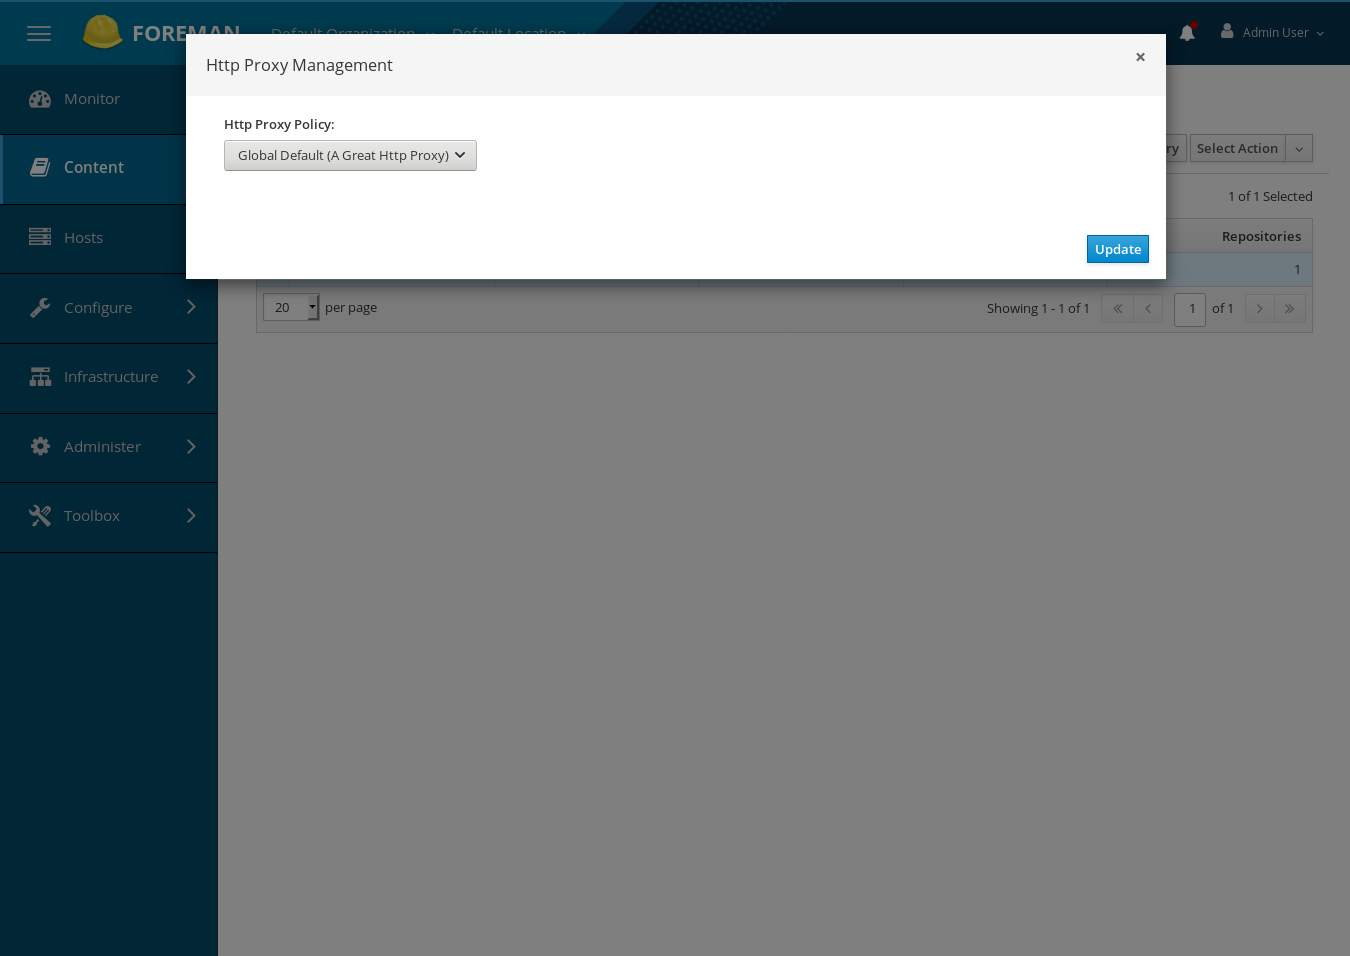
- Select Manage Http Proxy
- Accept the default selection Global Default (xxxx). Note that the text within the parenthesis is the name of the HTTP Proxy set as the global default.
- Click Update
Selecting the No HTTP Proxy policy
To choose a policy where no HTTP proxy is used for one or more products:
- navigate to: Content > Products
- Select one or more products by clicking the row checkbox for each product you want to assign the HTTP policy for
- Click the Select Action dropdown
- Select Manage Http Proxy
- Select the “No HTTP Proxy” selection.
- Click Update
Selecting a Specific HTTP Proxy
To choose a specific HTTP proxy for one or more products:
- navigate to: Content > Products
- Select one or more products by clicking the row checkbox for each product you want to assign the HTTP policy for
- Click the Select Action dropdown
- Select Manage Http Proxy
- Select the “Use specific HTTP proxy” policy selection.
- A new drop down will appear with a list of all curently defined HTTP proxies. Select the proxy you want.
- Click Update
Selecting a HTTP Proxy policy and HTTP Proxy for a new Repository
For more information about creating a new repository see Creating a Repository. There are two fields on the new repostory form for selecting the HTTP proxy policy and, if needed, a specific HTTP proxy.
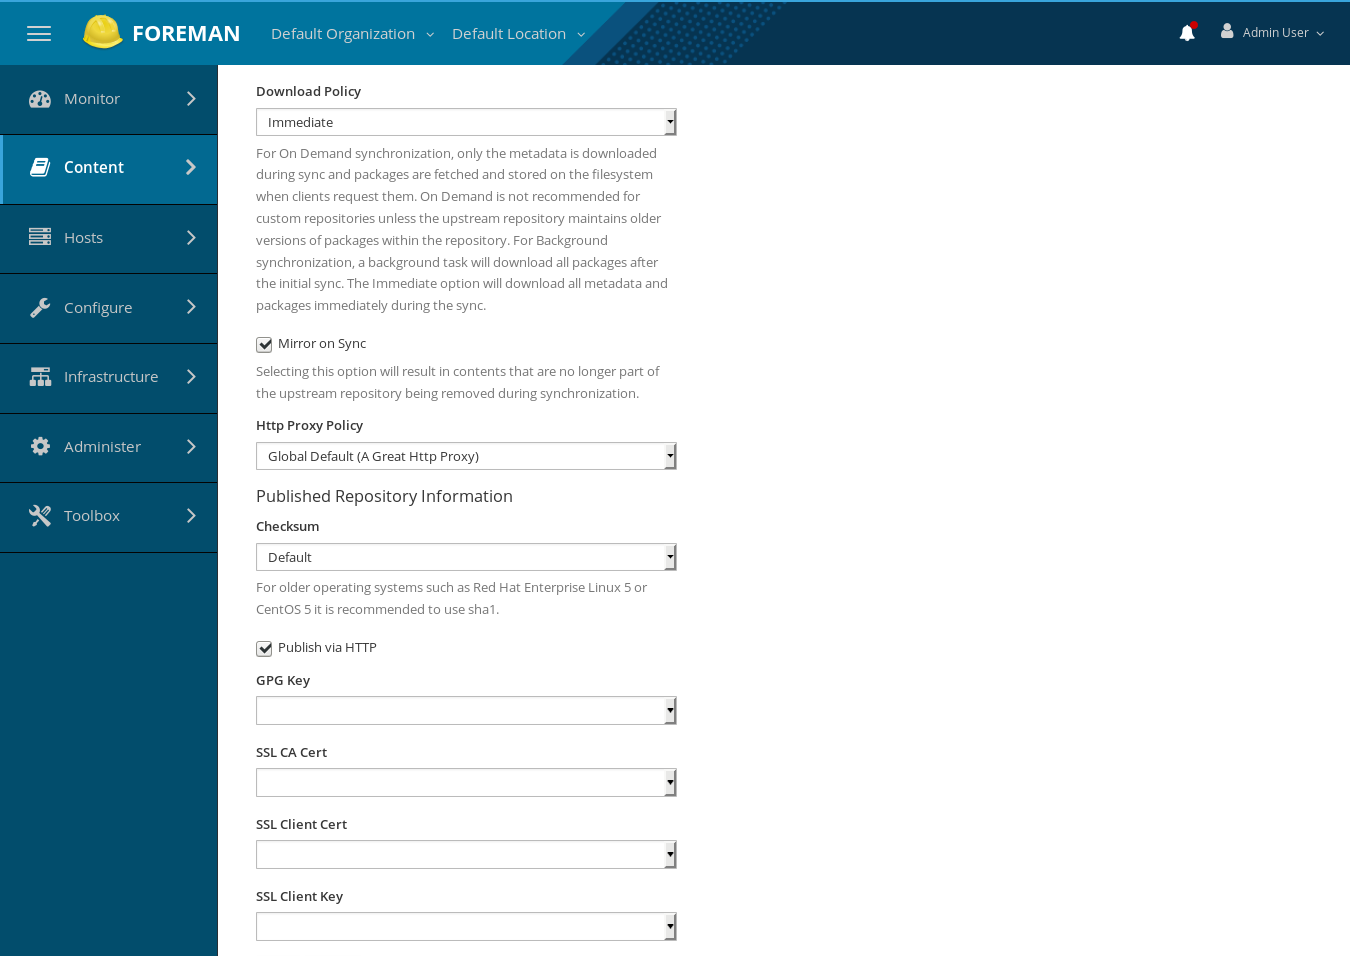
Assigning the global default HTTP Proxy
By default, a new repository will be created with the “Global Default” policy. You can see this is the default selection in the Http Proxy Policy selection.
Assigning the No HTTP Proxy policy
If you don’t want any http proxy to be used, click the Http Proxy Policy menu and select “No HTTP Proxy”.
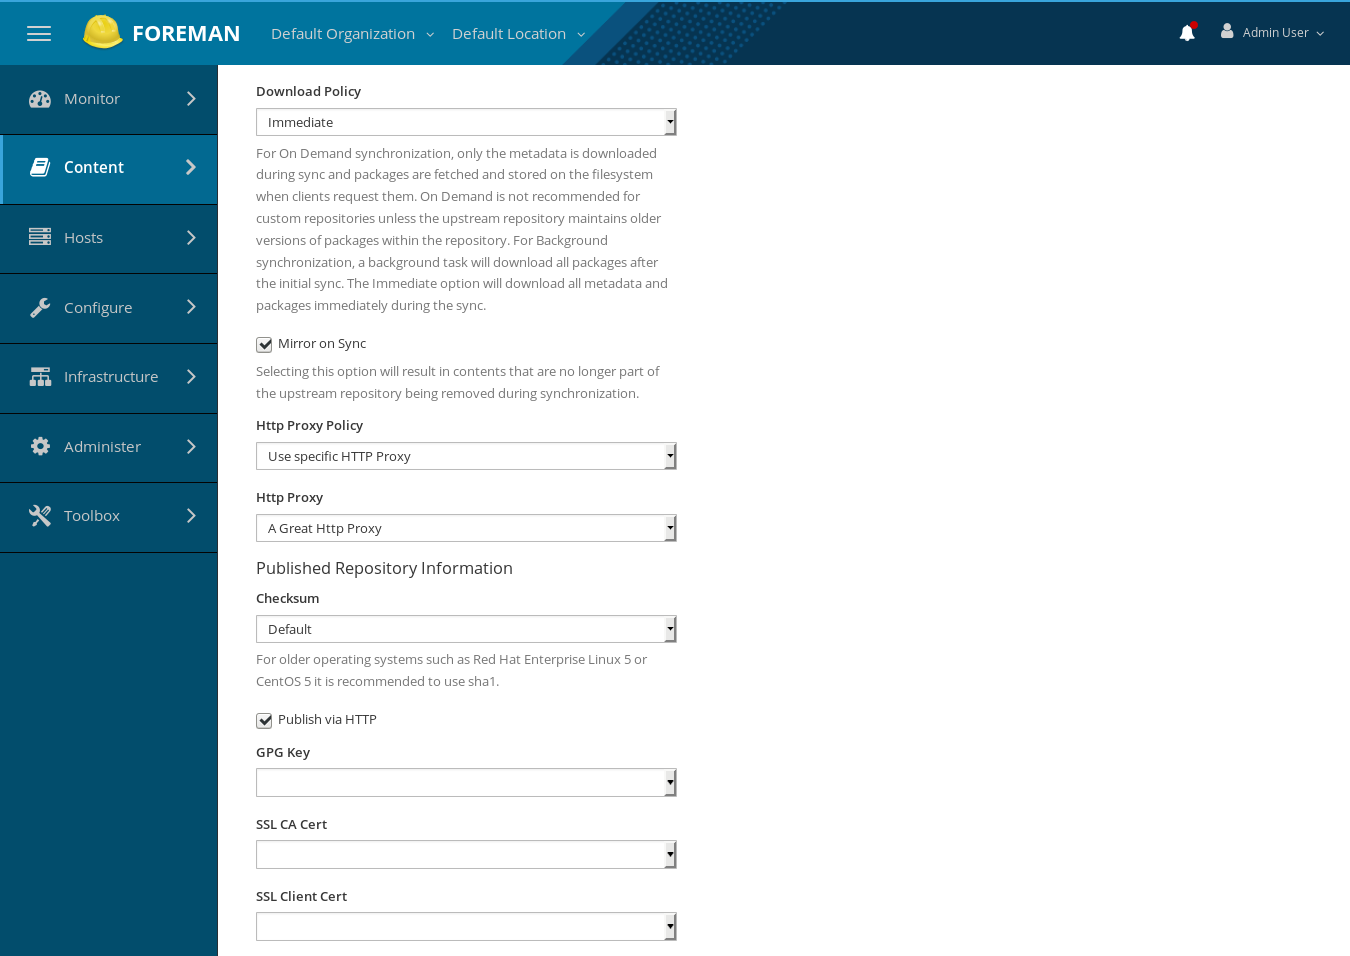
Assigning a specific HTTP Proxy
If you want to assign a specific HTTP proxy to be used for the new repository, click the Http Proxy Policy. A new menu will appear, presenting a list of all currently defined HTTP proxies. Select the wanted proxy and the new repository will use that proxy.
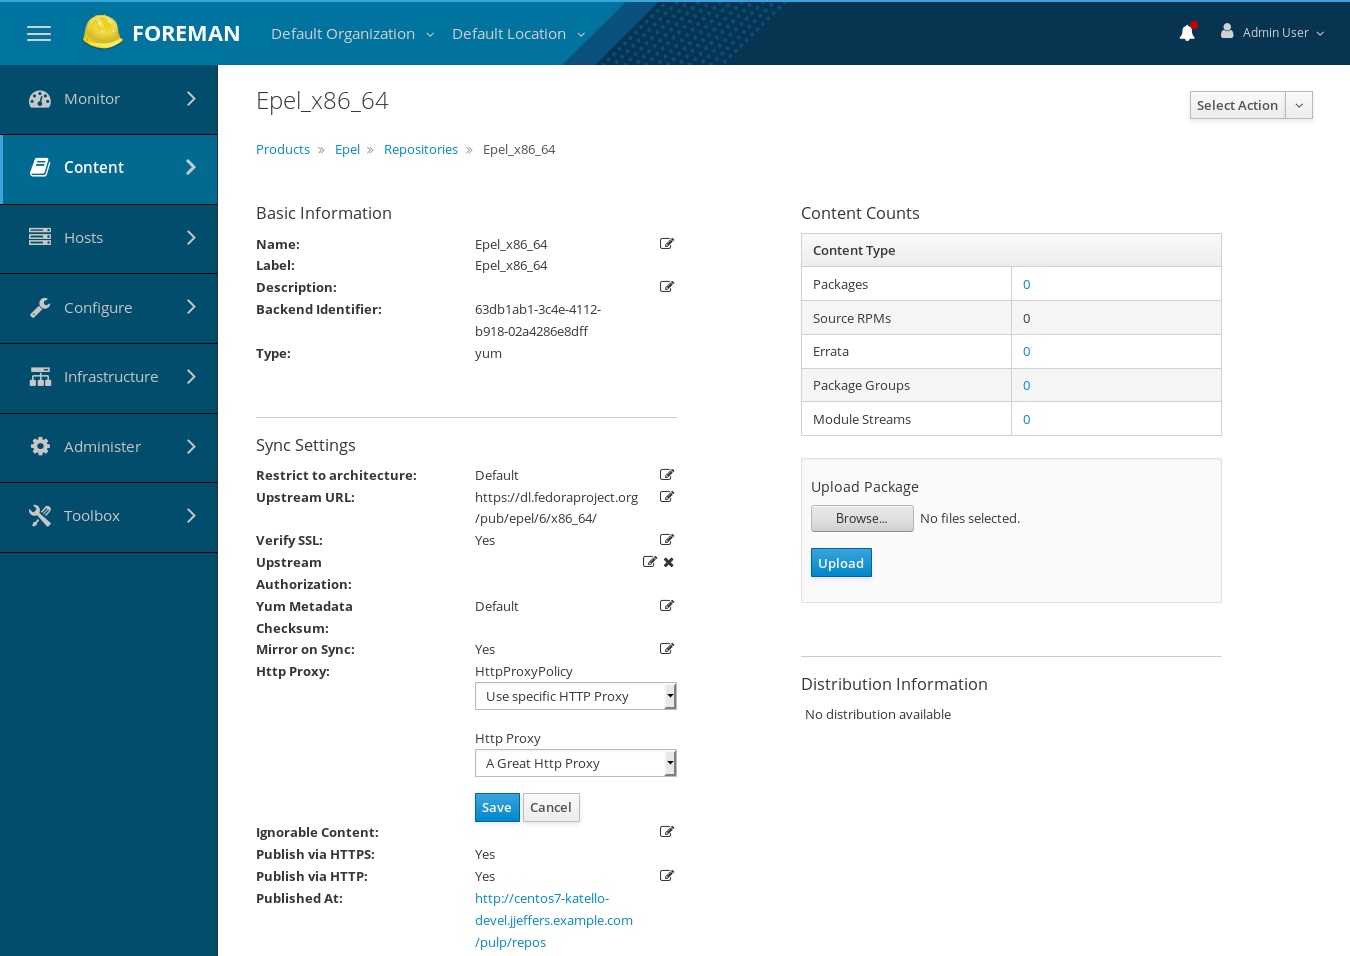
Assigning a HTTP Proxy Policy and HTTP Proxy for an existing Repository
To change the HTTP proxy policy or the HTTP proxy used by an existing repository:
- navigate to: Content -> Products -> (the repository you want to modify)
- under Sync Settings cick the form edit icon for the Http Proxy field. Note that the default display will show the current HTTP proxy policy and the name of the proxy the policy enables
- Menus for both the HTTP Proxy policy and, if you choose the “Use specific HTTP Proxy” policy, the HTTP Proxy appear
- To save any changes, click the Save button
- To ignore any changes, click the Cancel button